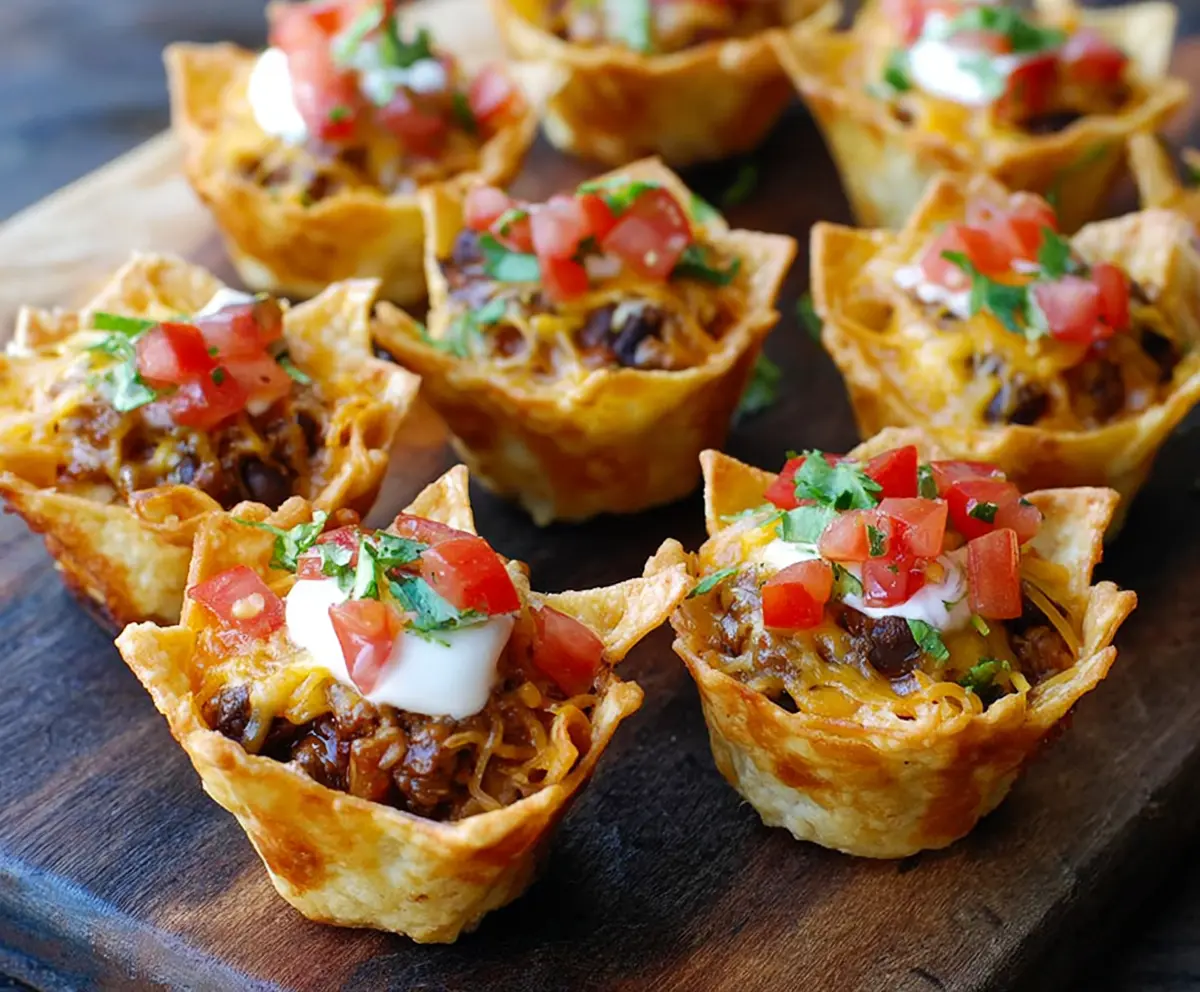
Crunchy Nacho Cups are a fun snack that brings all the flavors of nachos in a bite-sized treat! They’re made with crispy tortilla chips, melted cheese, and your favorite toppings.
These little cups are perfect for game day or movie night. You can stuff them with anything you like, and trust me, they disappear fast—just like my resolve when I see a chocolate cake! 😂
What I love most is how easy they are to make. Just bake them, fill them up, and enjoy! You can mix and match toppings, so everyone gets their favorite. It’s nacho heaven!
Key Ingredients & Substitutions
Tortillas: Small flour or corn tortillas work great here. If you can’t find small ones, you can cut regular ones into quarters or use tortilla chips for a quicker option. I prefer corn tortillas for their crunchiness!
Ground Beef or Turkey: Both work well, but ground turkey is a leaner option. If you’re looking for something vegetarian, try using lentils or a mix of mushrooms and beans. They’ll still give you a satisfying texture!
Taco Seasoning: While a store-bought mix is convenient, making your own with spices like cumin, chili powder, and paprika can enhance the flavor. It also lets you control the spice level!
Cheese: Cheddar is classic, but feel free to mix in Monterey Jack or pepper jack for a bit of heat. If you want to make it dairy-free, try using vegan cheese shreds.
Pico de Gallo: Fresh pico adds brightness. If you can’t make it at home, jarred salsa works too, but I always recommend fresh when possible for the best flavor!
How Do I Make Sure My Tortilla Cups Are Crispy?
Getting the perfect crispy tortilla cups is key! Start by preheating your oven and greasing your muffin tin—this prevents sticking and helps them crisp up.
- Use small tortillas or quarter larger ones. Press them into the muffin tin; make sure they have enough surface area to hold the filling.
- Don’t skip the initial bake (8-10 minutes) — it’s important to get them golden and crunchy before adding filling.
- Keep an eye on them in the oven. If they start to brown too quickly, cover them loosely with foil to avoid burning.
Let them cool a bit after baking before adding your toppings, so they stay firm and delicious!

Crunchy Nacho Cups
Ingredients You’ll Need:
For the Cups:
- 12 small flour or corn tortillas
- Cooking spray or oil for greasing
For the Filling:
- 1 lb ground beef or ground turkey
- 1 packet taco seasoning mix (or 2 tbsp homemade taco seasoning)
- 1/2 cup water
- 1 cup black beans, drained and rinsed
For Toppings:
- 1 1/2 cups shredded cheddar cheese
- 1 cup pico de gallo (diced tomatoes, onion, cilantro, lime juice)
- 1/2 cup sour cream
- Fresh cilantro, chopped (for garnish)
How Much Time Will You Need?
This recipe will take about 15-20 minutes of prep time and another 15-20 minutes for cooking. In total, you’re looking at around 40 minutes to have a delicious batch of Crunchy Nacho Cups ready to enjoy!
Step-by-Step Instructions:
1. Preheat and Prepare!
Start by preheating your oven to 375°F (190°C). While the oven is heating, grab your muffin tin and lightly grease it with cooking spray or a bit of oil to prevent sticking.
2. Shape Your Tortillas!
Next, if you’re using larger tortillas, cut them into triangles (4 pieces per tortilla). Alternatively, if you have small tortillas, you can simply use them whole. Press each piece firmly into the muffin cups to form little tortilla cups. The trick is to get them snug so they hold their shape!
3. Bake the Tortilla Shells!
Place the muffin tin in the oven and bake the tortilla shells for about 8-10 minutes until they are crispy and golden brown. Keep an eye on them so they don’t burn! Once done, remove them from the oven and set aside to cool.
4. Cook the Meat Filling!
In a skillet over medium heat, cook the ground beef or turkey until it’s fully browned. Make sure to break it apart as it cooks. Once it’s cooked through, drain any excess fat to keep it lean.
5. Add the Flavor!
Add the taco seasoning and water to the ground meat. Stir everything well and let it simmer for about 5 minutes until the sauce thickens and becomes flavorful.
6. Mix in the Beans!
After that, stir in the black beans and cook for another 1-2 minutes. This will add protein and extra flavor to your filling!
7. Fill Those Cups!
Now it’s time to fill your crispy tortilla cups! Spoon the beef and bean mixture into each cup until they’re well-filled.
8. Add Cheese!
Top each filled cup with a generous sprinkle of shredded cheddar cheese. This will melt beautifully in the next step!
9. Bake Again!
Return the filled cups to the oven and bake for an additional 5 minutes, or until the cheese is melted and bubbly! The aroma will be irresistible!
10. Cool and Garnish!
Once they’re done, take them out of the oven and let them cool slightly. Then, garnish each cup with a dollop of sour cream, a spoonful of pico de gallo, and a sprinkle of fresh cilantro on top for that perfect finishing touch!
11. Serve and Enjoy!
Serve your Crunchy Nacho Cups immediately while they’re warm, and watch them disappear as everyone enjoys this tasty treat!
These nacho cups are perfect for game day snacks or a casual get-together. Enjoy!
Can I Make These Nacho Cups Ahead of Time?
Absolutely! You can prep the tortilla cups and the beef mixture a few hours in advance. Just store them separately in the fridge. When you’re ready to serve, fill the cups and bake them as instructed for a fresh and crispy snack!
What Are Some Good Substitutes for the Ground Beef?
If you’re looking for alternatives to ground beef, you can use ground turkey, chicken, or even plant-based crumbles for a vegetarian option. For a different flavor, try sautéed mushrooms or lentils as a hearty substitute!
How Should I Store Leftover Nacho Cups?
Store any leftover nacho cups in an airtight container in the fridge for up to 2 days. To reheat, place them back in the oven briefly at 350°F (175°C) until warmed through, as microwaving may make the tortilla cups a bit soggy.
Can I Use Different Toppings?
Definitely! Feel free to customize your toppings based on your preference—black olives, jalapeños, or guacamole work great. Just remember to keep the sizes small for easy eating!