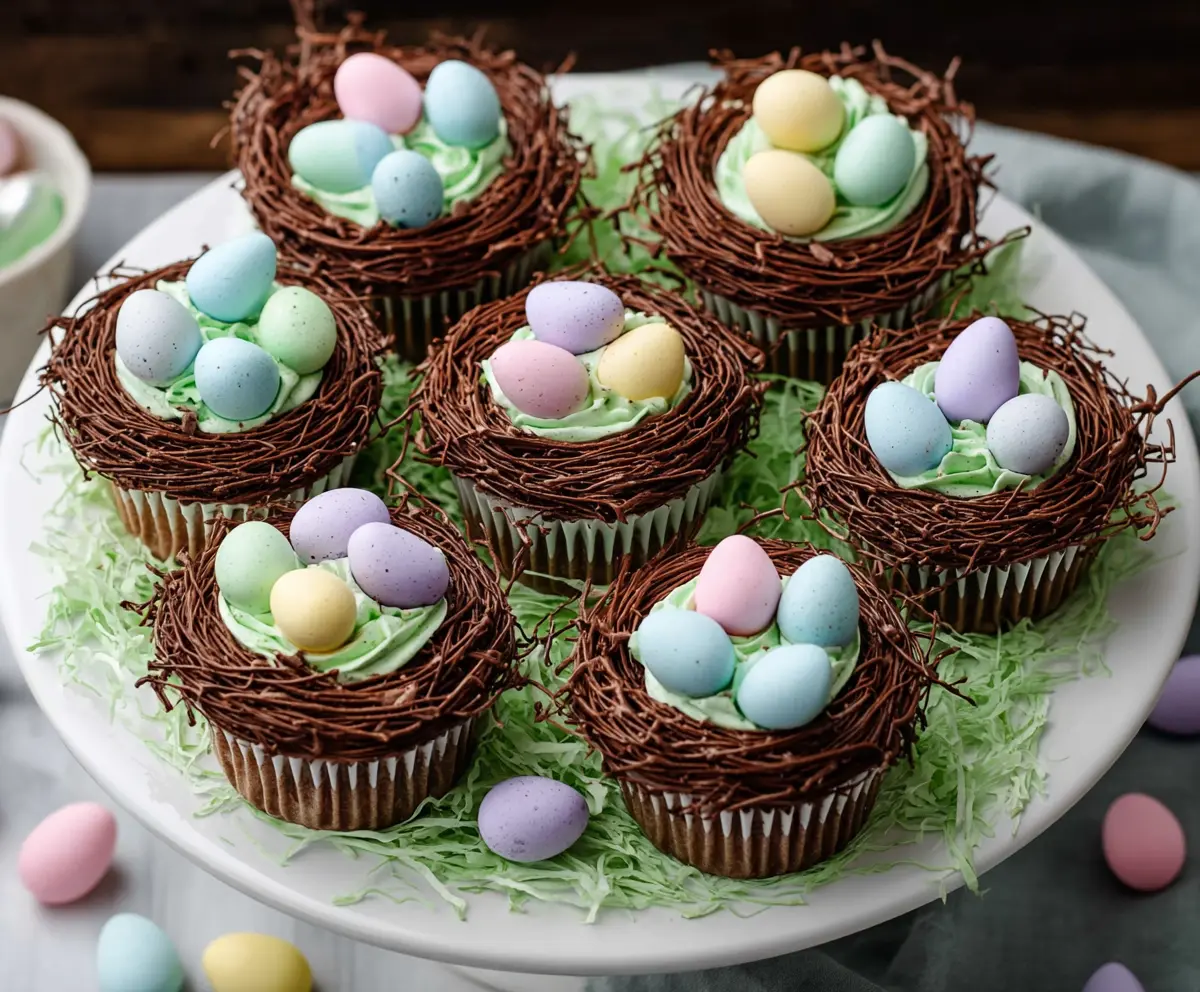
These Easter Egg Nest Cupcakes are as cute as they are tasty! Fluffy chocolate cake topped with creamy frosting creates a fun little nest for colorful candy eggs.
They’re perfect for celebrating Easter with family and friends. I love bringing them to gatherings—everyone gets a kick out of the little nests! 🐣
The best part? They’re super easy to whip up, and they always bring smiles. Plus, who can resist a cupcake that looks like a chocolate nest? Too fun!
Key Ingredients & Substitutions
All-Purpose Flour: This flour gives structure to the cupcakes. If you’re looking for a gluten-free option, try a 1:1 gluten-free baking blend. I recommend Bob’s Red Mill for great results.
Butter: Unsalted butter adds a rich flavor. For a lighter option, you can use coconut oil or a plant-based butter substitute, although it may slightly change the texture.
Buttermilk: This ingredient makes the cupcakes moist. If you don’t have buttermilk, mix ¾ cup of milk with 1 tablespoon of vinegar or lemon juice and let it sit for 5 minutes to mimic the tanginess.
Chocolate: Use semisweet or dark chocolate for the nests. If you’re looking for a dairy-free option, choose dairy-free chocolate chips. They work just as well!
Candy Eggs: Any small candy egg works here. Consider pastel M&Ms or even jelly beans for a fun twist!
How Do I Get the Cupcakes to Rise Perfectly?
Getting the cupcakes to rise beautifully involves a few key steps. First, make sure to properly cream the butter and sugar until light and fluffy, as this adds air to the batter.
- Always use room temperature ingredients; this helps in mixing evenly.
- Mix dry ingredients separately before adding to the wet mixture, which prevents clumping.
- Don’t overmix your batter once you add the flour—just mix until combined.
What’s the Best Way to Pipe Frosting Like Grass?
Piping the green frosting in a nest-like fashion can be tricky, but with the right tools, it’s simple! Use a piping bag with a grass or star tip for texture.
- Start in the center, moving out in a circular motion, and go back to the center to create a layered look.
- Practice a few swirls on a plate with leftover frosting to get comfortable before tackling the cupcakes.
How to Make Easter Egg Nest Cupcakes
Ingredients You’ll Need:
For the Cupcakes:
- 1 ¾ cups all-purpose flour
- 1 ½ tsp baking powder
- ½ tsp baking soda
- ¼ tsp salt
- ½ cup unsalted butter, softened
- 1 cup granulated sugar
- 2 large eggs
- 2 tsp vanilla extract
- ¾ cup buttermilk
For the Frosting:
- 1 cup unsalted butter, softened
- 4 cups powdered sugar
- 2-3 tbsp milk
- 1 tsp vanilla extract
- Green food coloring
For the Chocolate Nests:
- 8 oz semisweet or dark chocolate, melted
- ½ cup chow mein noodles or pretzel sticks (to mimic twigs)
For Decoration:
- Small candy eggs (such as speckled candy-coated chocolate eggs)
How Much Time Will You Need?
This recipe takes about 20 minutes to prepare the cupcakes and frosting, plus about 10 minutes to make the chocolate nests. After that, you’ll need about 18–20 minutes to bake the cupcakes, and some cooling time. Overall, plan for about 1 hour and 30 minutes to get everything ready, plus some chilling time for the nests.
Step-by-Step Instructions:
1. Prepare the Cupcakes:
Start by preheating your oven to 350°F (175°C) and lining a 12-cup muffin pan with cupcake liners. In a medium bowl, whisk together the all-purpose flour, baking powder, baking soda, and salt. In a large bowl, beat the softened butter and granulated sugar together until it becomes light and fluffy. Add the eggs one at a time, making sure to beat well after each addition, then stir in the vanilla extract.
Next, alternate adding the dry flour mixture and the buttermilk to the butter mixture, starting and ending with the flour. Mix until everything is just combined, being careful not to overmix. Divide the batter evenly amongst the cupcake liners, filling them about two-thirds full. Bake for 18-20 minutes or until a toothpick inserted in the center comes out clean. Let them cool completely on a wire rack.
2. Make the Frosting:
While the cupcakes cool, make the frosting. Beat the softened butter in a bowl until it’s creamy. Gradually add the powdered sugar, one cup at a time, and beat well after each addition. Once all the sugar is incorporated, add the milk and vanilla extract, mixing until you reach a spreadable consistency. Finally, add green food coloring a few drops at a time, mixing until you get your desired shade of green.
3. Make the Chocolate Nests:
For the chocolate nests, melt the semisweet or dark chocolate in a microwave-safe bowl, heating in 30-second intervals and stirring in between until it becomes smooth. Gently fold in the chow mein noodles or pretzel sticks until they are completely coated in chocolate. Spoon the mixture onto parchment paper, shaping it into small nests. Let them set in the refrigerator until firm, which should take about 15-20 minutes.
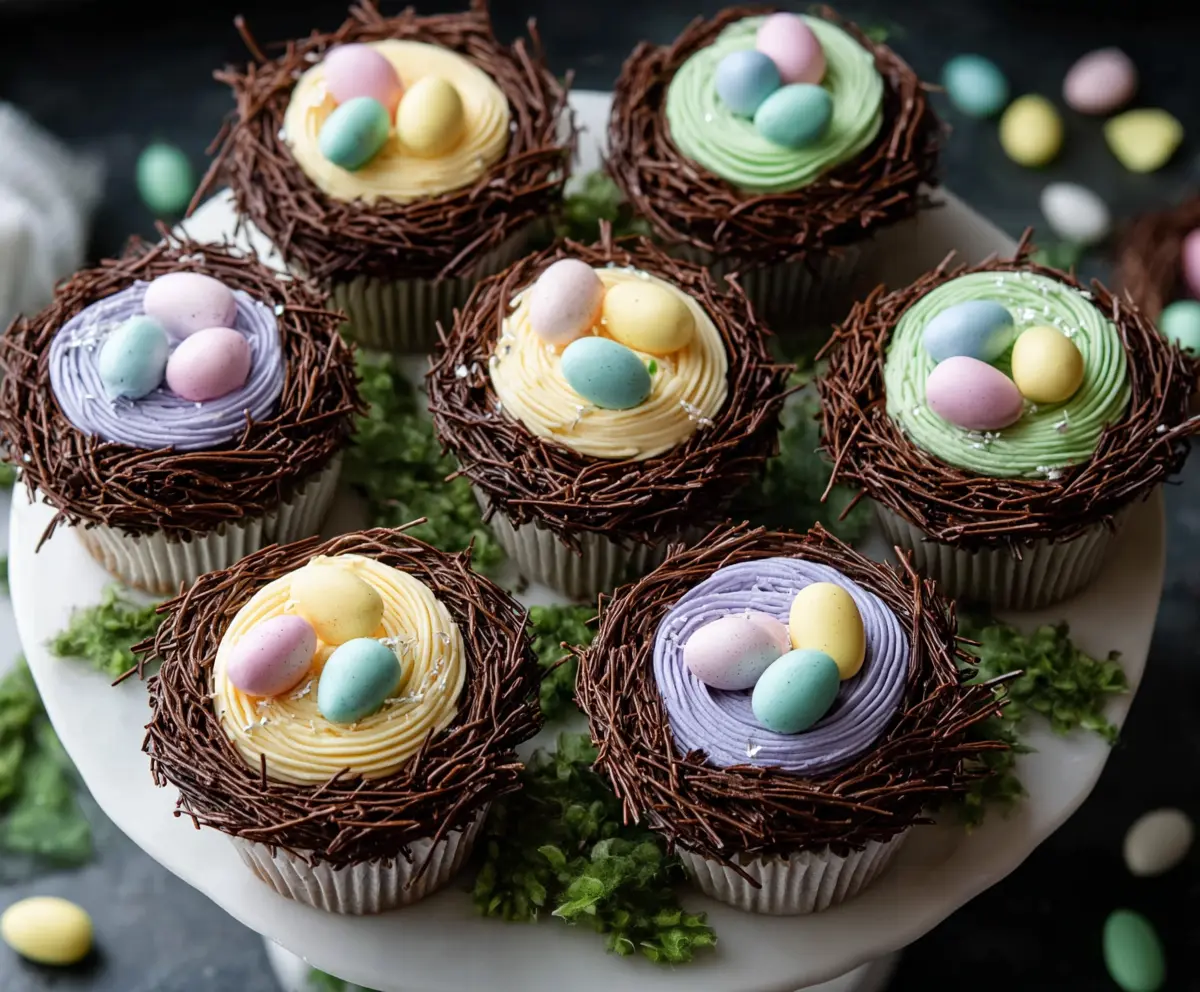
4. Assemble the Cupcakes:
Once your cupcakes have cooled, it’s time to decorate! Using a piping bag fitted with a grass or star tip, pipe the green frosting onto each cupcake in a nest-like pattern. Carefully place one of the chocolate nests on top of the frosting, ensuring it sits nicely. Finally, decorate each nest by placing 3-4 candy eggs inside, making them look like a delightful springtime treat!
5. Serve and Enjoy!
Arrange your beautifully decorated cupcakes on a serving platter. For an extra festive touch, you can add decorative green shredded paper or edible grass around the base. Serve them at room temperature and enjoy the cheerful flavors of spring!
These Easter Egg Nest Cupcakes are not only fun to make but also make a stunning centerpiece for your spring celebrations!
Can I Use a Different Type of Chocolate for the Nests?
Absolutely! While semisweet or dark chocolate works beautifully, you can also use milk chocolate for a sweeter flavor. If you’re making this for someone with dietary restrictions, try dairy-free chocolate chips, which will set just as well.
How Do I Store Leftover Cupcakes?
Leftover cupcakes should be stored in an airtight container at room temperature for up to 3 days. If you want to keep them longer, you can refrigerate them, but the frosting may lose its texture. Just bring them to room temperature before serving again!
Can I Make the Cupcakes Ahead of Time?
Yes, you can prepare the cupcakes a day in advance! Just bake and cool them, then store in an airtight container. Frost them on the day you plan to serve for the best presentation.
Is There a Gluten-Free Option for the Cupcakes?
Definitely! You can substitute the all-purpose flour with a gluten-free baking blend. Make sure to choose one that includes xanthan gum or other binding agents to help with texture!