
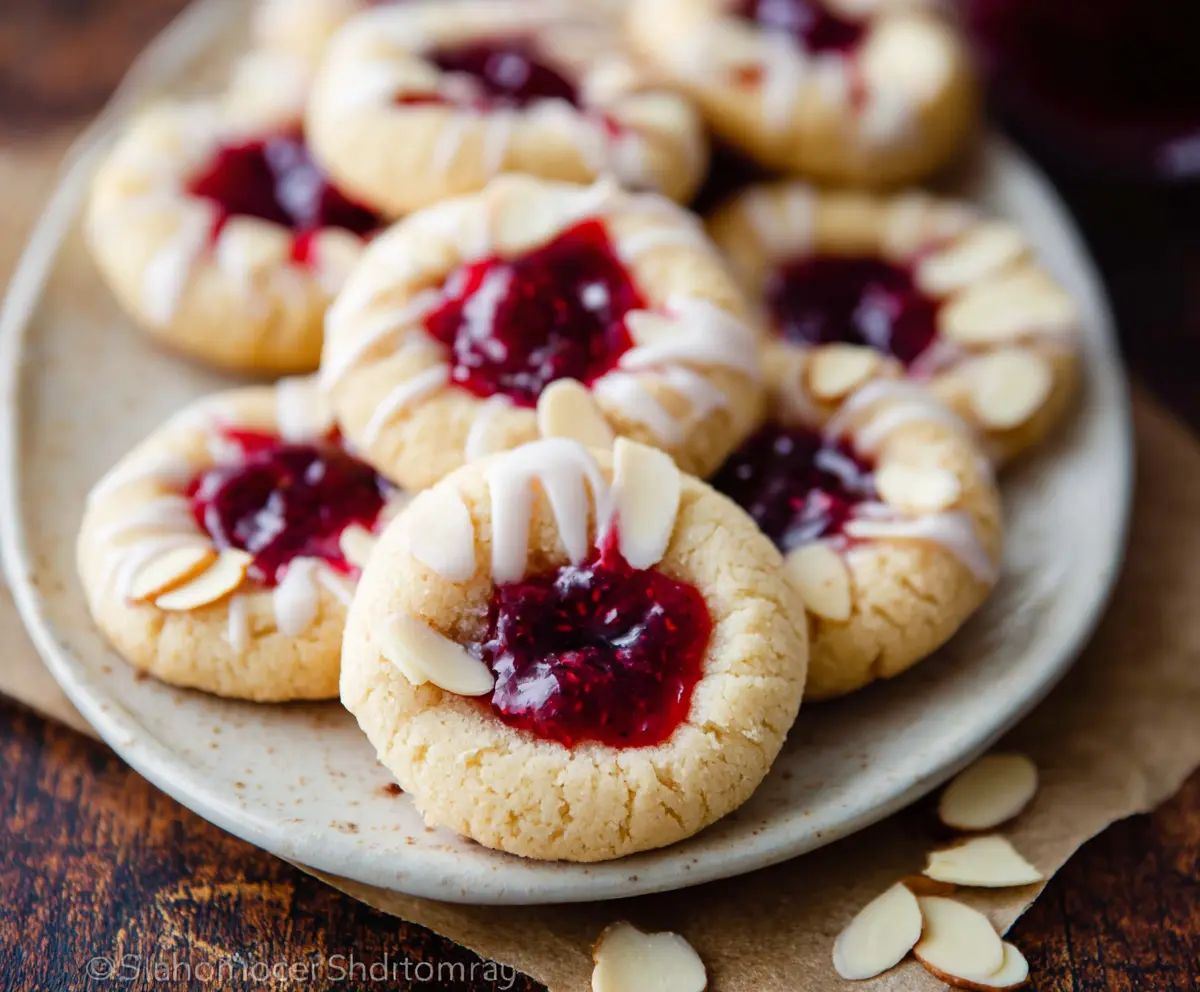
These charming raspberry almond thumbprint cookies are soft, sweet, and packed with fruity goodness! The almond flavor makes each bite a little nutty delight.
I love how easy these cookies are to make—just roll, thumbprint, and bake! Plus, they look so pretty on a plate that they’re perfect for sharing—or hiding away for later! 🍪
Key Ingredients & Substitutions
Unsalted Butter: Use softened unsalted butter for the best flavor. If you need a dairy-free option, substitute with coconut oil or a plant-based butter alternative.
Almond Extract: This gives the cookies a lovely almond flavor. If you don’t have it, you can use vanilla extract instead or omit it for a less nutty taste.
Raspberry Jam: Seedless raspberry jam is my favorite here for smoothness. You can swap it for any fruit jam like apricot or strawberry depending on your taste!
Sliced Almonds: These are optional but add a nice crunch. Feel free to replace them with chopped walnuts or pecans for a different nutty twist.
How Can I Get the Perfect Thumbprint?
The thumbprint technique is key to these cookies! Here’s how to do it perfectly:
- When shaping the dough, roll the balls gently to avoid cracks.
- Press gently with your thumb or a teaspoon to avoid breaking the edges.
- If the edges crack a bit, just pinch them back together before adding the jam.
Remember, the indentation should be deep enough to hold the jam but not so deep that it reaches the bottom. This keeps the delicious filling in place!
Enjoy making these delightful cookies; they’re sure to be a hit!
Easy Raspberry Almond Thumbprint Cookies
Ingredients:
- 1 cup (2 sticks) unsalted butter, softened
- 3/4 cup granulated sugar
- 1 large egg
- 1 teaspoon pure almond extract
- 2 cups all-purpose flour
- 1/2 teaspoon baking powder
- 1/4 teaspoon salt
- 1/2 cup raspberry jam (seedless preferred)
- 1/2 cup sliced almonds, for garnish (optional)
- 1 cup powdered sugar (for glaze)
- 1-2 tablespoons milk (for glaze)
- 1/4 teaspoon vanilla extract (for glaze)
Time Needed:
This delicious cookie recipe will take about 20 minutes to prepare, plus an additional 15 minutes of baking time. Allow some time for cooling and glazing, making the total time around 50 minutes before they’re ready to enjoy!
Instructions:
1. Preheat the Oven and Prepare the Baking Sheet:
Start by preheating your oven to 350°F (175°C). While that’s heating up, line a baking sheet with parchment paper or a silicone baking mat to prevent sticking.
2. Cream the Butter and Sugar:
In a large mixing bowl, use an electric mixer to beat the softened butter and granulated sugar together until the mixture is light, fluffy, and pale in color. This should take about 3 minutes. It’s important to cream them well to get that nice melt-in-your-mouth texture!
3. Add Egg and Extract:
Next, add one large egg and the almond extract to your butter mixture. Beat until everything is well combined and smooth.
4. Mix the Dry Ingredients:
In a separate bowl, whisk together the all-purpose flour, baking powder, and salt. This will help evenly distribute the baking powder and salt through the flour.
5. Combine Everything Together:
Gradually add the dry ingredients into the butter mixture, mixing just until combined. Be careful not to overmix; you want the dough to be tender and easy to work with.
6. Shape the Cookies:
Roll the dough into 1-inch balls and place them on the prepared baking sheet, making sure to leave about 2 inches of space between each cookie.
7. Create the Thumbprint:
With your thumb or the back of a teaspoon, gently press down into the center of each dough ball to create a small indentation. This is where the raspberry jam will go!
8. Add Jam:
Fill each thumbprint with approximately 1/2 teaspoon of raspberry jam. Be generous, but don’t overfill to avoid it bubbling over during baking.
9. Garnish with Almonds:
If you’d like, you can lightly press the sliced almonds around the edges of each cookie for some extra crunch and flavor.
10. Bake the Cookies:
Pop the baking sheet into your preheated oven and bake for about 12-15 minutes, or until the edges are lightly golden and the cookies look set.
11. Cool the Cookies:
Once baked, remove the cookies from the oven and let them cool on the baking sheet for about 5 minutes. After that, transfer them to a wire rack to cool completely.
12. Make the Glaze:
While the cookies are cooling, whisk together the powdered sugar, milk, and vanilla extract in a small bowl until you reach a smooth, drizzling consistency. You can add more milk if needed!
13. Glaze the Cookies:
Once the cookies are completely cool, drizzle the glaze over the top of each one. It adds a lovely finishing touch!
14. Serve and Enjoy:
Allow the glaze to set before serving. Now, grab a cookie (or two) and enjoy the wonderful combination of flavors!
These tender, buttery cookies with their bright raspberry centers and a hint of almond are sure to delight!
Can I Use a Different Jam for the Thumbprints?
Absolutely! While raspberry jam is traditional, you can use any favorite fruit jam such as strawberry, apricot, or blackberry. Just make sure the consistency is similar to avoid leaks during baking.
Can I Make These Cookies Gluten-Free?
Yes, you can! Substitute the all-purpose flour with a gluten-free 1:1 baking blend. Just be sure to check that all other ingredients are also gluten-free to keep the recipe safe for those with gluten intolerance.
How Should I Store Leftover Cookies?
Store leftover cookies in an airtight container at room temperature for up to 5 days. If you want to keep them longer, you can freeze them for up to 3 months. Just make sure to layer them with parchment paper to prevent sticking!
Can I Make the Dough Ahead of Time?
Yes, you can prepare the dough in advance! Wrap it tightly in plastic wrap and refrigerate for up to 3 days. When you’re ready to bake, let the dough sit at room temperature for a few minutes to soften slightly before shaping.