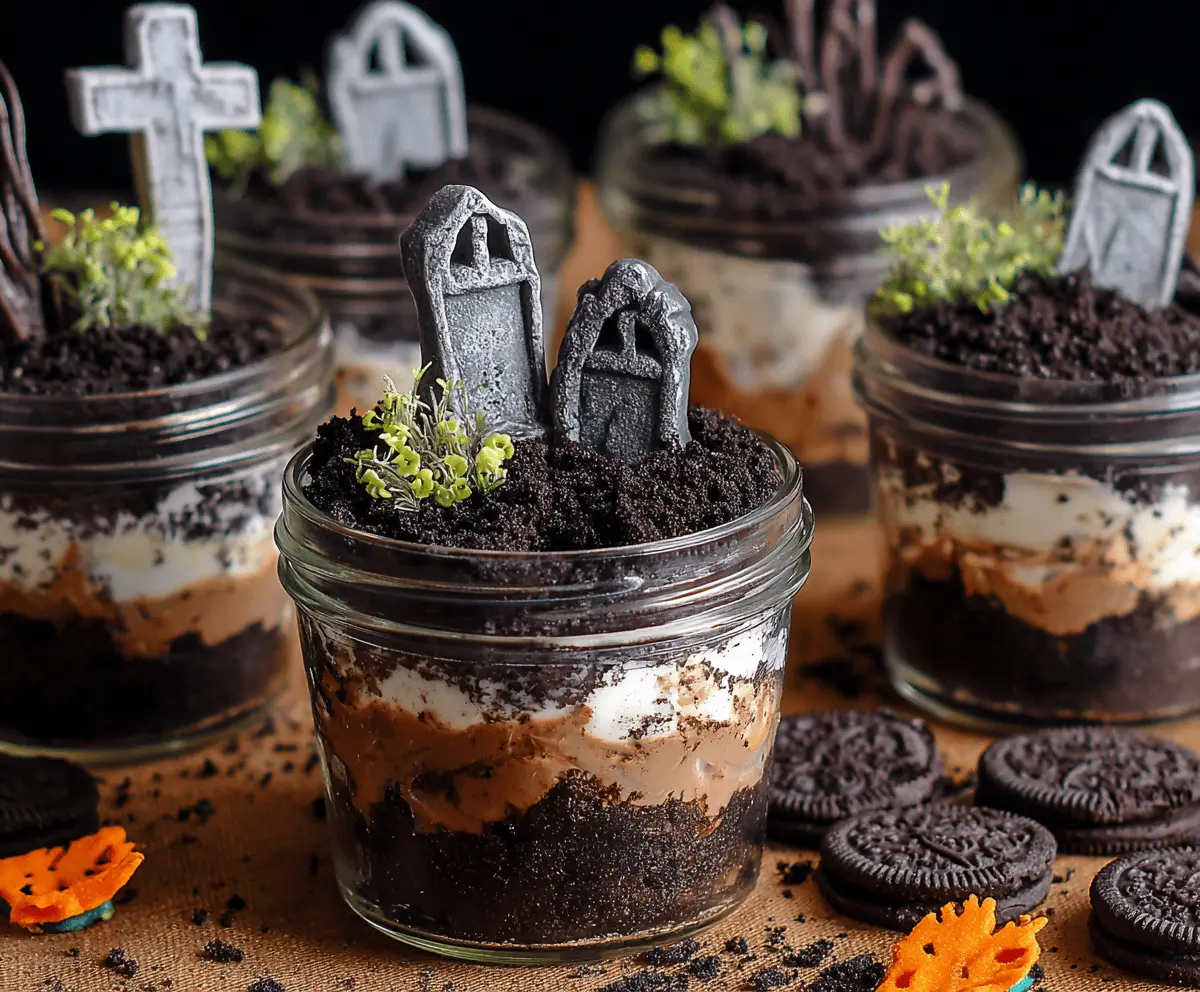
These spooky Graveyard Dirt Cups are a fun and tasty treat! With layers of chocolate pudding and crushed cookies, they look just like dirt. You can even top them with gummy worms for extra frightful fun!
Every time I make these, kids get so excited to dig in! They’re super easy to make, so you can whip up a batch for Halloween or any time you want a creepy dessert. Just grab a spoon and enjoy the sweet dirt! 😄
Key Ingredients & Substitutions
Oreo Cookies: These are perfect for that authentic “dirt” look. If you want a different flavor, try chocolate graham crackers or any chocolate cookie. You can even use gluten-free cookies for dietary needs.
Instant Chocolate Pudding Mix: This gives a quick and easy chocolate flavor. If you prefer homemade, use a simple chocolate pudding recipe instead. Or, vanilla pudding can work for a twist!
Heavy Cream: Needed for whipping to create a light texture. If you’re looking for a lighter option, you can use whipped topping or light cream. Coconut cream is a good dairy-free alternative.
Gummy Worms: These are a fun touch! Try other gummy candies like spiders or teeth for variety, especially for themed parties. If you’re looking to avoid sugar, consider gummy fruit snacks.
Tombstone Decorations: Edible decorations add personality. You can make homemade ones with chocolate or simply use cookie tombstones. Craft stores sometimes have cute, edible decor options.
How Do I Whip Cream to the Right Consistency?
Whipping cream is key to getting that light airy texture in your Dirt Cups. Here’s how you can do it right:
- Start with cold heavy cream. Chill your mixing bowl, too, for best results.
- Beat the cream on medium speed with a mixer. Gradually add powdered sugar, which helps stabilize it.
- Watch closely! Stop when you see stiff peaks form—this means it holds shape without being too runny.
Mix gently afterward if you’re folding in cream cheese to keep it light. This step is essential to prevent deflating the whipped cream!

Graveyard Dirt Cups
Ingredients You’ll Need:
For the Layers:
- 24 Oreo cookies (or any chocolate sandwich cookies)
- 1 package (3.9 oz) instant chocolate pudding mix
- 2 cups cold milk
- 1 cup heavy cream
For the Sweet Component:
- 2 tablespoons powdered sugar
- 1 teaspoon vanilla extract
- 4 oz cream cheese or mascarpone (optional) for cream layer (or use whipped cream)
For Decoration:
- Gummy worms or candy (for decoration)
- Edible tombstone decorations or mini graveyard toppers
- Small edible greenery or fresh herbs for “plants” (optional)
How Much Time Will You Need?
This recipe takes about 30 minutes of active prep time, plus at least 1 hour to chill before serving. It’s a perfect commitment for a fun, spooky dessert that everyone can enjoy!
Step-by-Step Instructions:
1. Prepare the “Dirt”:
Start by placing the Oreo cookies in a food processor and pulse until they resemble fine crumbs. If you don’t have a food processor, you can put the cookies in a ziplock bag and crush them with a rolling pin. This will create the dirt layer for your cups!
2. Make the Chocolate Pudding:
In a medium bowl, whisk together the instant chocolate pudding mix with the cold milk until it thickens—this should take about 2 minutes. Once thick, set this aside; it will be your delicious chocolate layer.
3. Make the Cream Layer:
In a separate bowl, whip the heavy cream together with powdered sugar and vanilla extract until you see stiff peaks. If you’re using cream cheese or mascarpone, blend a small amount with the whipped cream before folding in the rest; this will keep the mixture light and fluffy!
4. Assemble the Cups:
Grab your serving glasses or jars. Start with a layer of the crushed Oreo cookies to resemble dirt, then add a layer of the chocolate pudding, and follow this with a layer of the whipped cream mixture. Repeat these layers until you reach nearly the top of the glasses.
5. Top the Cups:
Add a final layer of crushed Oreos on top to give that extra “dirt” look. This makes it even more realistic and fun!
6. Decorate:
This is where you can get creative! Insert edible tombstone decorations, place gummy worms crawling out, and sprinkle some small edible greenery or herbs around for added effect.
7. Chill:
Pop the assembled cups into the fridge for at least 1 hour. This helps the layers set nicely so they hold their shape when you dig in!
8. Serve:
When it’s time to indulge, serve these spooky Graveyard Dirt Cups to your excited guests. Enjoy digging into these spooky and delicious desserts!
This recipe is sure to delight at Halloween parties or any time you want a creepy yet tasty treat!
Can I Use Different Types of Cookies?
Absolutely! If you want to change things up, you can use chocolate graham crackers, gluten-free cookies, or even other sandwich cookies like chocolate chip varieties for a different flavor while still achieving that “dirt” look.
How to Store Leftover Graveyard Dirt Cups?
Store any leftovers in an airtight container in the fridge for up to 2 days. To keep the layers fresh, make sure they’re well-sealed. Just remember not to add any gummy decorations until you’re ready to serve, as they can get mushy in the fridge!
Can I Make These Ahead of Time?
Yes, you can prepare the layers and assemble the cups a day in advance. Just keep them covered in the fridge. Wait to add the toppings until shortly before serving to keep them looking fresh and appealing!
What Can I Use If I Don’t Have Heavy Cream?
If you don’t have heavy cream, you can substitute it with whipped topping or coconut cream for a dairy-free option. The key is to ensure the substitute can be whipped to add that lightness to the dessert.