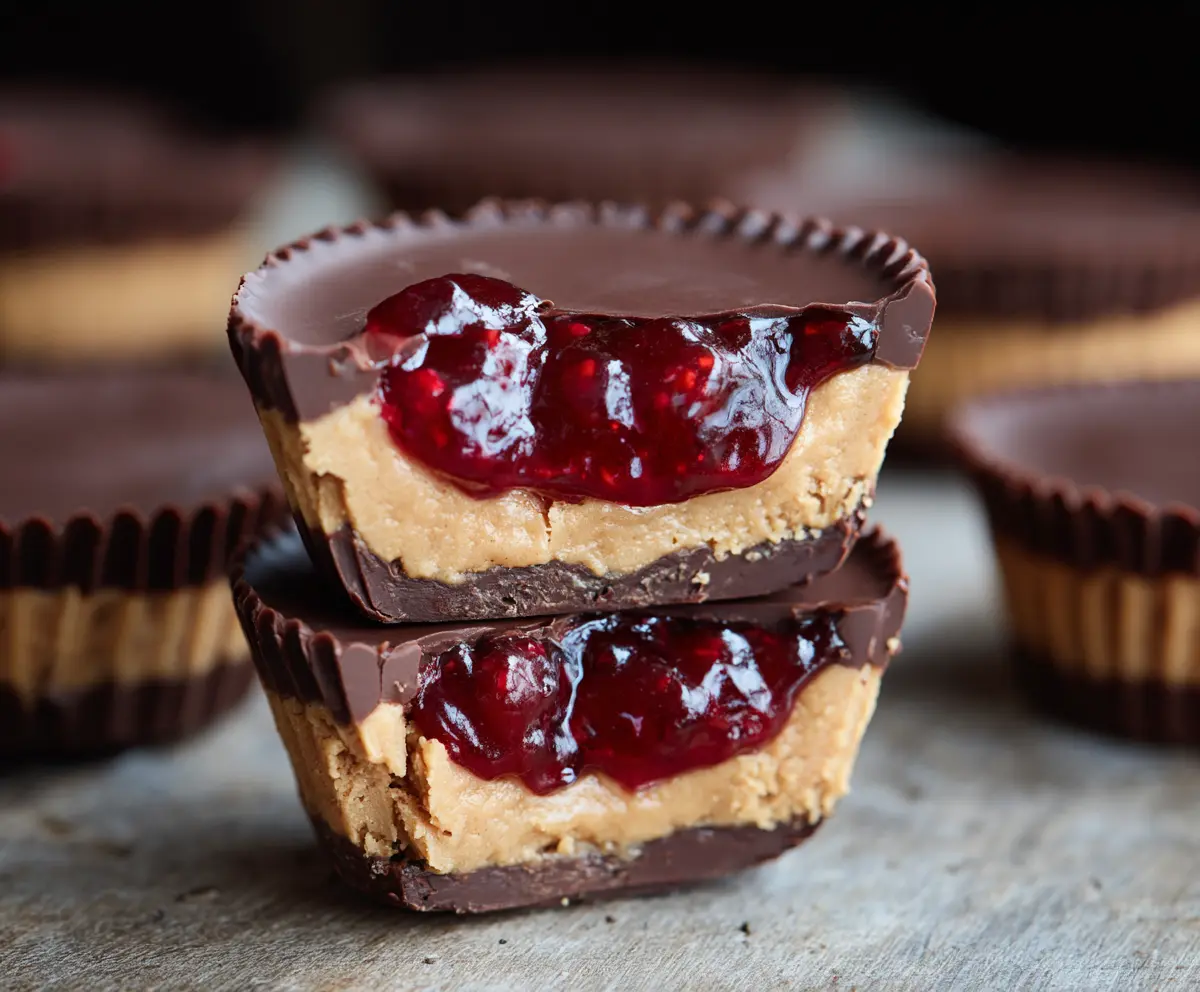
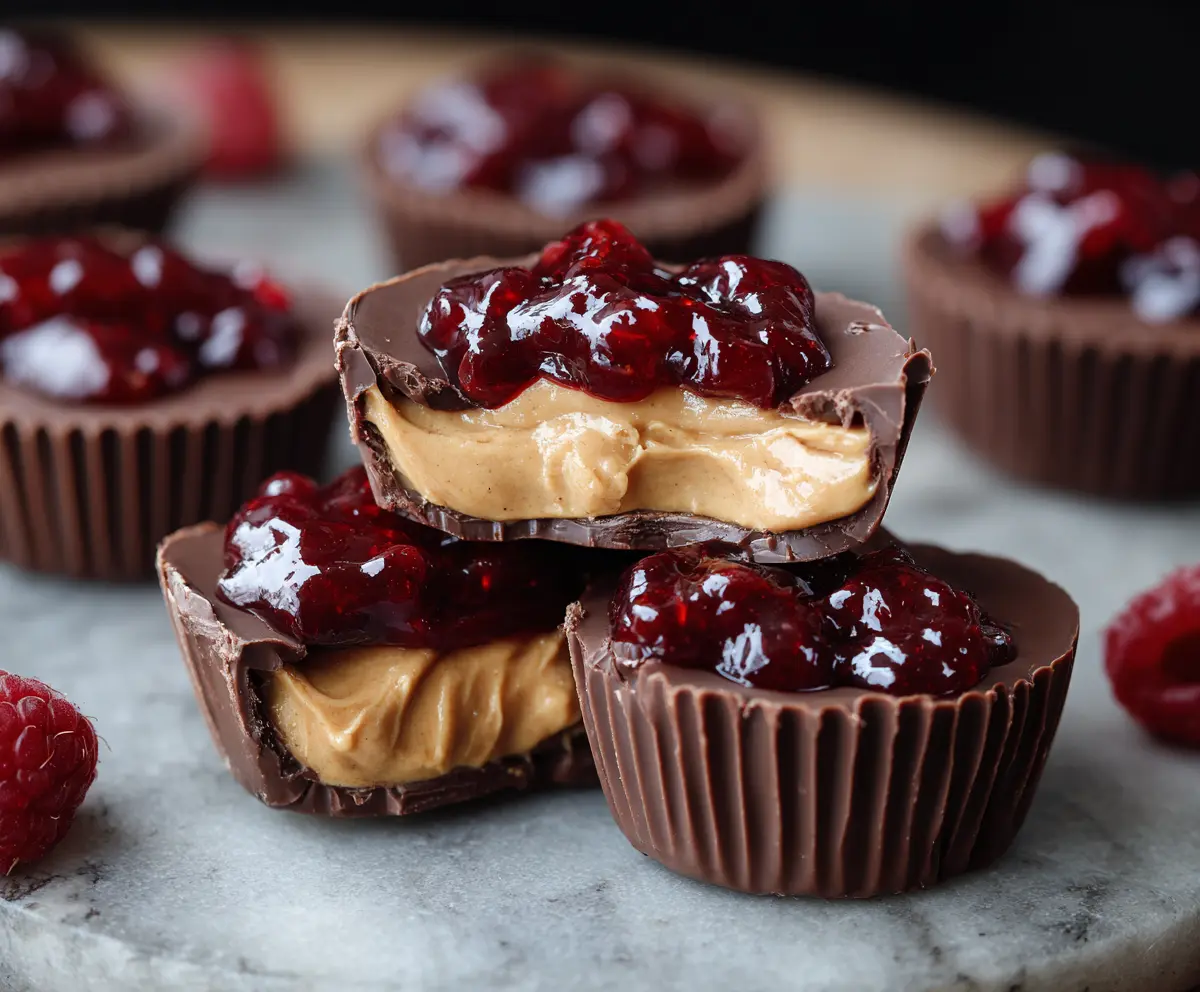
These Peanut Butter and Jelly Cups are the perfect sweet treat! Imagine creamy peanut butter nestled inside a chocolate shell, topped with a burst of fruity jelly. Yum!
They’re super easy to make, and I love how they remind me of childhood lunches. Who wouldn’t want to munch on these during movie night? Just be careful—you might eat them all in one sitting! 😄
Key Ingredients & Substitutions
Pecan Butter: For a different twist, you might try almond or cashew butter. They give a unique flavor but still complement the chocolate and jelly well!
Unsalted Butter: If you’re dairy-free, coconut oil works great! Just keep in mind it’ll add a slight coconut flavor.
Powdered Sugar: You can substitute with maple sugar for a more natural sweetener, but remember it may change the texture a bit.
Semi-Sweet Chocolate Chips: Dark chocolate is perfect if you prefer less sweetness. You can also use dairy-free chocolate options if needed!
Fruit Jelly: Any jelly or jam you love works. Try using grape, peach, or even Nutella if you’re feeling adventurous.
How to Melt Chocolate Perfectly Without It Seizing?
Melting chocolate can be tricky, but with a few tips, you’ll have smooth, creamy chocolate every time.
- Use a microwave-safe bowl when melting chocolate; opt for low power to prevent burning.
- Melt in short bursts of 30 seconds, stirring in between. This keeps the heat even and avoids hot spots.
- If your chocolate does seize, add a tiny bit of vegetable oil or shortening to bring it back together.
These simple techniques help ensure your Peanut Butter and Jelly Cups turn out perfectly every time! Enjoy creating your delicious treats!
How to Make Peanut Butter And Jelly Cups
Ingredients You’ll Need:
For the Peanut Filling:
- 1 cup creamy peanut butter (natural or smooth)
- 1/4 cup unsalted butter, softened
- 1/4 cup powdered sugar
- 1/2 tsp vanilla extract
For the Chocolate Coating:
- 2 cups semi-sweet chocolate chips (or chocolate melting wafers)
For the Jelly Layer:
- 1/3 cup fruit jelly or preserves (classic strawberry or raspberry)
How Much Time Will You Need?
This recipe takes about 15 minutes to prepare, plus an additional 40 minutes to chill in the refrigerator. Great for a quick and delicious homemade treat!
Step-by-Step Instructions:
1. Prepare Muffin Tin:
Start by lining a mini muffin tin with paper liners. This will make it easy to remove the cups once they’re set. Set the tin aside while you make the filling.
2. Make the Peanut Butter Filling:
In a medium bowl, mix together the peanut butter, softened butter, powdered sugar, and vanilla extract until the mixture is smooth and creamy. Use a sturdy spatula or a hand mixer to make it easy!
3. Melt the Chocolate:
In a microwave-safe bowl, melt 1 cup of the chocolate chips in 30-second intervals, stirring in between until melted and smooth. Be careful not to overheat!
4. Create the Chocolate Base:
Take a spoonful of the melted chocolate and pour approximately 1 teaspoon into the bottom of each paper liner. Use the back of the spoon to spread the melted chocolate slightly up the sides of the liner. This will create a base for your peanut butter filling.
5. Chill the Chocolate:
Place the muffin tin in the fridge for about 10 minutes to let the chocolate set firmly. This will help keep your layers distinct.
6. Add Peanut Butter Filling:
Once the chocolate is set, take about 1 tablespoon of the peanut butter mixture and carefully scoop it into each cup. Gently press down the filling to make it even, but leave some space at the top for the jelly.
7. Top with Jelly:
Add about 1/2 teaspoon of jelly on top of the peanut butter layer in each cup. Feel free to use your favorite jam to make it your own!
8. Cover with More Chocolate:
Melt the remaining chocolate chips and spoon over the jelly, completely covering it. Make sure no jelly is showing for perfect presentation!
9. Final Chill:
Put the muffin tin back in the fridge for at least 30 minutes, or until the cups are fully firm and set. This helps everything stick together nicely!
10. Serve and Enjoy!
Once the cups are set, carefully remove them from the muffin tin and peel off the paper liners. Enjoy your creamy, chocolaty Peanut Butter and Jelly Cups either chilled or at room temperature!
These delicious cups are a delightful twist on the classic peanut butter and jelly sandwich, perfect for satisfying your sweet tooth!
Can I Use Different Nut Butters?
Absolutely! Feel free to substitute peanut butter with almond, cashew, or even sunflower seed butter for a nut-free option. Just keep in mind that the flavor and texture may vary slightly!
How Do I Store Leftovers?
Store any leftovers in an airtight container in the fridge for up to a week. You can also freeze them for longer storage—just thaw in the fridge before enjoying!
Can I Make These Vegan?
Yes! Use dairy-free chocolate chips and replace the butter with coconut oil or vegan butter. Ensure your jelly is also vegan-friendly, and you’re all set!
How Do I Make These Cups More Chocolatey?
If you love a richer chocolate flavor, try adding cocoa powder to the peanut butter mix or drizzling melted chocolate on top before serving. Delicious!