These Turmeric Sesame Chicken Spring Rolls are a fun, crispy treat! Filled with tender chicken and bright veggies, they pack a flavorful punch, all wrapped in a delicate rice paper.
You won’t believe how easy they are to make! Just whip up the filling, roll them up, and fry until golden. Perfect for sharing or keeping all to yourself—no judgment here! 😄
Key Ingredients & Substitutions
Chicken: Cooked chicken breast is great for this recipe. If you don’t have chicken, feel free to try shredded tofu or cooked shrimp for a twist. They’ll soak up the flavors wonderfully!
Turmeric: This spice adds a beautiful color and unique taste. If you’re out of turmeric, you could use curry powder, which has a similar effect, although the flavor will differ a bit.
Sesame Oil: This oil gives a nutty flavor that’s hard to replace. If you don’t have it, try a light olive oil or avocado oil, but add a sprinkle of sesame seeds for that signature taste.
Fresh Ginger & Garlic: Both bring lots of freshness. If you don’t have fresh ginger, ground ginger can work in a pinch, but use less. And for garlic, garlic powder is a substitute, but the flavor won’t be as vibrant.
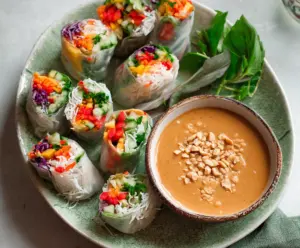
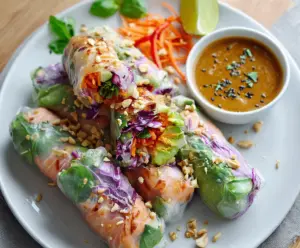
Spring Roll Wrappers: If you can’t find spring roll wrappers, try rice paper wraps or even tortillas. The texture will change a bit, but they’ll still be delicious!
How Do I Wrap Spring Rolls Like a Pro?
Wrapping spring rolls can be tricky, but with a few tips, you’ll be a pro! Start by laying the wrapper in a diamond shape. It’s helpful to have a little bowl of water handy to seal the edges. Here’s how:
- Spoon the filling near the bottom corner of the wrapper.
- Fold the bottom corner over the filling tightly.
- Fold in the sides, then roll it up towards the top corner. Use water to seal the edge.
Make sure not to overfill, as it makes wrapping harder. Practice makes perfect, so don’t worry if your first ones aren’t perfect!
How to Make Turmeric Sesame Chicken Spring Rolls
Ingredients You’ll Need:
For the Spring Rolls:
- 1 lb (450g) cooked chicken breast, shredded
- 1 tsp turmeric powder
- 2 tbsp sesame oil
- 2 cloves garlic, minced
- 1 tbsp fresh ginger, minced
- 1 cup shredded cabbage (purple or green)
- 1/2 cup shredded carrots
- 1/2 cup thinly sliced green onions (reserve some for garnish)
- 1/4 cup soy sauce
- 1 tbsp hoisin sauce (optional)
- 1 tbsp rice vinegar
- 1 tbsp toasted sesame seeds, plus extra for garnish
- 12-14 spring roll wrappers
- Oil for frying (vegetable or canola oil)
For the Dipping Sauce:
- 1/4 cup soy sauce
- 1 tbsp rice vinegar
- 1 tsp sesame oil
- 1 tsp honey or sugar
- 1 tsp toasted sesame seeds
How Much Time Will You Need?
This recipe takes about 20 minutes to prepare, plus about 4-5 minutes for frying. So in total, you’ll need around 30 minutes to make these delicious spring rolls and the accompanying dipping sauce!
Step-by-Step Instructions:
1. Prepare the Chicken Filling:
In a mixing bowl, combine the shredded chicken with turmeric powder, 1 tablespoon of sesame oil, minced garlic, and minced ginger. Toss everything together until the chicken is evenly coated with the seasonings.
2. Cook the Filling:
Heat a pan over medium heat and add the seasoned chicken mixture. Stir-fry for about 3-4 minutes until it becomes fragrant and warmed through.
3. Add the Vegetables:
To the pan, add shredded cabbage, shredded carrots, thinly sliced green onions, soy sauce, hoisin sauce (if using), rice vinegar, and toasted sesame seeds. Stir-fry the mixture for another 2-3 minutes until the vegetables are slightly tender but still have a nice crunch. Remove the pan from heat and let the filling cool.
4. Wrap the Spring Rolls:
Set up a clean surface to wrap the spring rolls. Take one spring roll wrapper and place it on a flat surface with a corner pointed towards you (so it looks like a diamond). Spoon about 2-3 tablespoons of the chicken-vegetable filling near the bottom corner of the wrapper.
5. Roll the Spring Rolls:
Fold the bottom corner of the wrapper over the filling, then fold in the two side corners tightly. Roll up towards the top corner, sealing the edge with a little water to secure it. Repeat this process with the remaining wrappers and filling.
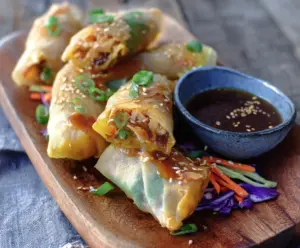
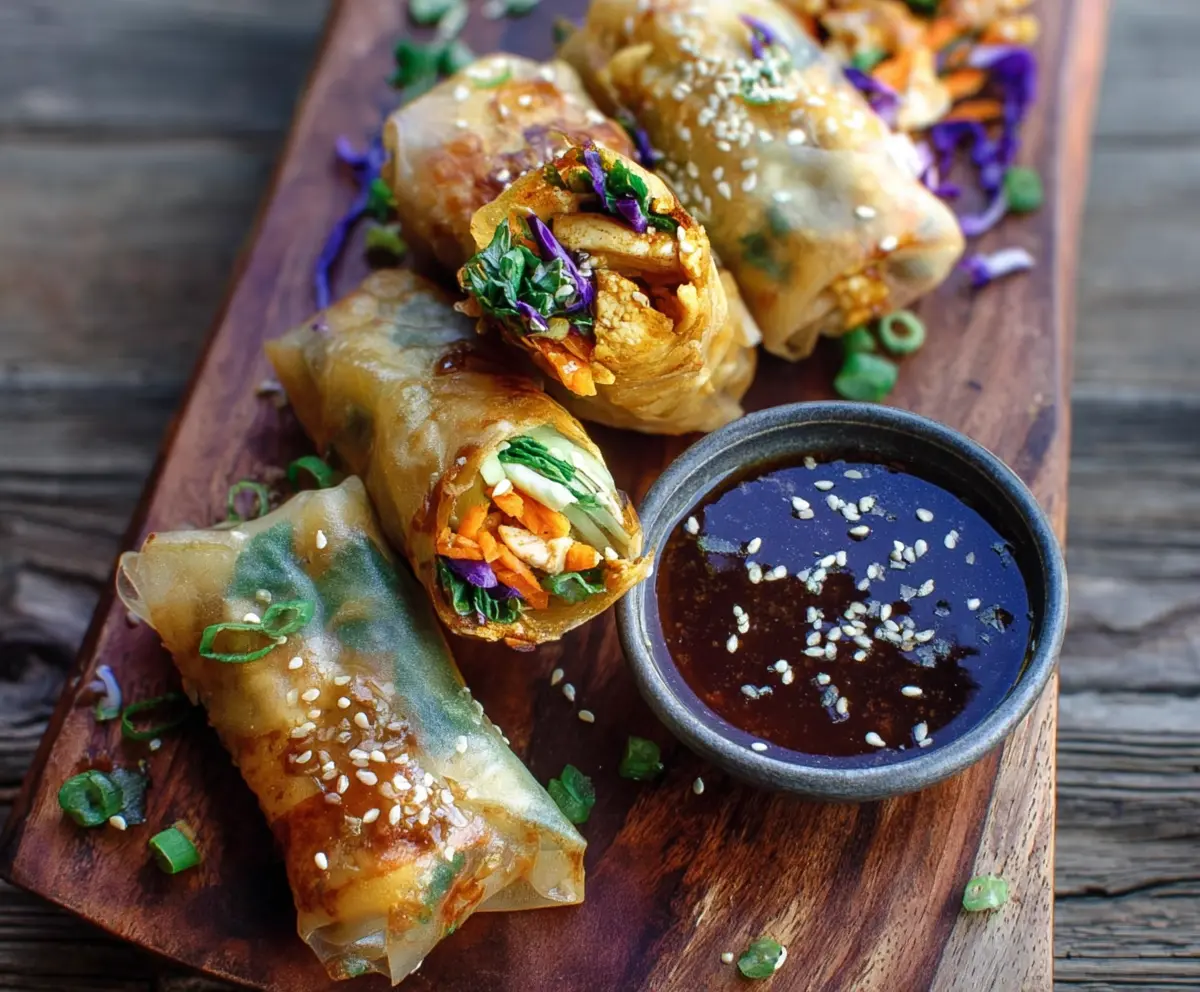
6. Fry the Spring Rolls:
In a deep pan or fryer, heat oil to 350°F (175°C). Carefully place the spring rolls in the hot oil in batches and fry them until they turn golden brown and crispy, about 3-4 minutes. Once done, drain them on paper towels to remove any excess oil.
7. Make the Dipping Sauce:
In a small bowl, mix together soy sauce, rice vinegar, sesame oil, honey (or sugar), and toasted sesame seeds. Stir until well combined.
8. Serve:
Enjoy the spring rolls hot, garnished with sliced green onions and sesame seeds. Serve them alongside the dipping sauce. For a fresh touch, feel free to add some shredded purple cabbage and carrot sticks on the side.
Enjoy your crispy, flavorful Turmeric Sesame Chicken Spring Rolls!
Can I Use Leftover Chicken for This Recipe?
Absolutely! Leftover cooked chicken is perfect for these spring rolls. Just shred it and follow the recipe as instructed. It will save you time and add great flavor!
Can I Bake Instead of Frying the Spring Rolls?
Yes, you can bake the spring rolls for a healthier option! Preheat your oven to 400°F (200°C). Place the wrapped spring rolls on a baking sheet lined with parchment paper and lightly brush them with sesame oil. Bake for about 20 minutes or until they’re golden brown, flipping halfway through for even cooking.
How to Store Leftover Spring Rolls?
To store leftovers, let the spring rolls cool completely, then place them in an airtight container. They can be refrigerated for up to 3 days. To reheat, bake them in the oven at 350°F (175°C) until warmed through, about 10-15 minutes.
Are These Spring Rolls Freezable?
Yes, you can freeze uncooked spring rolls! Arrange them in a single layer on a baking sheet, freeze until solid, then transfer them to a freezer-safe bag. When ready to cook, fry them straight from the freezer without thawing – just add a few extra minutes to the cooking time!