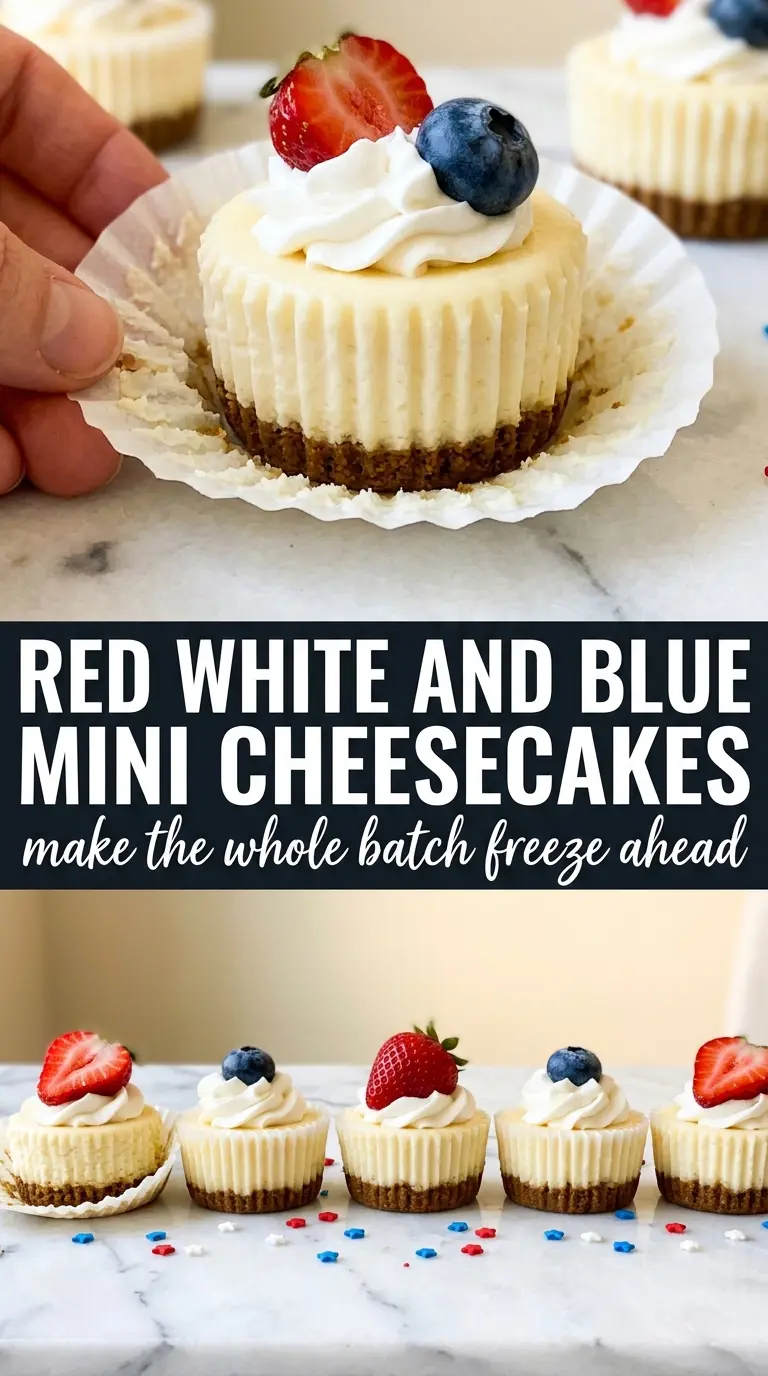
These red, white, and blue mini cheesecakes bake up with a smooth, tangy filling, a sturdy cookie base, and just enough size to feel special without the fuss of slicing a full cake. The centers stay creamy instead of dense, and the fruit on top gives each one a clean, fresh finish that keeps the whole dessert from feeling heavy.
The trick is stopping the bake while the centers are still slightly soft. Mini cheesecakes set as they cool, and if you wait until they look completely firm in the oven, they usually end up dry after chilling. A little sour cream in the batter also helps the texture stay silky and adds the kind of tang that makes cheesecake taste like cheesecake.
Below, I’ve added the small details that matter most: how to keep the tops smooth, why the cookies go in first, and the easiest way to switch up the toppings without losing the patriotic look.
The filling baked up smooth and the centers set perfectly after chilling. I loved that the cookie base stayed crisp under the cream cheese, and the strawberry-blueberry topping made them look bakery-worthy.
Love the creamy centers and fresh berry topping? Save these red, white, and blue mini cheesecakes for the next patriotic dessert table.
Why the Centers Stay Creamy Instead of Cracking
Mini cheesecakes fail for the same reason full-size ones do: too much air in the batter, too much heat in the oven, or too much baking time. You want the cream cheese and sugar beaten until smooth, but not whipped into a fluffy mousse. Once the eggs go in, mix just until each one disappears. That keeps the filling dense in the good way and helps it set without those little surface cracks.
The other detail that matters is the bake itself. Pull them when the centers still have a slight wobble; they should look set around the edges and a little soft in the middle. If they look fully firm in the oven, they’re already overbaked. The chill time finishes the job, and that’s when the texture turns from soft to sliceable.
What the Cookie Base and Sour Cream Are Doing Here
Golden Oreos or regular Oreos — Either one gives you a sturdy, no-fuss base. Golden Oreos keep the flavor lighter and more classic for cheesecake, while chocolate Oreos add a deeper contrast. You don’t need to crush them first; one cookie pressed flat in each liner is exactly the right amount.
Cream cheese — This is the backbone of the filling, so use full-fat block cream cheese, not the spreadable tub kind. The block style blends smoother and sets more predictably. If it’s even a little cold, you’ll end up with lumps that never fully disappear.
Sour cream — This gives the filling a little extra tang and helps it stay silky after chilling. If you’re out, plain full-fat Greek yogurt works in the same amount, though the finish will be a touch less rich.
Fresh berries — The strawberries and blueberries are more than decoration. They cut through the richness and keep the top of each cheesecake bright and fresh. Frozen berries don’t work well here because they weep as they thaw.
Building the Batter So It Bakes Evenly
Starting with the Cookie Layer
Line the muffin tin with cupcake liners, then set one cookie flat in the bottom of each cup. Press it down only if it needs help staying centered. The cookie will soften slightly as the cheesecake chills, so you want it snug but not crushed into crumbs. If the liners are thin and flimsy, a double liner helps the cheesecakes release cleanly.
Mixing the Filling Without Overworking It
Beat the cream cheese and sugar until the mixture looks glossy and completely smooth, with no pale lumps stuck to the bowl. Add the eggs one at a time and mix just until combined after each one. Overmixing adds air, and air is what gives you puffing, then sinking, then cracks. Stir in the vanilla and sour cream at the end so the batter stays even and thick.
Baking Until Just Barely Set
Spoon the batter into the liners until each cup is about three-quarters full. Bake at 325°F until the edges look set and the centers still wobble a little when you gently tap the pan. They will look underdone when they come out, and that’s correct. Let them cool in the pan first, because moving them too early can make the centers collapse.
Chilling for the Right Texture
After 30 minutes on the counter, move the pan to the refrigerator and give the cheesecakes at least 2 hours. Longer is fine. Chilling firms the filling, deepens the flavor, and makes the tops stable enough for whipped cream and fruit. If you top them too early, the whipped cream can slide and the berries can sink.
Three Ways to Change the Finish Without Losing the Look
Golden Oreo version for a softer, sweeter base
Use Golden Oreos if you want the crust to taste more like vanilla shortbread than chocolate cookie. They keep the focus on the creamy filling and fresh berries, and they pair especially well with the white topping and sprinkles.
Gluten-free mini cheesecakes
Swap in gluten-free sandwich cookies and keep the rest of the method the same. The texture stays nearly identical because the cookie is acting as a base, not a structural crust that needs extra binding. Check that the cookies are pressed flat and centered so they don’t tilt when the batter goes in.
Lighter topping for a less sweet dessert
Skip the sprinkles and use just whipped cream, strawberries, and blueberries. That keeps the patriotic look but trims some of the sweetness, which is nice when the cheesecakes are serving alongside other desserts. A small spoonful of lightly sweetened whipped cream is enough.
Make-ahead for a party platter
Bake and chill the cheesecakes a day ahead, then add the whipped cream and berries just before serving. That keeps the tops neat and the fruit fresh. If you decorate them too early, the berries can bleed color into the cream and the whipped cream starts to weep.
Storage and Reheating
- Refrigerator: Store covered for up to 4 days. The cookie base softens a little after the first day, but the texture stays good.
- Freezer: Freeze the plain cheesecakes without toppings for up to 1 month. Wrap each one well and thaw in the refrigerator overnight before decorating.
- Reheating: Don’t reheat these. Mini cheesecakes are meant to be served chilled, and warming them changes the texture. Let frozen ones thaw fully in the fridge before adding the toppings.
The Things That Trip People Up With This Dish

Red, White and Blue Mini Cheesecakes
Ingredients
Equipment
Method
- Preheat the oven to 325°F and line a 12-cup muffin tin with cupcake liners. This ensures the liners are ready before the batter goes in.
- Place one Oreo cookie flat in the bottom of each liner. Use 12 cookies so every cup has a crust layer.
- Beat the cream cheese and granulated sugar until smooth. Mix just until the texture looks creamy and lump-free.
- Add the eggs one at a time and mix well after each. Stop and scrape the sides if needed so the batter stays smooth.
- Beat in the vanilla extract and sour cream. Mix until fully incorporated and glossy.
- Divide the batter evenly among the 12 cups, filling each about 3/4 full. Keep portions consistent for even baking.
- Bake for 18–20 minutes at 325°F, until the centers are just barely set. Look for a slight jiggle in the middle rather than a firm surface.
- Cool the cheesecakes in the pan for 30 minutes. They should firm up slightly as they come down in temperature.
- Refrigerate for at least 2 hours before serving. Chill until cold so the tops slice cleanly and the flavor settles.
- Top each mini cheesecake with a swirl of whipped cream. Add the swirl right before serving for the best texture.
- Add a strawberry slice to each cheesecake. Place it near the center so the red stands out.
- Add a few blueberries on top of each cheesecake. Use enough to form a blue crown without covering the swirl completely.
- Finish with a pinch of red and blue sprinkles on each mini cheesecake. Keep them light so they don’t sink into the whipped cream.


