Bright fruit arranged into a clean American flag turns a simple platter into the kind of centerpiece people actually crowd around. The blueberries stay compact and dark in the corner, the strawberries bring bold color across the tray, and the banana rounds keep the white stripes crisp enough to read from across the table. When the rows are tight and even, it looks polished without any special equipment or fussy carving.
What makes this version work is the order of assembly. The blueberries go in first so the canton has a firm shape, then the strawberry and banana rows can be packed in around it without shifting the layout. Halving the strawberries gives you flatter edges and a steadier stripe, while a quick brush of lemon juice buys the bananas enough time to hold their color through serving. This is the kind of platter that looks like you spent an hour on it, even though it comes together in about twenty minutes.
Below, you’ll find the little details that keep the fruit from sliding around, plus the easiest way to scale the platter up for a bigger crowd.
The banana slices held up better than I expected, and brushing them with lemon juice kept the stripes from turning brown before the burgers were even done. My kids thought the blueberry corner was the best part.
Love how the American Flag Fruit Platter comes together with just fresh fruit and a tidy layout? Save it to Pinterest for the next patriotic party or summer cookout.
The Layout That Keeps the Flag Looking Sharp
Most fruit platters slide out of shape because the rows are built too loosely. The blueberries need to be packed in tightly enough to hold their rectangle, and the strawberry rows need to sit shoulder to shoulder so the red stripes read as clean bands instead of scattered fruit. If the tray has too much empty space, the bananas drift and the whole design starts looking patchy.
Start by mapping the blueberry corner first. That gives you a fixed anchor point for every row that follows. Then lay the strawberries and bananas in straight lines across the tray, pressing them close enough to touch without smashing them. The cleanest result comes from working with fruit that is dry on the outside, because extra moisture makes the berries and banana slices slide.
What Each Fruit Is Doing in the Design
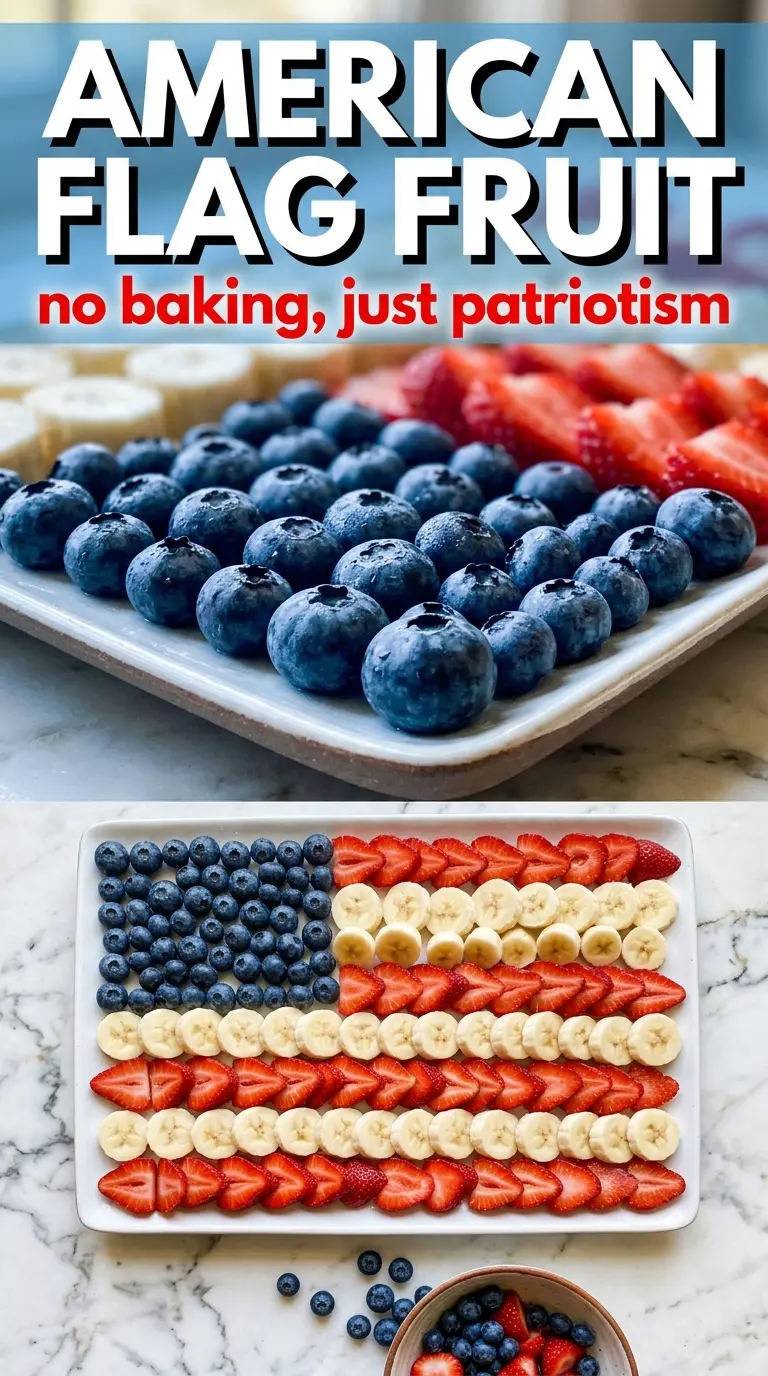
- Blueberries — These build the star field in the upper left corner, and their small size is what lets the canton look dense and intentional. Fresh blueberries work best here because frozen berries soften and bleed color. If your berries are very large, spread them in a slightly deeper layer so the rectangle doesn’t look sparse.
- Strawberries — Halving them lengthwise creates flatter pieces that sit in straight stripes instead of rolling around. That cut edge also gives the tray a neater, more graphic look than whole berries would. Pick berries that are firm and similar in size so the rows stay even.
- Bananas — They give you the white stripes, but they brown fast, so the lemon juice matters. A light brush is enough; soaking them makes the fruit wet and slippery. Slice them just before assembling so they stay bright and don’t soften before serving.
- Lemon juice — This doesn’t add much flavor at the amount used here, but it slows browning and keeps the banana rows looking fresh. Use fresh lemon juice if you can, since bottled can taste flat on delicate fruit. Brush, don’t drench, or the bananas will pick up too much moisture.
Building the Rows So the Tray Stays Neat
Set the Blueberry Corner First
Choose a large rectangular tray or cutting board with enough room for the stripes to run cleanly from end to end. Spoon the blueberries into the upper left corner and pack them into a solid block, filling gaps as you go. If the corner looks loose, the rest of the flag will drift out of alignment, so this first shape needs to be dense and square.
Lay the Strawberry Stripes in Straight Bands
Work from the blueberry section across the tray, setting the strawberry halves cut-side down in long rows. Keep the berries close enough that the red reads as a solid stripe. If a row starts to look crooked, nudge it back into line before adding the next band, because the shape gets harder to correct once the tray is full.
Slide in the Banana Rows Last
Brush the banana slices lightly with lemon juice, then tuck them into the spaces between the strawberry rows. The goal is a calm, even stripe, not a thick layer of overlapping rounds. If the bananas overlap too much, they trap moisture and turn the stripe mushy, so keep the slices in a single neat layer whenever possible.
Serve Before the Fruit Starts to Shift
Once the platter is assembled, move it straight to the table or cover it loosely and refrigerate for no more than an hour. Fruit starts to weep as soon as it sits, and that moisture loosens the whole design. If you need to wait longer, hold the components separately and build the platter right before serving.
How to Adjust the Platter for Different Crowds and Dietary Needs
Make It Bigger for a Party Table
Double the fruit and use a larger tray or a rimmed sheet pan if you need the platter to feed a bigger group. The layout still works the same way, but the stripes will need to be longer and the blueberry block wider so the flag proportions don’t look stretched.
Use Pineapple or Apple Instead of Banana
If you want a fruit that holds its color longer, swap the banana stripes for peeled apple slices or pale pineapple spears. Apples stay crisp but need lemon juice too, while pineapple brings a little tang and holds up well for longer serving windows.
Turn It Into a Dairy-Free, Gluten-Free Dessert Board
This platter already fits both dairy-free and gluten-free eating without any changes, which is part of why it works so well for mixed crowds. If you want to make it feel more dessert-like, serve it with a bowl of coconut whipped cream on the side instead of building anything creamy into the flag itself.
Switch the Berries for What Looks Best at the Market
If strawberries aren’t in great shape, raspberries can work for the red stripes, but they won’t hold a straight line as cleanly and the flag will look more rustic. Choose the best-looking red fruit you can find, because this recipe depends on strong color contrast more than anything else.
Storage and Reheating
- Refrigerator: Best served right away, but you can refrigerate uncovered for up to 1 hour before serving. After that, the bananas soften and the fruit starts to release liquid.
- Freezer: This platter doesn’t freeze well. The fruit changes texture completely once thawed, and the flag design loses its shape.
- Reheating: No reheating needed. If the platter has sat too long, the fix is to rebuild it with fresh fruit rather than trying to revive softened slices.
Answers to the Questions Worth Asking
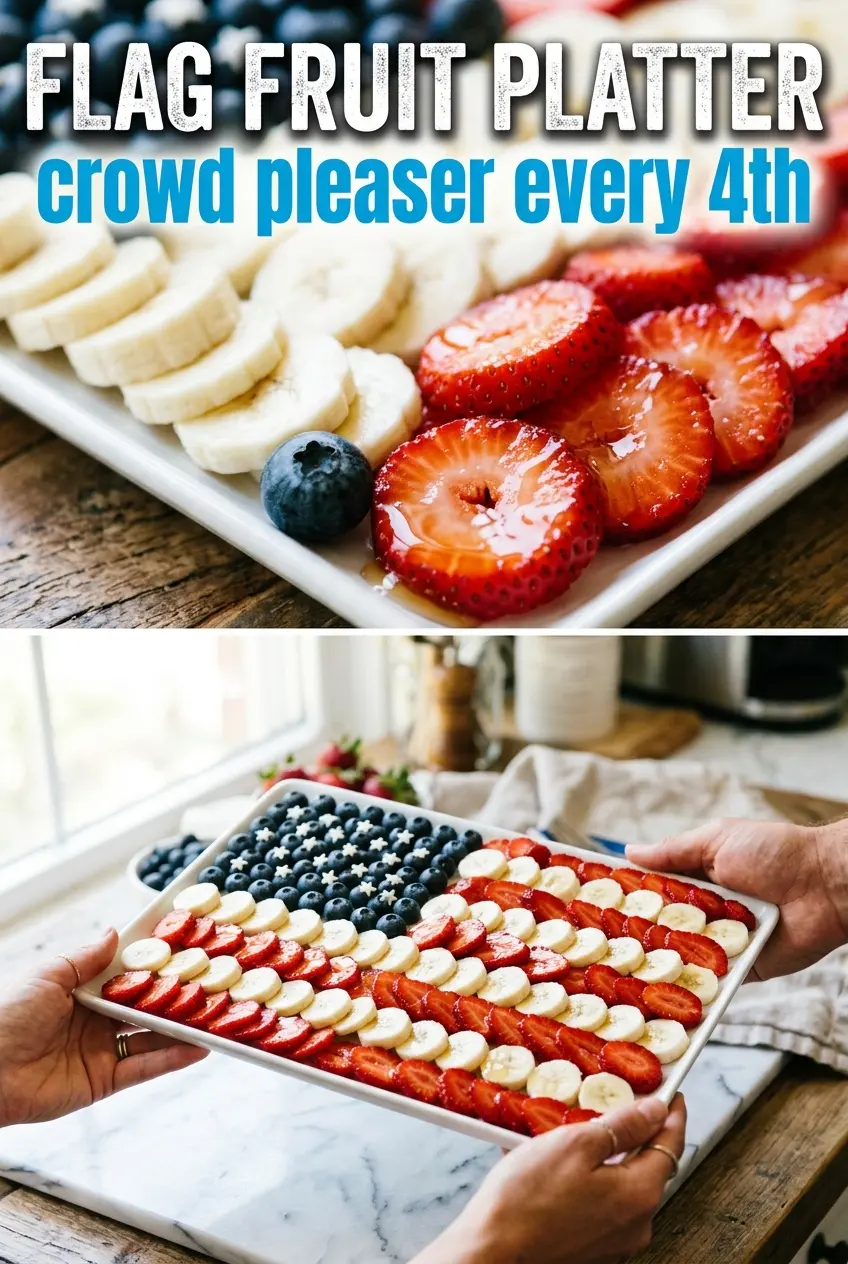
American Flag Fruit Platter
Ingredients
Equipment
Method
- Choose a large rectangular serving tray or cutting board and place it with the long side facing you for easier row building. Keep the surface dry so berries and slices don’t slide.
- In the upper left corner, arrange a dense rectangle of fresh blueberries to form the canton (star field). Press the berries lightly so the edges look clean and squared off.
- Starting from the top right and working left from the blueberry section, lay rows of halved strawberries cut-side down to form the red stripes. Keep the rows tight and parallel for a flag look.
- Brush banana slices with lemon juice to prevent browning, then arrange them in rows between the strawberry stripes to create the white stripes. Overlap slices slightly so the white bands read clearly.
- Continue alternating strawberry and banana rows across the full length of the tray until the flag is filled end to end. Lightly adjust spacing so every stripe is even.
- Serve immediately, or refrigerate the platter uncovered for up to 1 hour before serving. Keep it uncovered to prevent fruit from weeping.


