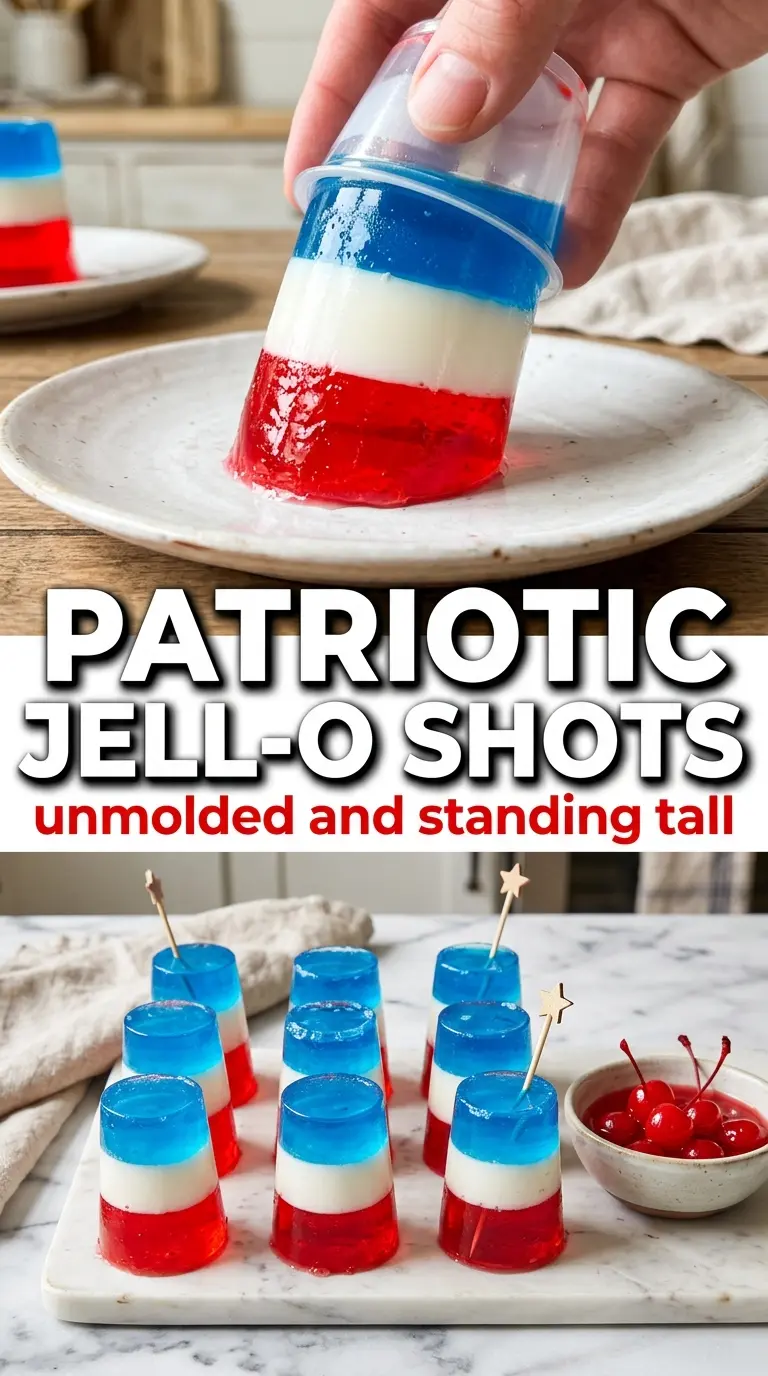
These red, white, and blue Jell-O shots set up in crisp, separate layers with a clean jiggle and a bright, party-ready look. The cherry bottom brings the color, the creamy middle softens the sweetness, and the blue top finishes the whole thing with a sharp patriotic contrast that holds its shape in the cup.
Layered shots like these only work when each layer is fully set before the next one goes in, and that means patience matters more than speed. The trick is cooling the blue and white mixtures enough that they don’t melt what’s underneath, but not so long that they start to thicken in the bowl. A small pour over the back of a spoon helps each layer settle without tunneling into the one below.
Below, I’ve included the timing cues that keep the layers neat, plus a few swaps for using different flavors or making a non-alcoholic version. If you’ve ever had a layered shot smear together, the method here will help fix that.
The layers actually stayed separate, and the white middle turned out creamy instead of rubbery. I used clear plastic cups and they looked great on the table.
These layered red, white, and blue Jell-O shots stay sharp and glossy when you give each color time to set.
The Part That Keeps the Layers Clean Instead of Muddy
The biggest mistake with layered Jell-O shots is rushing the next color in before the layer beneath has actually set. Even if the surface looks firm, a warm liquid can still sink and blur the line between layers. That’s why the white layer matters most here: it acts like a visual divider, but it only stays clean if it’s cooled before you spoon it on and fully set before the blue layer goes in.
Another thing that helps is keeping the alcohol amounts modest. Too much vodka weakens the set and gives you soft, slumping layers instead of neat squares of color. The amounts here are enough for flavor and a little kick, but not so much that the gelatin loses structure.
- Cherry or strawberry Jell-O — This gives you the strongest red color and the cleanest set. Cherry tastes a little sharper; strawberry is softer and sweeter. Either works.
- Berry blue Jell-O — The blue layer is mostly about color, but berry blue also gives you the brightest finish. A darker blue gelatin can look muddy in a layered cup, so this flavor keeps the top layer vivid.
- Unflavored gelatin — This is what lets the white layer set without adding another flavor. It’s not interchangeable with flavored gelatin here, because you need a neutral middle that won’t fight the red and blue layers.
- Sweetened condensed milk — This creates the creamy white stripe and gives the shots that classic patriotic look. Regular milk won’t behave the same way, and it won’t give you the same opaque layer.
- Cold vodka — Cold vodka blends in more smoothly and helps the mixture cool faster before it meets the cups. Room-temperature vodka can soften the set a little too much.
What Each Ingredient Is Actually Doing in This Recipe
- Primary ingredient (the star) — Quality matters most. Choose the best you can find.
- Cooking medium (oil, butter, or broth) — This carries flavors and prevents dryness.
- Seasonings (salt, pepper, spices, herbs) — Layer flavors so nothing overpowers. Build depth gradually.
- Aromatics (garlic, onion, herbs) — Cook with fat to bloom flavors. Become the foundation.
- Supporting ingredients — Complement the main ingredient without overpowering it.
- Sauce or liquid (if applicable) — Brings flavors together. Balance richness with acid.
- Acid (lemon, vinegar, wine, or other) — Brightens and prevents flat-tasting results.
- Final finish (garnish, glaze, or sauce) — Prevents one-dimensional taste and adds visual appeal.
How to Stack the Cups Without Melting What’s Already Set
Mix the Red Layer First
Start by dissolving the red Jell-O completely in boiling water, stirring for the full two minutes so no granules stay behind. Add the cold vodka after the powder is dissolved, not before, so the gelatin has already opened up and can set properly. Pour into the cups while the liquid is still warm but not steaming. If you pour it in while it’s too hot, the cups can fog up and the layer takes longer to chill.
Wait for a Full Set Before Adding White
The red layer needs to be fully firm, not just cool, before the white goes on top. That usually takes about 45 minutes, but your fridge might run slower or faster. If you touch the surface and it still feels tacky or wobbly, wait longer. A soft base is where the layers start blending instead of stacking.
Build the Creamy Middle Slowly
When you mix the condensed milk, boiling water, and unflavored gelatin, stir until the gelatin disappears completely. Let it cool a bit before adding the cold water, then spoon it gently over the set red layer. A spoon helps break the fall so the white layer spreads instead of punching through the red. If the mixture starts to thicken in the bowl, stir it and move faster before it turns lumpy.
Finish With the Blue Layer
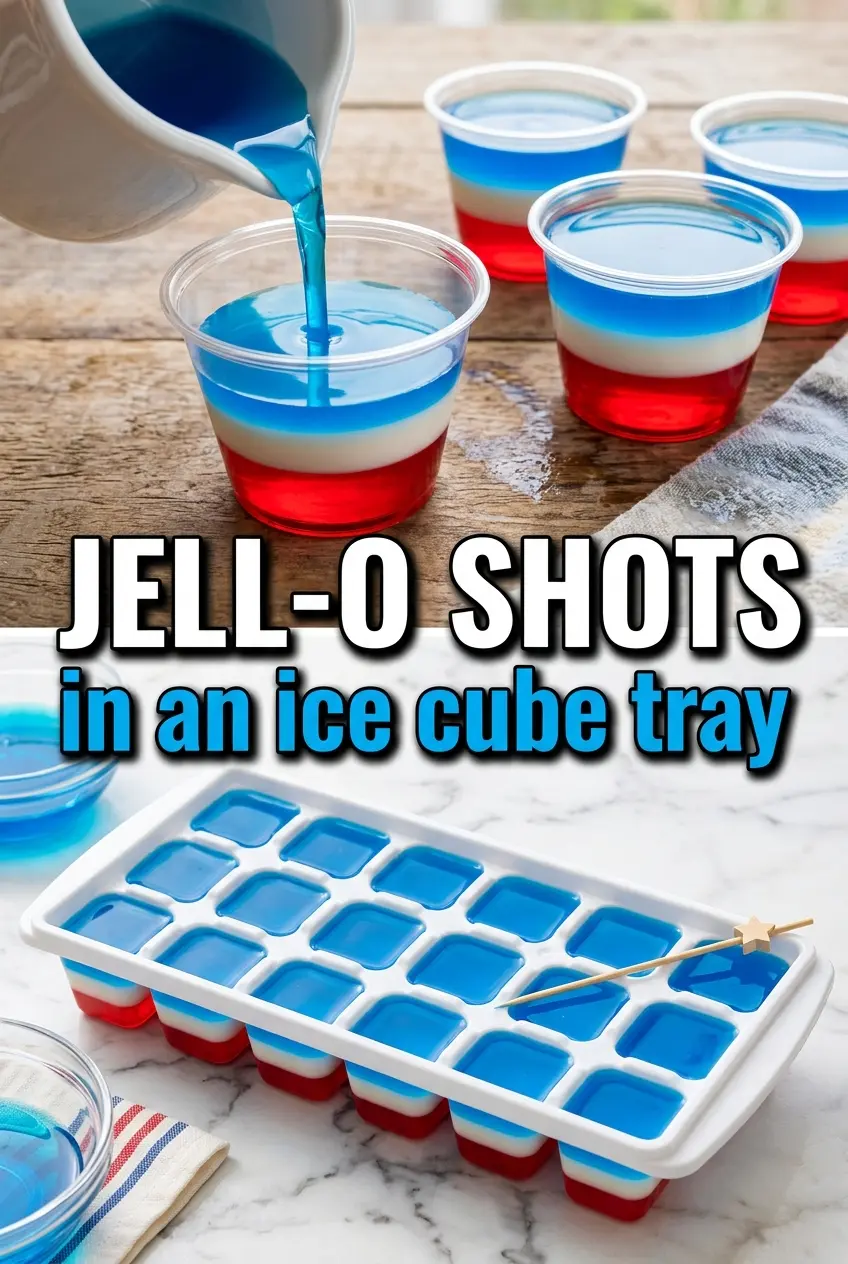
Let the white layer set until it’s firm across the top before you add the blue mixture. Cool the blue Jell-O to room temperature first; if it’s still hot, it can soften the white layer on contact. Pour slowly down the side of the cup or over the back of a spoon so the blue floats on top instead of cutting through. Then chill the cups until the tops are fully set and glossy.
How to Change the Colors, Strength, or Alcohol Level Without Losing the Layered Look
Make Them Non-Alcoholic
Swap the vodka for cold water in both fruit layers. You’ll lose the little bite that vodka brings, but the shots will set more firmly and work well for mixed-age parties. Keep the total liquid amount the same so the texture stays balanced.
Use Different Colors for Other Holidays
Swap the red and blue Jell-O flavors for whatever colors you want, but keep the white condensed milk layer in the middle if you still want that striped look. The visual contrast is what makes these pop, so pick flavors with strong color and avoid pale mixes that fade in the cup.
Make a Lighter Vodka Version
Use less vodka and replace the missing amount with cold water. The shots will taste milder and hold a firmer set, which helps if you’re serving a crowd and want them to unmold cleanly from plastic cups. Don’t go overboard with the vodka or the layers can turn soft and lose their edges.
Storage and Serving
- Refrigerator: Store covered for up to 3 days. The layers stay intact, but the tops can start to lose a little shine after the second day.
- Freezer: Don’t freeze these. Gelatin turns grainy and the texture breaks when it thaws.
- Serving: Keep them chilled until the last minute and set them out just before guests arrive. Warm cups make the layers sweat and soften faster than you’d expect.
Questions I Get Asked About This Recipe
Jell-O Shots
Ingredients
Equipment
Method
- Dissolve the cherry or strawberry Jell-O in 1 cup boiling water, stirring for 2 minutes until fully dissolved and looking smooth.
- Mix in 1/2 cup cold vodka, then pour into shot cups until each is filled about one-third of the way.
- Refrigerate the cups for 45 minutes until the red layer is fully set and no longer jiggles when gently nudged.
- In a mixing bowl, stir together sweetened condensed milk, 1 cup boiling water, and unflavored gelatin until the gelatin dissolves and the mixture looks uniform.
- Let the white mixture cool slightly, then stir in 1/2 cup cold water so it looks glossy again.
- Spoon the white layer gently over the set red layer, aiming to cover without disturbing the base.
- Refrigerate for another 45 minutes until the white layer is fully set.
- Dissolve the berry blue Jell-O in 1 cup boiling water, stirring for 2 minutes until completely dissolved and smooth.
- Mix in 1/2 cup cold vodka, then cool to room temperature so the liquid won’t melt the white layer.
- Gently pour the blue layer over the set white layer to create even coverage and clear, glossy stripes.
- Refrigerate for at least 1 hour until fully set, then serve cold for maximum jiggle.


