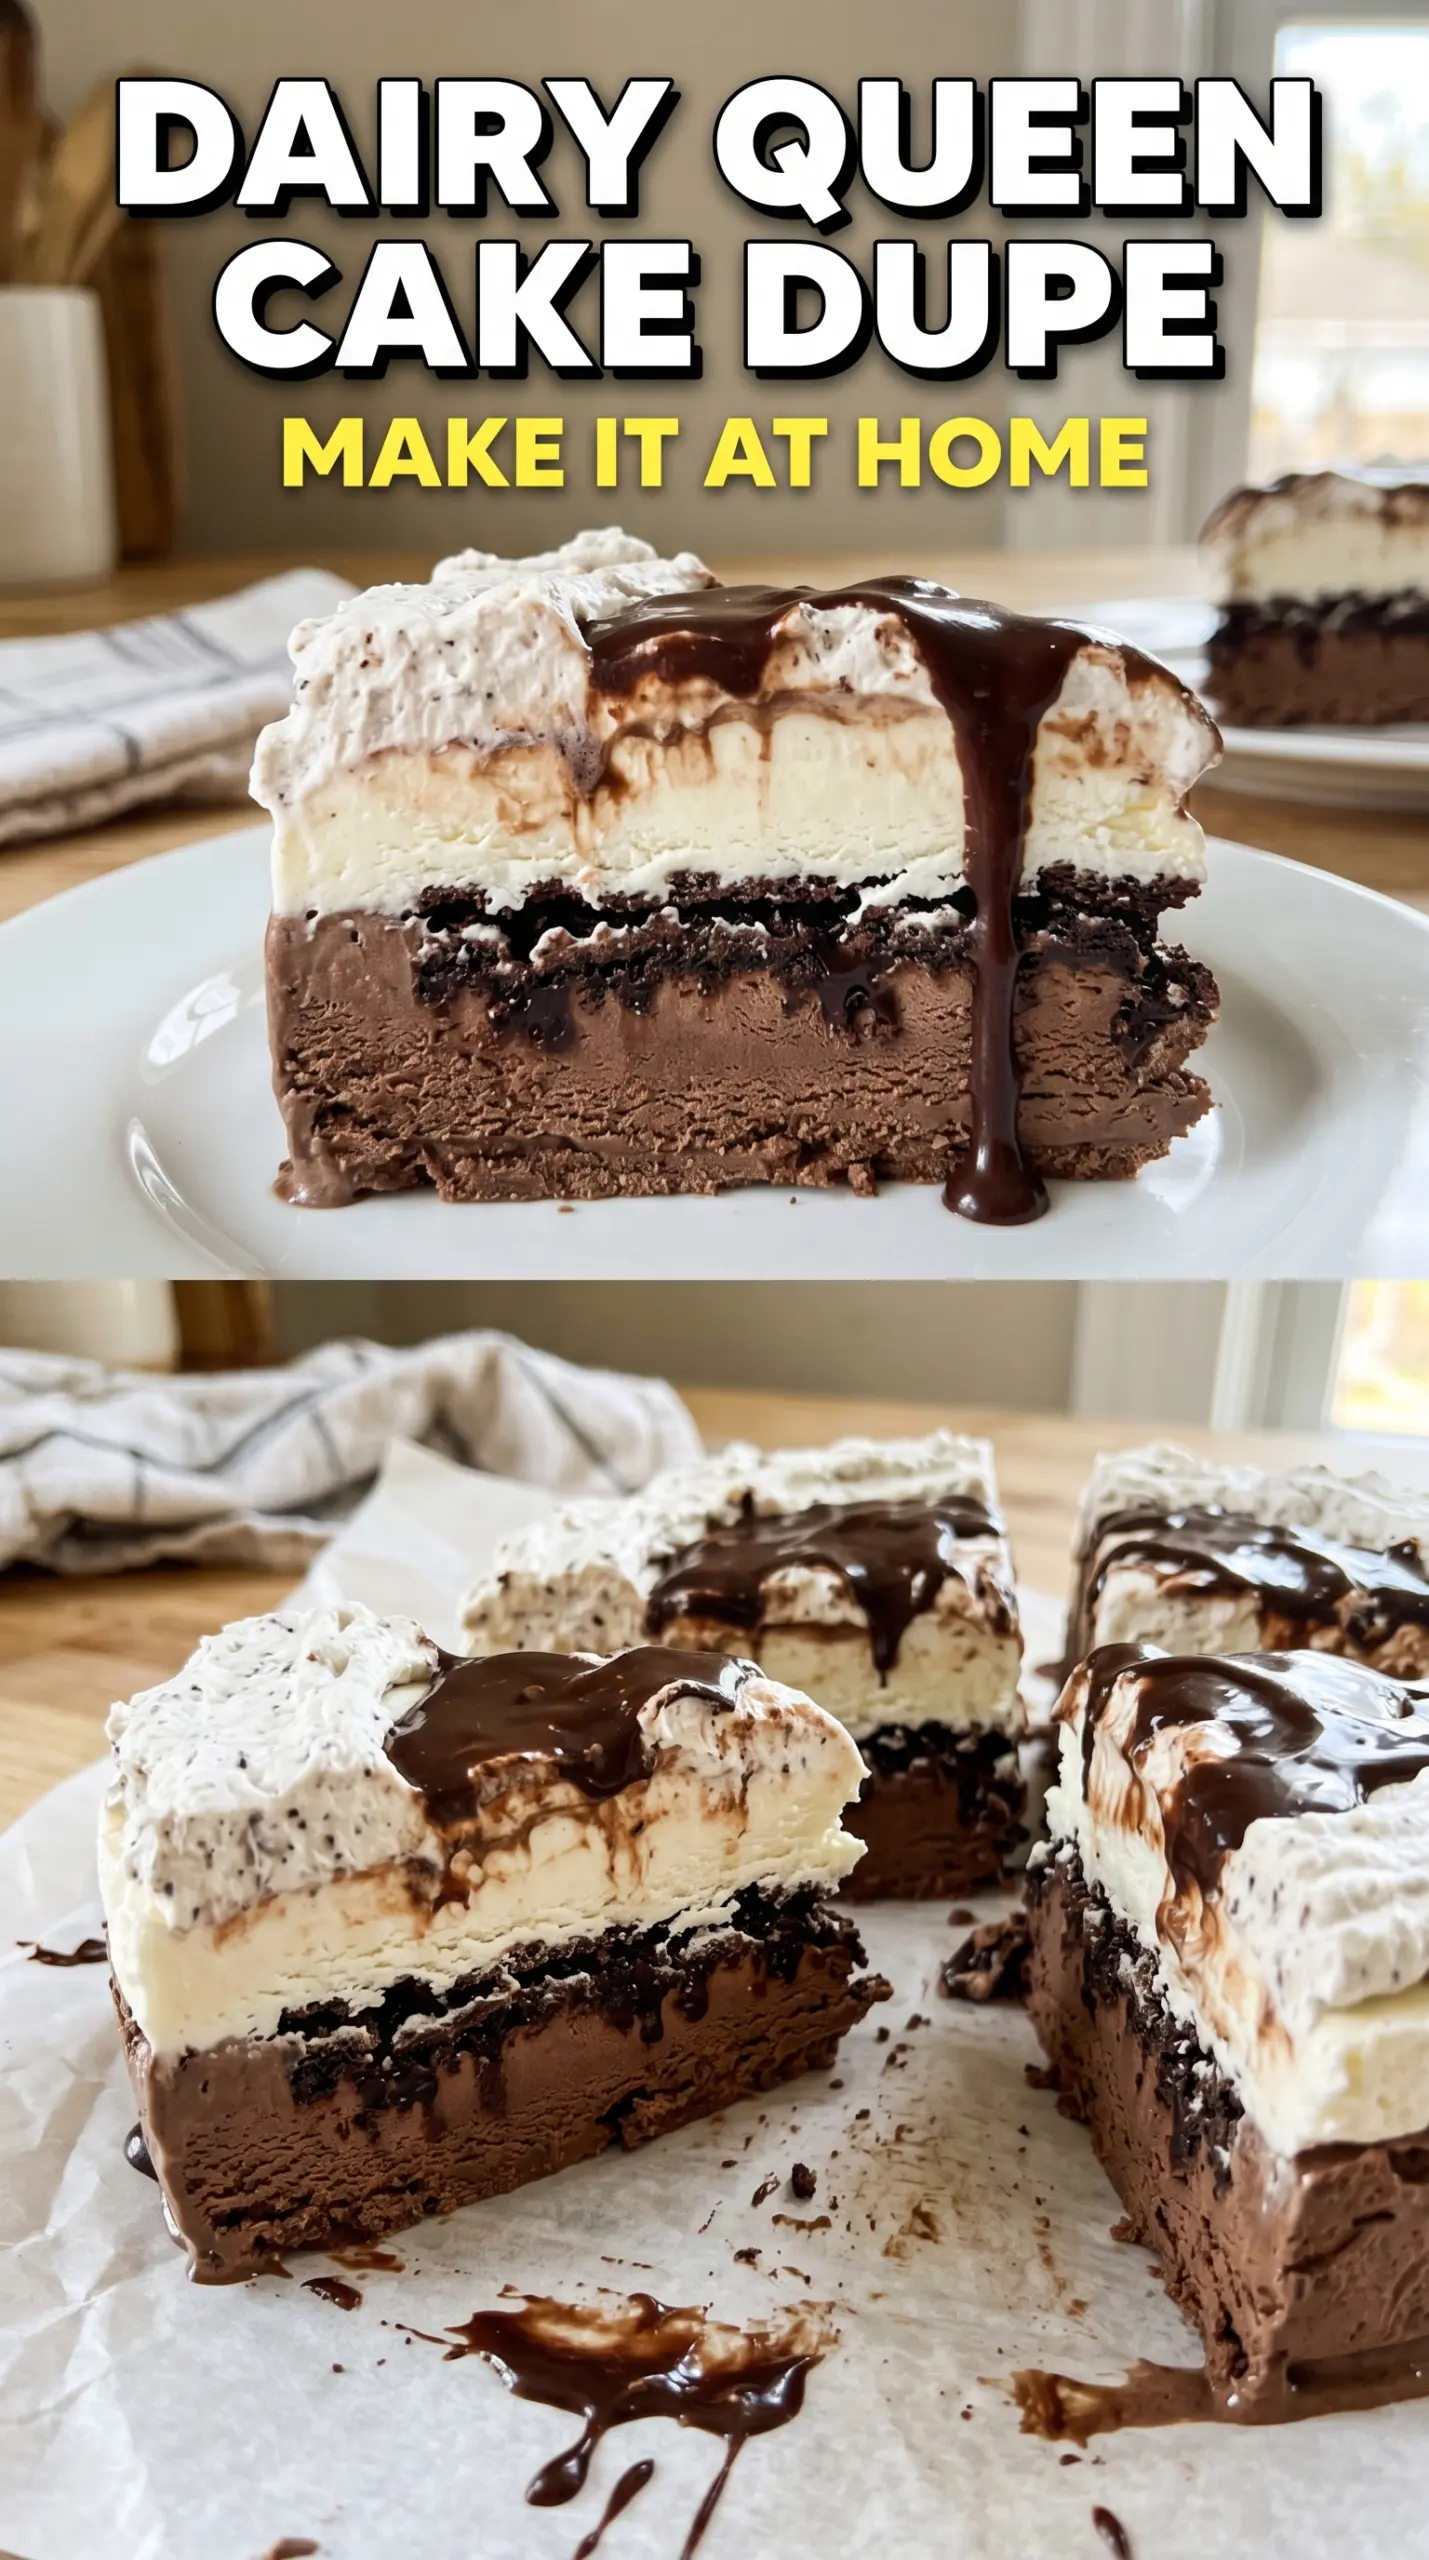
Copycat Dairy Queen ice cream cake delivers that unmistakable frozen slice: chocolate ice cream on the bottom, a thick Oreo fudge crunch layer in the middle, and a smooth vanilla top under a cloud of whipped topping. The first cut is the payoff. You get clean layers, a little crackle from the cookie filling, and that nostalgic mix of chocolate, cream, and cookies that makes people light up before the plate even hits the table.
The key is handling each layer at the right softness. The ice cream needs to be spreadable, not melted, so it settles into an even slab without turning icy. The Oreo layer works because the hot fudge coats every crumb and keeps the middle chewy and dense instead of dry and sandy. After each layer, the freezer does the real work. Rushing that part is how the cake loses its stripes and turns into a scoopable mess.
Below, I’ll show you the little timing details that keep the layers sharp, plus a few smart swaps if you want a different pan size or need to make it ahead for a birthday.
The Oreo layer stayed crunchy in the middle and the vanilla top sliced clean after a full freeze overnight. It tasted just like the Dairy Queen cake we always get for birthdays.
Save this homemade DQ ice cream cake for birthdays when you want those sharp chocolate, Oreo crunch, and vanilla layers without leaving the house.
The Freeze Time That Keeps the Layers Sharp
The biggest mistake with an ice cream cake is moving too fast between layers. If the chocolate base isn’t firm before the Oreo fudge goes on, the middle sinks and smears. If the Oreo layer isn’t set before the vanilla goes over it, the whole cake turns muddy at the edges instead of keeping those clean stripes that make the slice look like the real thing.
Work with soft ice cream, then freeze between each layer until the surface feels solid when you press it lightly. You’re not trying to make it rock hard after every step, just stable enough to support the next layer. That short pause is what keeps the filling from blending into the ice cream and gives you neat, bakery-style slices later.
- Chocolate ice cream — This is the base, so choose one with a flavor you actually like eating straight from the carton. A firmer, richer ice cream sets up better than a thin, airy one.
- Vanilla ice cream — A classic vanilla balances the deep chocolate and keeps the cake from tasting too heavy. If you want a stronger “frosted cake” vibe, use a French vanilla, which brings a little extra richness.
- Oreos — Regular Oreos give the most familiar crunch and flavor. You want fine crumbs, not big chunks, so the middle layer spreads evenly and slices cleanly.
- Hot fudge sauce — This is what binds the cookie crumbs into that signature middle layer. Use a thick fudge sauce, not thin syrup, or the crunch layer will run.
- Whipped topping — Cool Whip or a similar stabilized topping holds its shape much better than softly whipped cream in the freezer. Fresh whipped cream tastes nice but softens faster and loses that tidy look.
- Chocolate shell or ganache — Chocolate shell gives you that crisp decorative drizzle. Ganache works too if you want a smoother finish, but it won’t harden the same way.
What Each Ingredient Is Actually Doing in This Ice Cream Cake
- Base layer (cookies, cake, or graham cracker) — This provides structure and stability. Crushed and mixed with butter creates a firm foundation.
- Ice cream (the main star) — Use quality ice cream or make homemade. Softness matters for layering.
- Sauce or topping between layers (fudge, caramel, or fruit) — This adds moisture, flavor, and prevents dryness. Don’t skip this layer.
- Frosting or whipped cream (optional outer layer) — This prevents freezer burn and adds creaminess. Stabilized whipped cream works best.
- Freezing time (at least 4-6 hours) — This sets the layers so cake slices cleanly. Longer freezing prevents melting during serving.
- Room temperature before serving (5-10 minutes) — This softens the cake slightly for better texture. Serve immediately after thawing.
- Toppings (chocolate, nuts, cookies, or sprinkles) — These add visual appeal and texture. Add right before serving.
- Storage (in freezer at 0°F or below) — This prevents ice crystal formation and maintains quality. Cover with plastic wrap.
Building the Cake So It Slices Like the Original
Pressing in the Chocolate Base
Spread the softened chocolate ice cream into the pan and work it all the way to the corners. Use an offset spatula or the back of a spoon dipped in warm water for a smoother surface. If the ice cream is too melted, it will freeze with icy ridges instead of a dense layer, so stop softening it as soon as it’s scoopable. Freeze until the top feels firm enough to hold the filling without giving way.
Making the Oreo Fudge Crunch
Stir the crushed Oreos with the hot fudge until every crumb is coated, then spread that mixture over the firm chocolate layer. It should look dark, thick, and a little sticky, not soupy. If the fudge is warm enough to pour, let it cool for a few minutes first so it doesn’t melt the ice cream underneath. Spread gently from the center outward so you don’t pull up the bottom layer.
Setting the Vanilla Top
Spread the softened vanilla ice cream over the frozen crunch layer and smooth it into one even sheet. This layer needs a light hand, because pressing too hard can drag the cookie filling upward and ruin the middle stripe. Freeze long enough that the top is solid all the way through before you add the whipped topping. That extra time is what keeps the surface neat when you decorate it.
Finishing and Freezing the Cake Solid
Spread the whipped topping over the top in thick swirls or a smooth blanket, then drizzle with chocolate shell and add sprinkles. Work quickly, because the colder the cake stays, the cleaner the decoration looks. After decorating, freeze it again until it’s fully set; two hours is the minimum, but longer is better if you want picture-perfect slices. Let it sit at room temperature for a few minutes before cutting so the knife passes through the layers without cracking the top.
How to Adapt the Cake Without Losing the Nostalgia
Make it in a springform pan for cleaner sides
A 10-inch springform pan gives you taller, neater layers and makes unmolding easier if you want a bakery-style presentation. Line the bottom with parchment for the cleanest release, and freeze the cake solid before removing the ring so the sides don’t slump.
Use dairy-free ice cream and whipped topping
This works well with plant-based chocolate and vanilla ice cream, plus a dairy-free whipped topping. The texture will be a little softer than the original, so give it extra freezing time and use a thick dairy-free fudge sauce that sets up firmly.
Swap the chocolate base for cookies and cream
If you want a sweeter, more cookie-forward cake, use cookies-and-cream ice cream in place of the chocolate layer. You’ll lose some of the stark dark-light contrast that makes the classic look iconic, but the flavor lands closer to a frozen birthday cake with extra crunch.
Storage and Reheating
- Refrigerator: Ice cream cake doesn’t belong in the fridge for long. Keep it frozen instead, and only let it sit out 5 to 10 minutes before serving so the knife slides through cleanly.
- Freezer: It freezes well for up to 1 week when wrapped tightly or covered well. For the best texture, press a piece of plastic wrap directly against any cut surface before covering.
- Reheating: Don’t reheat this one. The right move is a short thaw on the counter, just until the outer edge softens enough to slice without shattering the top.
Answers to the Questions Worth Asking
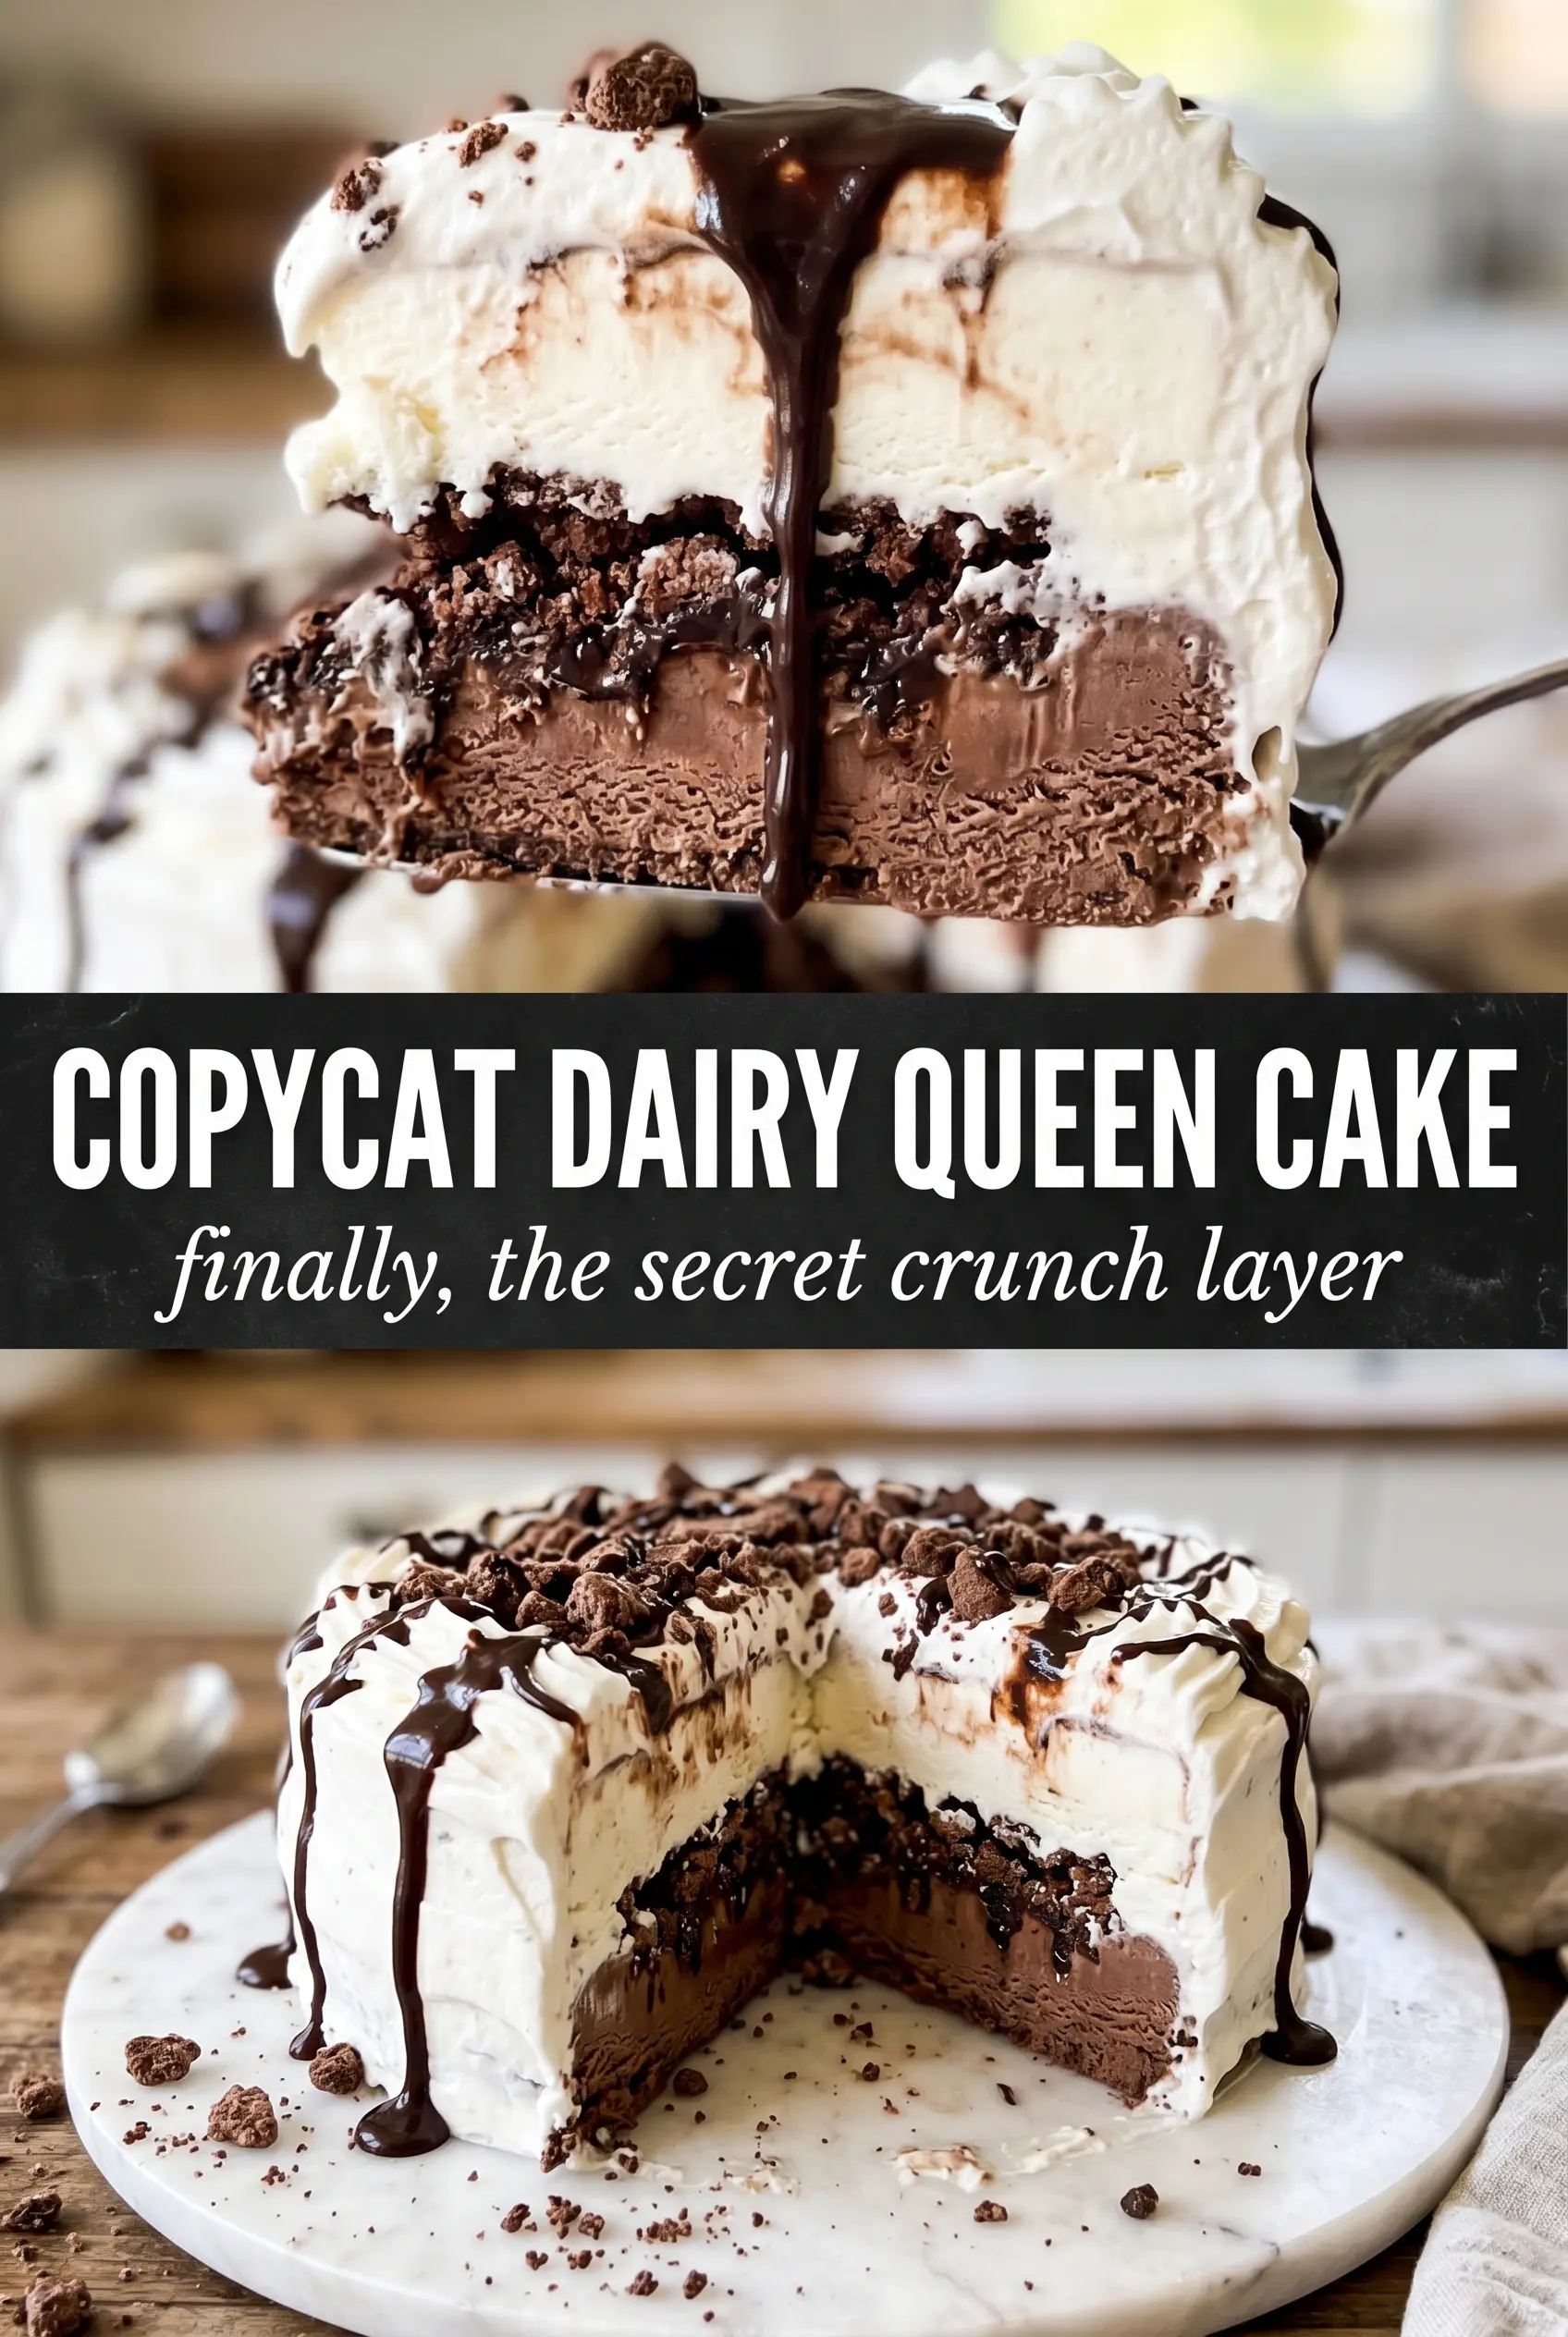
Copycat Dairy Queen Ice Cream Cake
Ingredients
Equipment
Method
- Spread the softened chocolate ice cream into the bottom of a 9x13 pan or 10-inch springform and smooth the top. Freeze for 1 hour until firm.
- Mix the crushed Oreo cookies with the hot fudge sauce until the mixture is evenly combined and glossy. Spread this crunch layer evenly over the frozen chocolate ice cream.
- Freeze the layered cake for 30 minutes to set the Oreo crunch layer.
- Spread the softened vanilla ice cream over the Oreo crunch layer, smoothing completely so it reaches the edges. Freeze at least 4 hours until set.
- Top the frozen cake with whipped topping and smooth it across the surface. Decorate with drizzled chocolate shell or ganache and colorful sprinkles.
- Freeze the assembled cake for at least 2 more hours before serving so the layers slice cleanly.


