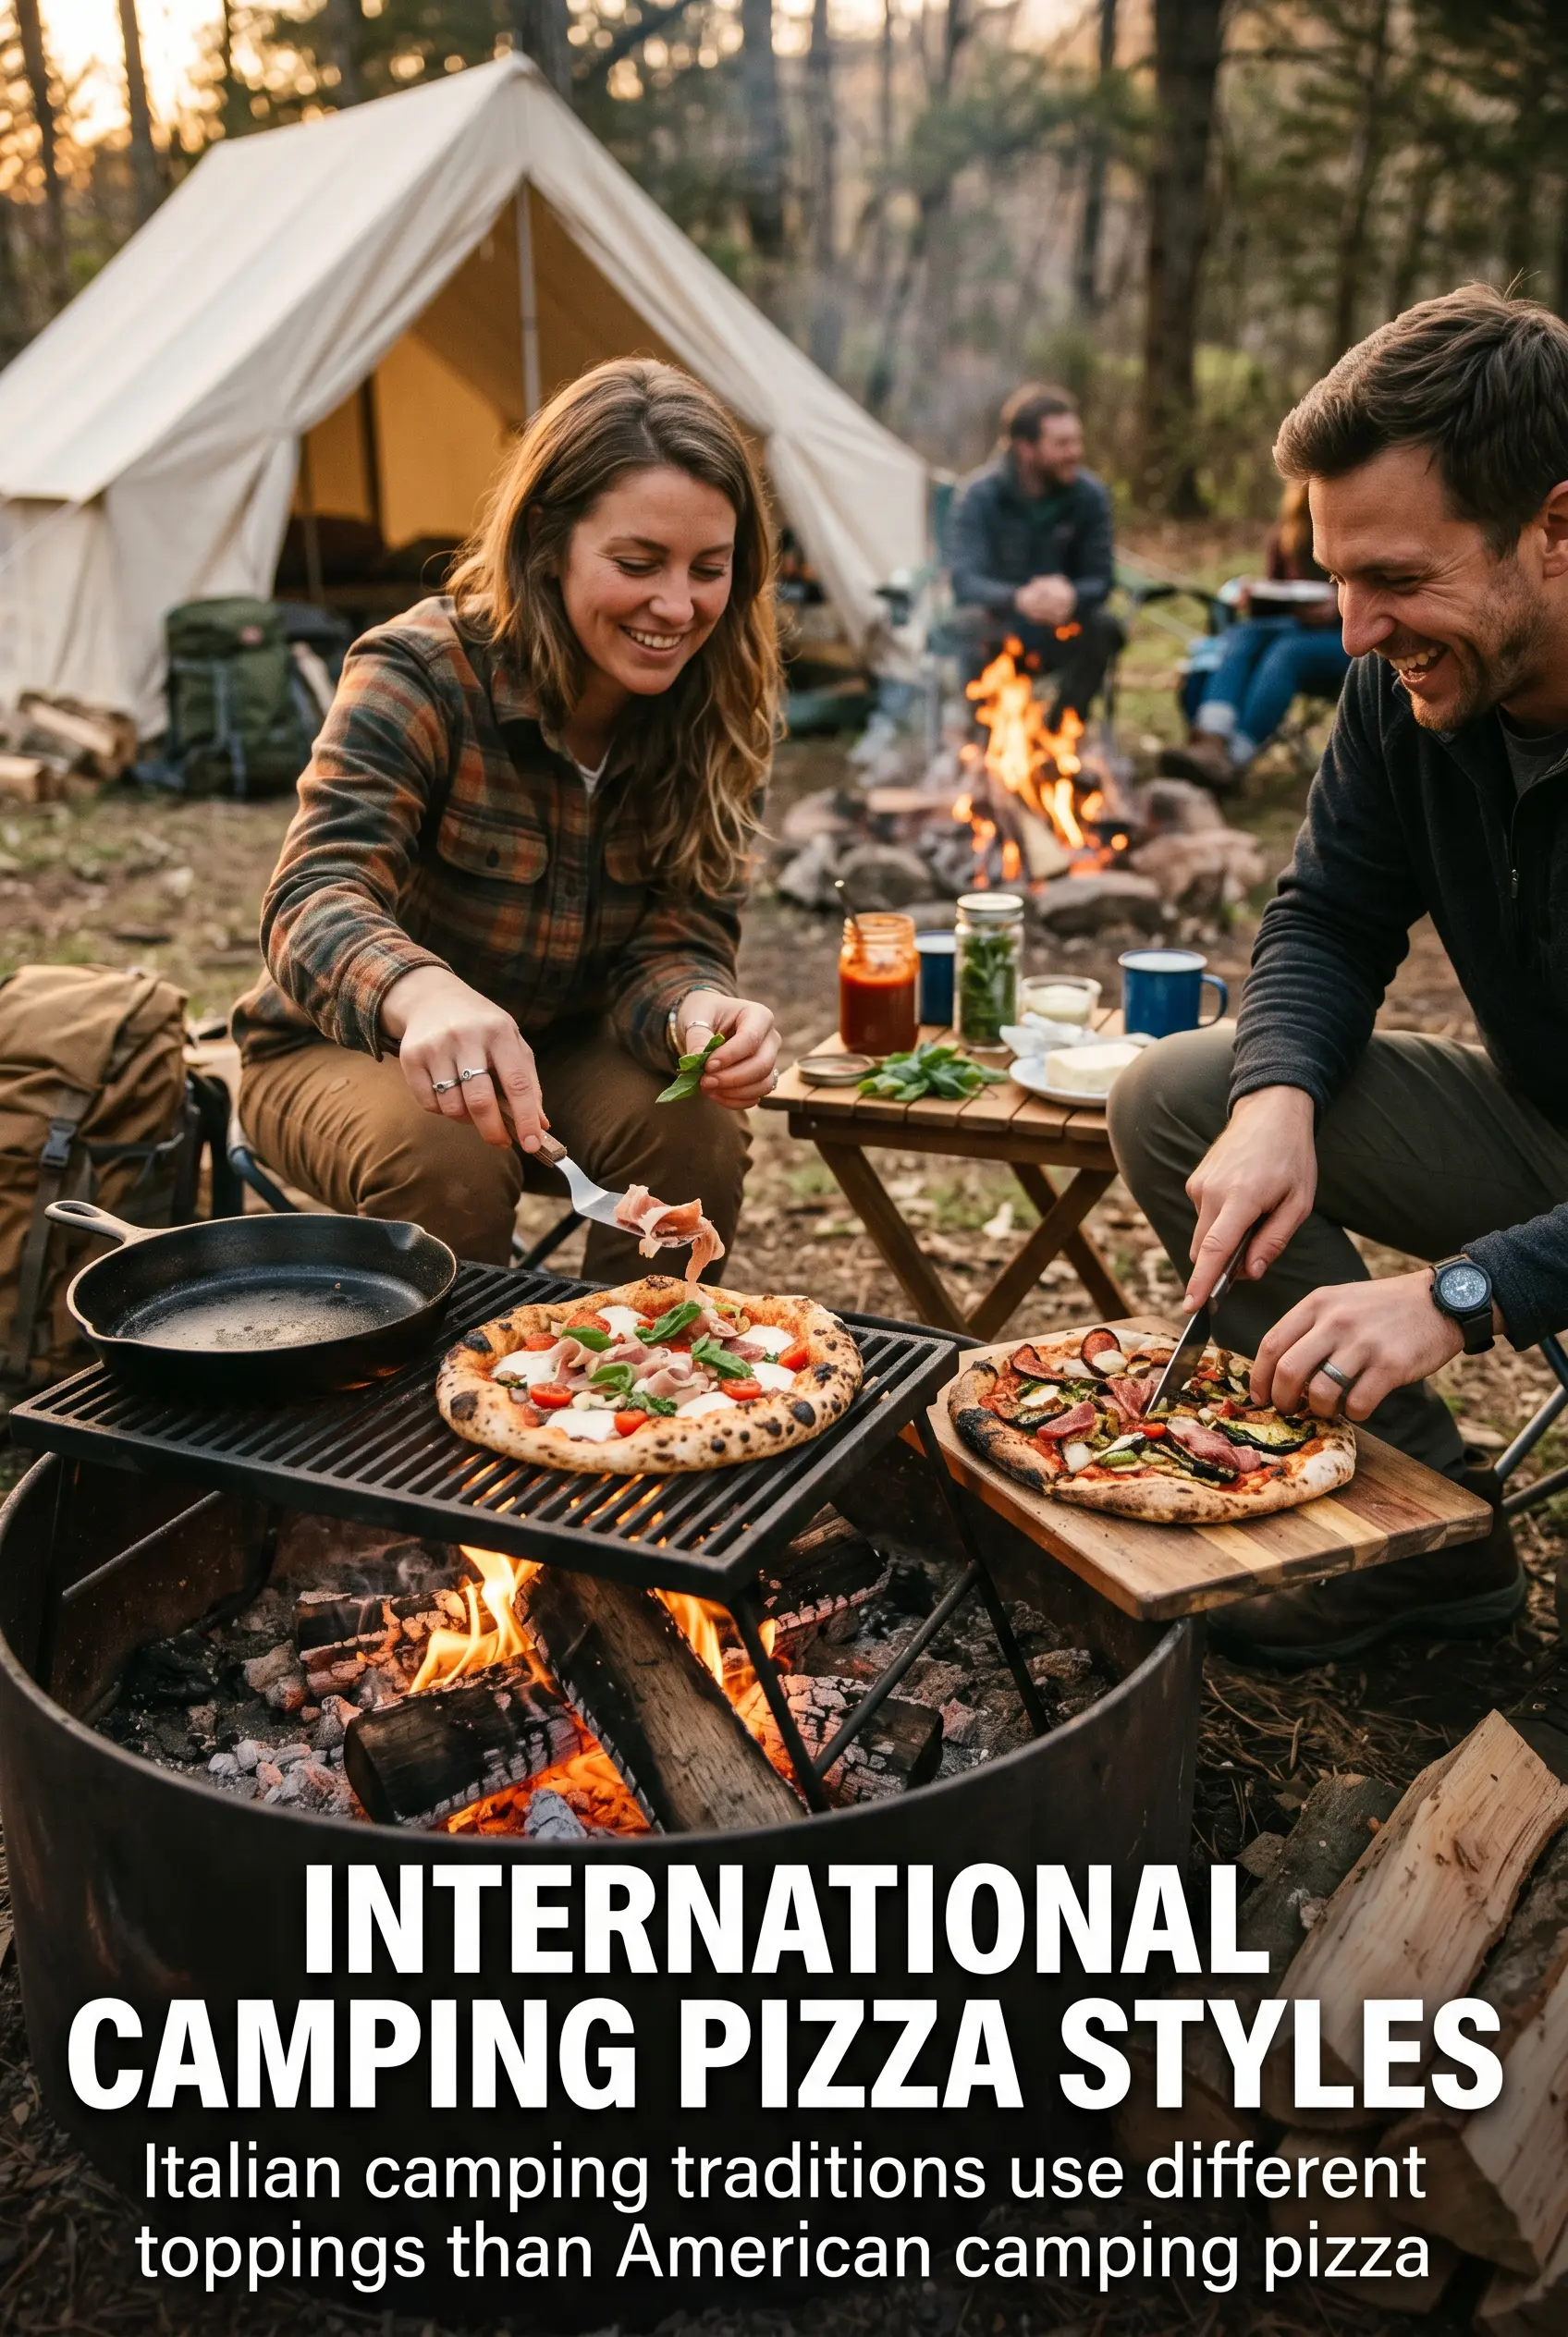
Charred crust, bubbling cheese, and a smoky edge from the fire make grilled campfire pizza feel a lot more special than a regular weeknight pizza. The dough picks up those dark grill marks fast, then the toppings melt right on the hot, griddled surface so every slice has a crisp bottom and a soft, chewy center. It’s the kind of dinner that disappears fast because everybody wants a piece with the most cheese pull and the most crunch.
The trick is to treat the dough like flatbread for the first minute or two, not like raw pizza waiting for a long bake. Brush one side with olive oil, lay it oil-side down on a clean, medium-hot grate, and let it firm up before you flip it. That first sear gives you the structure you need so the crust won’t fold when you add sauce and cheese. Keep the toppings light and the heat steady, and the pizza comes off the grill with a crisp base instead of a soggy middle.
Below, I’ve included the timing cues that matter most, along with a few ways to adapt this for different toppings and cooking setups. If you’ve ever had a grilled pizza go limp or burn before the cheese melted, the process notes will save you a lot of guesswork.
The crust got those perfect grill marks and stayed crisp under the sauce, and the foil cover melted the cheese in just a few minutes. We used pepperoni and peppers, and it tasted like something from a pizza oven.
Like this grilled campfire pizza? Save it for the nights when you want charred crust, melted cheese, and a smoky outdoor dinner.
The Grate Needs to Be Hot Enough to Char, Not Burn
Grilled pizza fails in one of two ways: the dough sticks, or the toppings sit there while the bottom goes too far. The fix is heat control and a quick first sear. You want a medium fire with a clean, oiled grate so the dough can set on contact. If the fire is raging, the outside scorches before the center has time to firm up; if it’s too cool, the crust dries out instead of crisping.
The first side cooks naked because it needs structure before the toppings go on. Once you flip it, work fast. Sauce, cheese, and toppings should go on in a thin layer so the lid or foil can trap heat and melt everything before the bottom overcooks. That balance is what gives you a pizza that holds together when you slice it.
What Each Ingredient Is Actually Doing in This Pizza

- Pizza dough — Store-bought dough works well here, and homemade works too. What matters most is that it’s rested enough to stretch without snapping back. Cold dough fights you on the grill, so let it sit at room temperature before you shape it.
- Olive oil — This does more than add flavor. It helps prevent sticking and gives the bottom side a quick head start on browning. Use enough to coat the dough lightly, not so much that it pools and flares on the grate.
- Pizza sauce — A thicker sauce is better than a thin, watery one. The grill doesn’t give the sauce time to cook down, so a loose sauce can soak right into the crust and soften it. If your sauce is thin, simmer it for a few minutes first.
- Mozzarella — Shredded low-moisture mozzarella melts most evenly and gives you that classic pizza stretch. Fresh mozzarella can work, but it releases more liquid, so blot it well and use it sparingly.
- Toppings — Keep them pre-cooked or thinly sliced if they need extra time. Pepperoni, cooked sausage, mushrooms, peppers, and onions all work well, but heavy toppings can weigh down the crust and slow the melt.
- Parmesan and basil — Add these at the end for the best finish. Parmesan brings salt and sharpness, while basil gives you a fresh hit that cuts through the smoke and cheese.
Building the Pizza in the Right Order on the Grill
Stretching and Oiling the Dough
Divide the dough into four portions and stretch each one into a thin round. Don’t chase a perfect circle; uneven edges are fine as long as the center stays fairly even. Brush one side with olive oil, because that side goes down first and needs to release cleanly from the grate. If the dough keeps springing back, let it rest for 5 minutes and try again.
Seizing the First Side Over the Fire
Place the dough oil-side down on a medium-hot campfire grate. In 2 to 3 minutes, the bottom should show deep grill marks and feel firm enough to lift without sagging. If it sticks, give it another 30 seconds; don’t rip it free or you’ll tear the crust. You’re looking for a surface that has some structure but hasn’t dried out.
Flipping and Topping Fast
Flip the crust so the grilled side faces up, then add sauce, cheese, and toppings quickly. Work in a thin layer so the center can heat through before the bottom gets too dark. If you pile on too much sauce, the crust loses its crunch. This is the moment to move with purpose, not fuss over perfect topping symmetry.
Melting Under the Lid
Cover the pizza with a lid or tented foil and cook for 3 to 5 minutes. The trapped heat melts the cheese from the top while the fire finishes crisping the bottom. Lift the cover and check for bubbling cheese and a crust that releases easily with tongs or a spatula. If the cheese isn’t melting, the heat is too low; if the bottom is getting too dark, move the pizza slightly farther from the hottest coals.
Ways to Change the Toppings Without Losing the Crisp Crust
Gluten-Free Dough
Use a gluten-free pizza dough that’s made for stretching, not a crumbly crust mix. It often needs a little extra oil and a gentler flip, because it tears more easily than wheat dough. The payoff is still worth it: you get the same smoky, crisp-edged result if you keep the crust thin and the toppings light.
Dairy-Free Pizza
Swap in your favorite dairy-free mozzarella style shreds and keep the toppings simple so the cheese can melt evenly. Some plant-based cheeses soften better than they stretch, so cover the pizza a minute or two longer if needed. A little extra Parmesan-style finish or fresh basil helps bring back the sharp, savory edge.
Meat Lover’s Version
Use pepperoni, cooked sausage, or bacon, but keep the total amount moderate. Too much meat traps steam and softens the crust. Pre-cooked toppings are the safest choice because the grill stage is short and you’re not giving raw meat enough time to finish.
Vegetarian Grilled Pizza
Loaded with thinly sliced peppers, mushrooms, onions, or zucchini, this version needs vegetables that have been pre-cooked or sliced very thin. Raw vegetables can stay firm while the crust finishes, which throws off the timing. A quick sauté before grilling keeps everything tender and prevents excess moisture.
Storage and Reheating
- Refrigerator: Store leftovers in an airtight container for up to 3 days. The crust softens a bit, but it still reheats well.
- Freezer: Freeze slices individually wrapped, then bag them for up to 2 months. Reheat straight from frozen for the best texture.
- Reheating: Warm slices in a skillet over medium-low heat or in a 375°F oven until the cheese melts again. The common mistake is microwaving, which makes the crust rubbery and the cheese greasy.
Answers to the Questions Worth Asking
Grilled Campfire Pizza
Ingredients
Equipment
Method
- Divide the pizza dough into 4 portions and stretch each into a thin round. Aim for even thickness so it cooks quickly over the heat.
- Brush one side of each dough round with olive oil. This helps it crisp and char without sticking to the grate.
- Place the dough oil-side down on the campfire grate over medium heat. Cook for 2-3 minutes until the bottom is charred and crispy, with visible dark spots.
- Flip the dough and quickly add pizza sauce, mozzarella cheese, and your toppings to the grilled side. Work fast so the crust stays firm enough to top.
- Cover with a lid or foil and cook for 3-5 minutes until the cheese melts and the bottom is crispy. Look for bubbly cheese and browned edges.
- Remove the pizza from the grill. Let it rest briefly so the toppings settle and the cheese firms slightly for slicing.
- Top with grated Parmesan cheese and fresh basil, then slice and serve. Serve right away while the crust is hot and the cheese is stretchy.