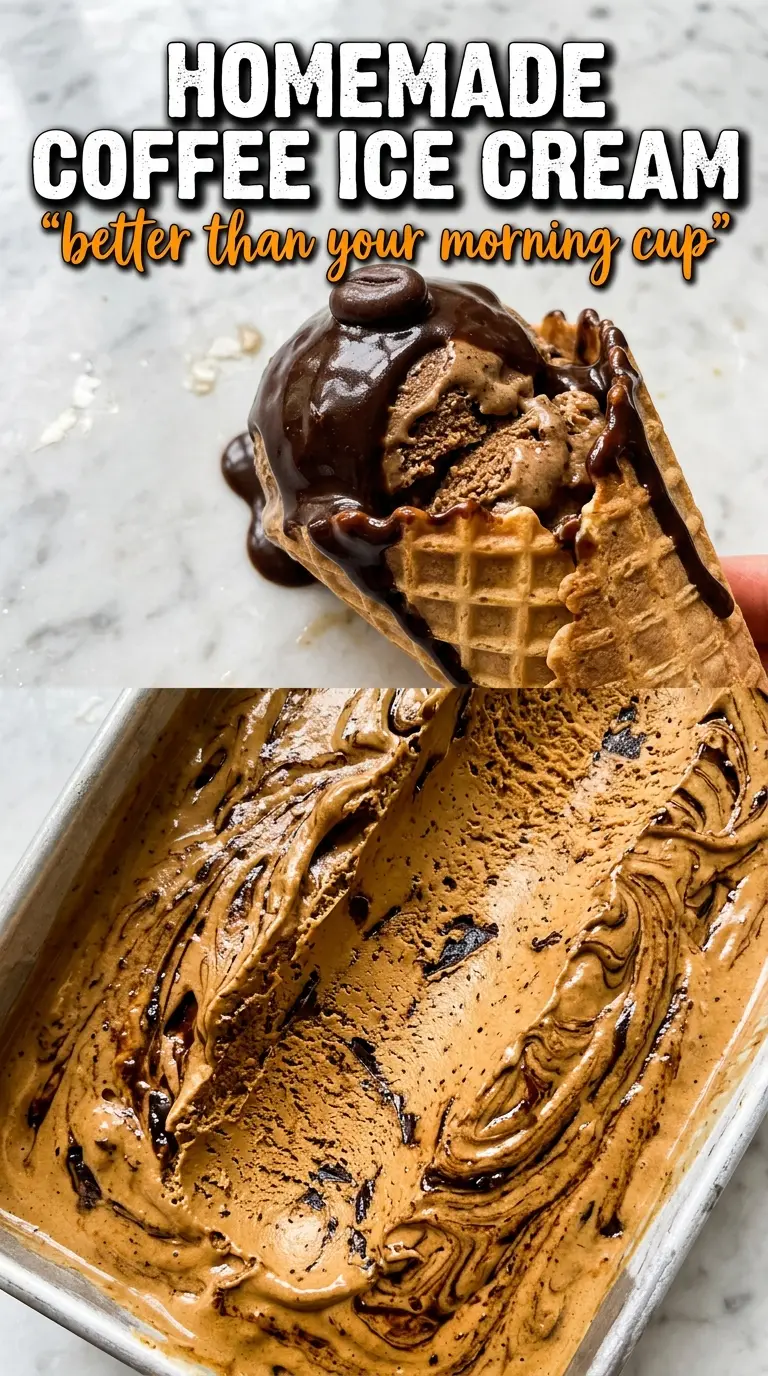
Deep, custardy coffee ice cream makes a strong case for keeping an ice cream maker around. The flavor lands somewhere between a cold espresso and a rich café au lait, with enough body from the custard base to scoop cleanly instead of turning icy or thin. The coffee comes through bold and roasted, but the sweetness stays in check, which is exactly what you want when the dessert is built around one clear flavor.
What makes this version work is the layering. The optional coffee beans add a round, brewed depth, while instant espresso powder brings the sharper coffee note that keeps the ice cream from tasting flat after freezing. Egg yolks and cream give it that dense, satin texture you expect from a good custard ice cream, and cooking the base just until it coats a spoon keeps it smooth instead of eggy.
Below, I’ll walk through the small timing details that matter, plus a few smart swaps if you want to lean more mocha, make it without the beans, or store it for later without losing that clean scoop.
The custard turned out silky and the coffee flavor stayed bold after freezing. I used the beans for the steep and it tasted like a good espresso shop scoop, not just sweet cream with coffee in it.
Save this homemade coffee ice cream for the nights when you want a deep espresso flavor and a custard base that churns into a smooth, scoopable finish.
The Part That Keeps Coffee Ice Cream from Turning Flat
Coffee ice cream can taste sharp in the bowl and dull once it freezes if the base isn’t strong enough. The fix is simple: use both an infusion and a concentrated coffee element. The steeped beans build roundness, while the espresso powder pushes the coffee flavor through the cold so it still tastes like coffee after churning and freezing.
The other trap is heat. Custard needs enough time to thicken, but it doesn’t want a hard boil. If the base gets too hot, the eggs can scramble or the dairy can take on a grainy texture. Pull it off the heat as soon as it coats the back of a spoon and it reaches about 175°F.
- Instant espresso powder — This is the ingredient that keeps the flavor bold. Regular brewed coffee won’t give you the same concentrated punch without watering down the custard.
- Whole coffee beans — Optional, but worth using if you want a deeper brewed note. They steep best in hot cream, then get strained out before the custard is built.
- Egg yolks — They give the ice cream its dense, creamy body. There isn’t a real substitute here if you want classic custard texture.
- Heavy cream and whole milk — Cream brings richness; milk keeps the base from feeling heavy. Swapping in lower-fat dairy will give you a icier finish.
- Vanilla — It doesn’t make the ice cream taste like vanilla; it rounds out the coffee and softens any bitterness at the edges.
What Each Ingredient Is Actually Doing in This Ice Cream
- Base ingredient (cream, milk, or custard) — This provides the foundation and richness. Quality matters.
- Sweetener (sugar, honey, or condensed milk) — This sweetens and prevents ice crystals. The ratio is critical.
- Flavor element (vanilla, fruit, chocolate, coffee, or other) — This defines the ice cream personality. Use quality ingredients.
- Egg yolks (if making custard base) — These create richness and silky texture. Optional but elevates ice cream.
- Churning (if using ice cream maker) — This incorporates air and prevents ice crystals. Critical for smooth texture.
- Freezing temperature and time — Proper freezing prevents rock-hard texture. Store at 0°F or below.
- Mix-ins (chocolate, cookies, fruit, or swirls) — These add texture and prevent one-dimensional flavor. Add near end of churning.
- Serving temperature (slightly soft, not rock hard) — This provides creamy mouthfeel. Remove from freezer 5 minutes before serving.
Building the Custard Without Scrambling the Eggs
Steeping the Coffee Base
Warm the cream, milk, and coffee beans until the mixture is steaming, then turn off the heat and let it sit for 15 minutes. That rest time is where the bean flavor pulls into the dairy without turning bitter. If you skip the steep, the ice cream still works, but the coffee note stays more one-dimensional.
Tempering the Yolks
Whisk the egg yolks and sugar until they look pale and a little thick, then drizzle in the hot coffee cream slowly while whisking the whole time. That gradual addition keeps the yolks from seizing. If you dump the hot liquid in all at once, you’ll end up with sweet scrambled eggs instead of custard.
Cooking to the Right Nappe
Return the mixture to the saucepan and cook over medium-low heat, stirring constantly and scraping the bottom and corners of the pan. The custard is ready when it thickens enough to coat a spoon and leaves a clean trail when you run your finger through it. Don’t chase a boil here; gentle heat is what gives you a smooth base instead of a curdled one.
Straining, Chilling, and Churning
Strain the custard while it’s still warm to catch any tiny cooked bits, then stir in the vanilla and salt. Set the bowl over an ice bath until the base is fully cool before moving it to the fridge. If you churn warm custard, the mixture won’t freeze evenly and the final texture will be loose instead of dense and creamy.
Mocha Swirl Version
Add 2 to 3 tablespoons of cocoa powder with the sugar, or fold in a thin chocolate fudge ribbon after churning. The cocoa softens the roastiness and gives you a mocha profile without changing the custard method.
Dairy-Free Coffee Ice Cream
Use full-fat coconut milk in place of the cream and milk, then add a tablespoon of cornstarch slurry for body. You’ll lose a little of the classic custard richness, but the coffee flavor still comes through cleanly and the texture stays scoopable.
Without Coffee Beans
Skip the steeped beans and use the espresso powder alone. The ice cream will taste slightly cleaner and more direct, with less brewed depth, which is still excellent if you want the fastest version.
Storage and Reheating
- Refrigerator: The base can sit covered for up to 24 hours before churning. After that, the flavor is still fine, but the texture starts to lose a little freshness.
- Freezer: Freeze the churned ice cream in an airtight container for up to 2 weeks for best texture. It will keep longer, but the surface can take on ice crystals if the container isn’t sealed well.
- Reheating: Not needed for the finished ice cream. If it gets too firm, let it sit at room temperature for 5 to 10 minutes so the scoop softens instead of forcing it with a warm spoon, which melts the edges and leaves the center hard.
Answers to the Questions Worth Asking

Homemade Coffee Ice Cream
Ingredients
Equipment
Method
- Combine heavy cream, whole milk, and whole coffee beans (if using) in a saucepan and heat until steaming. Maintain a gentle steam and steep for 15 minutes, then strain out the beans.
- Whisk instant espresso powder into the warm cream until fully dissolved, with no visible dark powder.
- Whisk egg yolks and granulated sugar until pale and slightly thick. Slowly whisk in the hot coffee cream so the yolks warm evenly.
- Return the mixture to the saucepan and cook over medium-low heat, stirring constantly, until the custard coats the back of a spoon (175°F).
- Strain the custard, stir in vanilla extract and salt, then cool completely over an ice bath until cold. Pour onto a sheet pan to speed chilling.
- Refrigerate at least 4 hours, then churn in an ice cream maker and freeze until firm.


