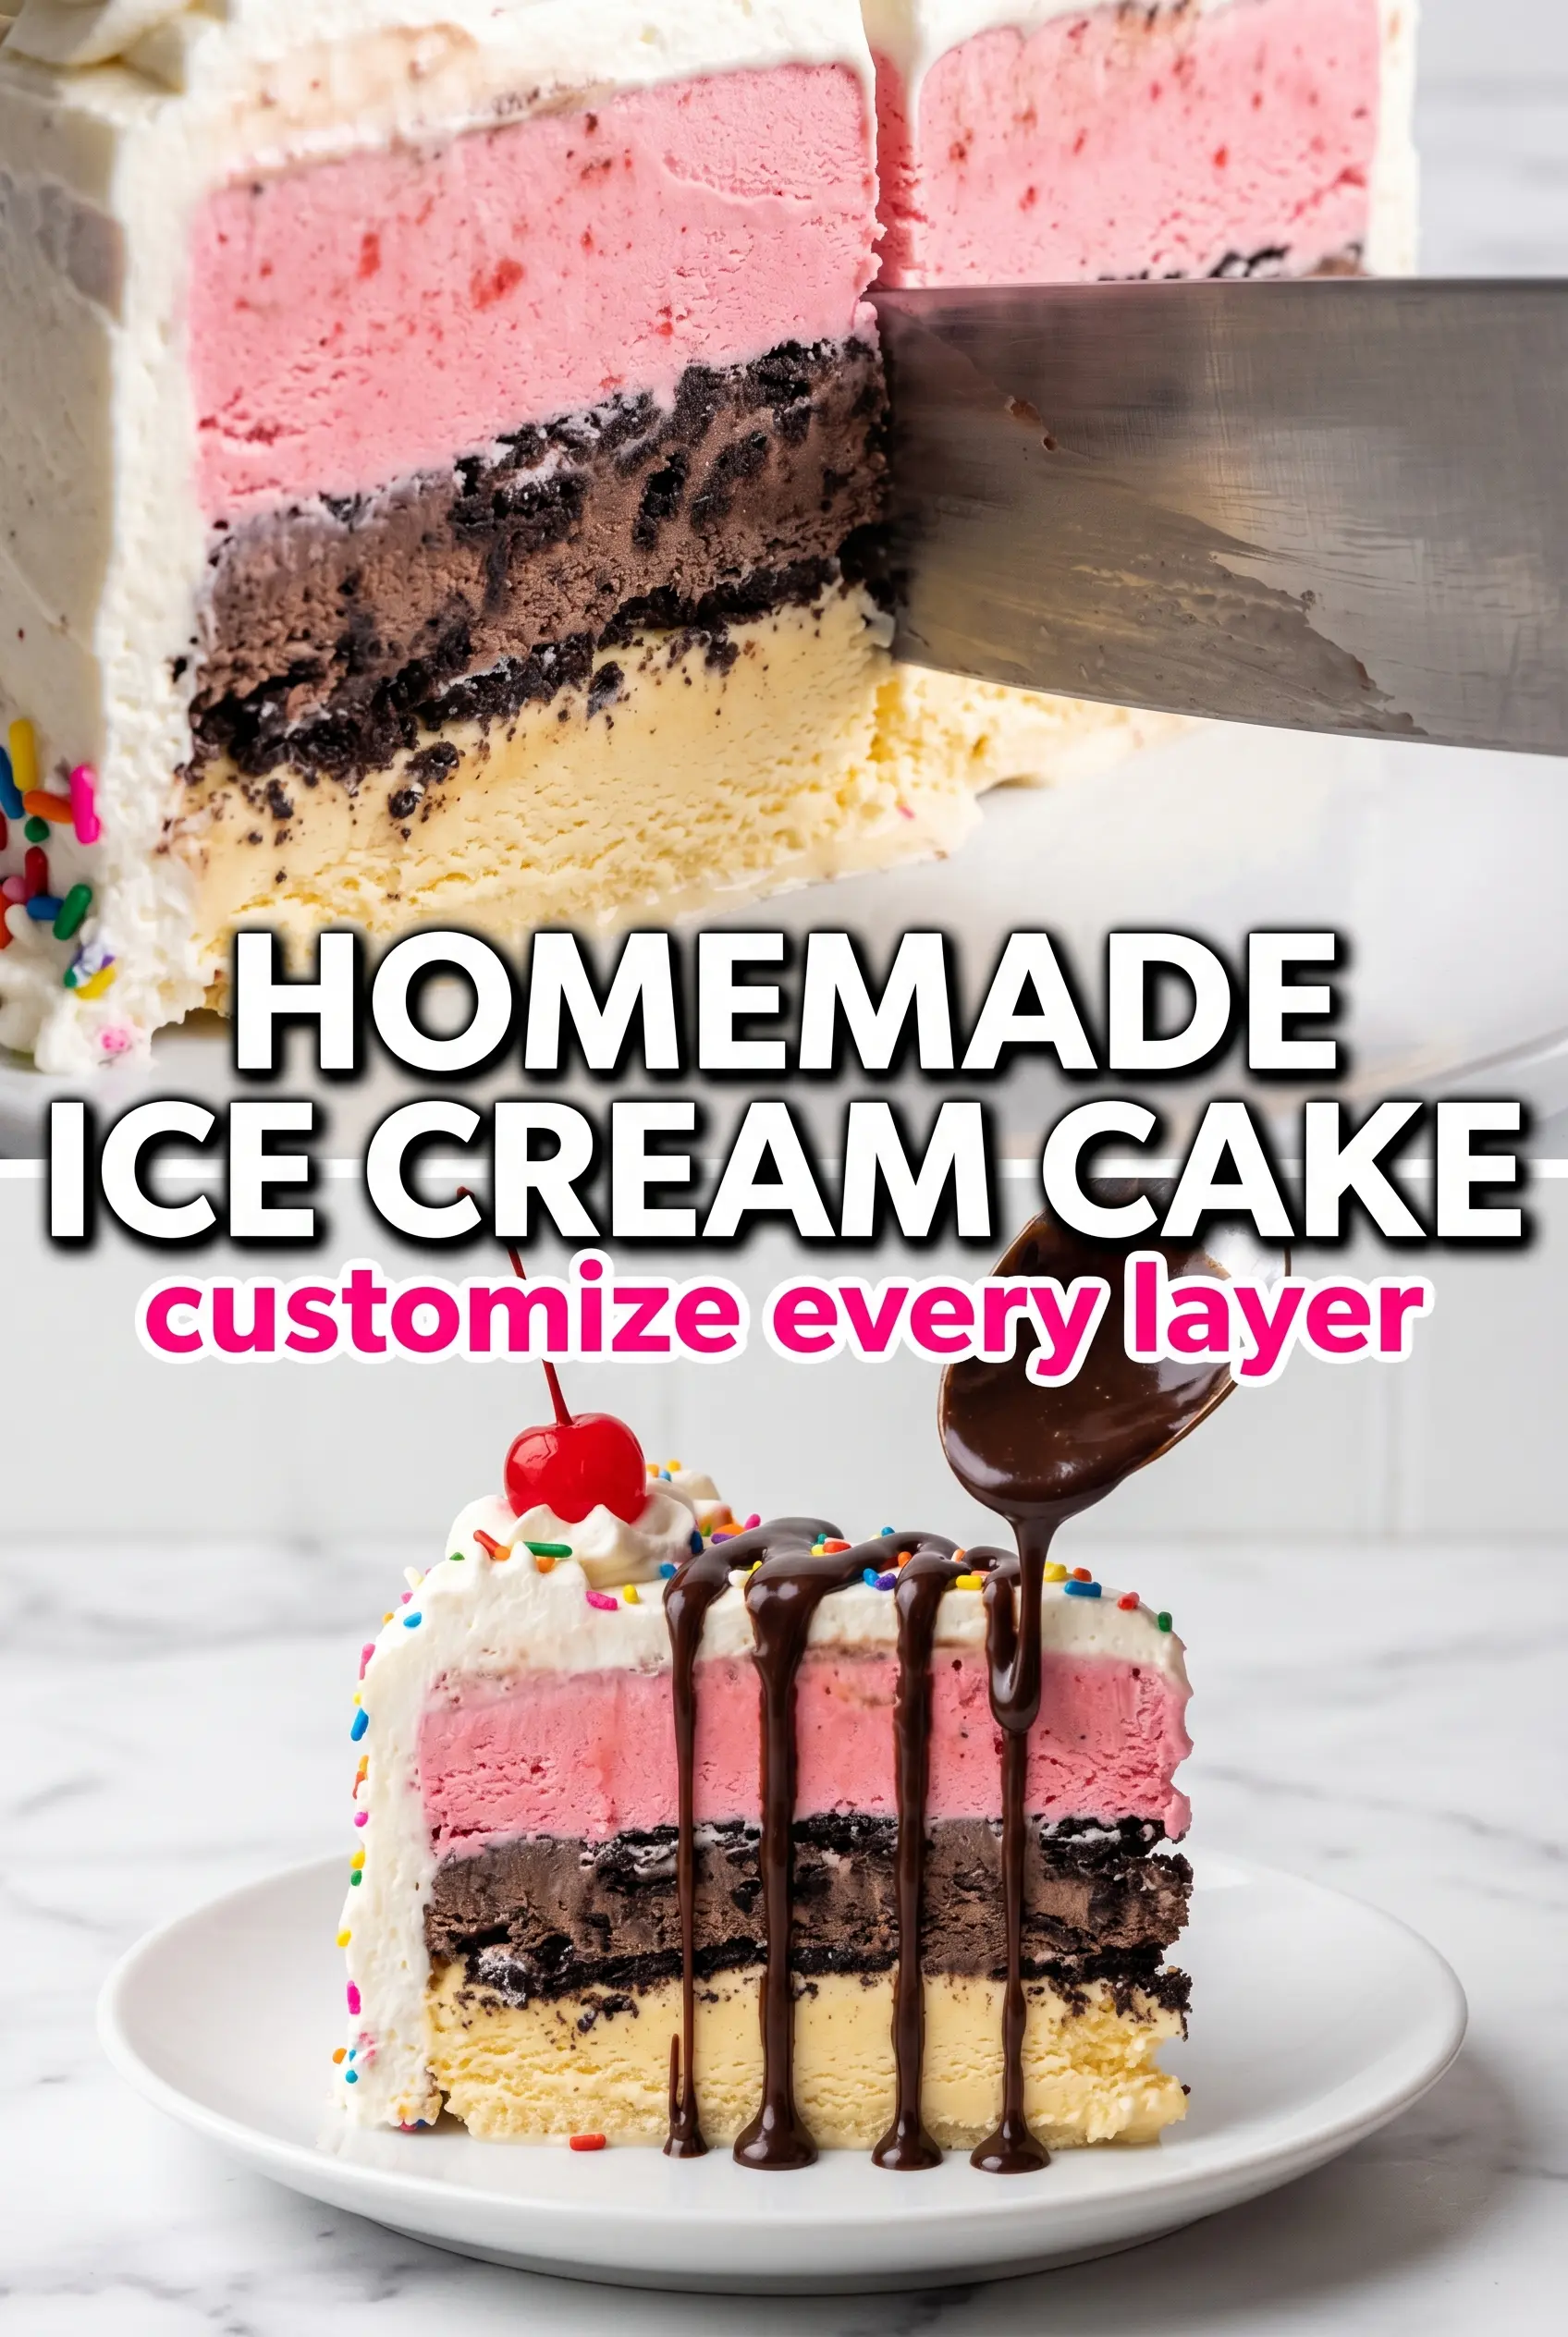
Ice cream cake hits the sweet spot between nostalgic and practical: it slices cleanly when it’s built right, and the layers stay distinct instead of collapsing into a messy slab on the plate. The Oreo crust gives you a firm, chocolatey base, the vanilla layer keeps things classic, and the strawberry layer brings a bright contrast that keeps each bite from tasting flat. A ribbon of fudge in the middle ties everything together without turning the whole cake muddy.
The part that matters most is patience between layers. Each addition needs enough freezer time to firm up before the next one goes in, or the colors and textures blur together. Slightly softened ice cream spreads without ripping up the layer underneath, and a cooled fudge sauce keeps the vanilla from melting into a puddle. That’s the difference between a cake you can slice and one that slumps the second the knife touches it.
Below, you’ll find the trick for getting those layers smooth, the best way to unmold the cake without cracking the edges, and a few smart swaps if you want to change the flavor or make it ahead for a party.
The crust pressed up beautifully and the fudge stayed in a clean ribbon instead of leaking into the vanilla. I let it freeze overnight and the slices came out neat with no melting mess.
Layered ice cream cake with Oreo crust, fudge ribbon, and clean slices that hold their shape.
The Shortcut That Makes the Layers Slice Cleanly
The biggest mistake with ice cream cake is building it too fast. If the base layer isn’t firm before the next one goes in, the crust lifts, the fudge sinks, and the whole cake turns into a marbled mess instead of distinct layers. Freezing between stages isn’t busywork here. It’s what gives you that clean cross-section when you cut into it.
Springform pans earn their keep because they let you release the cake without prying at the sides. Line the bottom if you want an easier lift, but the real insurance is firm packing on the crust and enough freezer time after each layer. The cake should feel solid at every stage before you move on.
What Each Layer Is Doing in This Cake
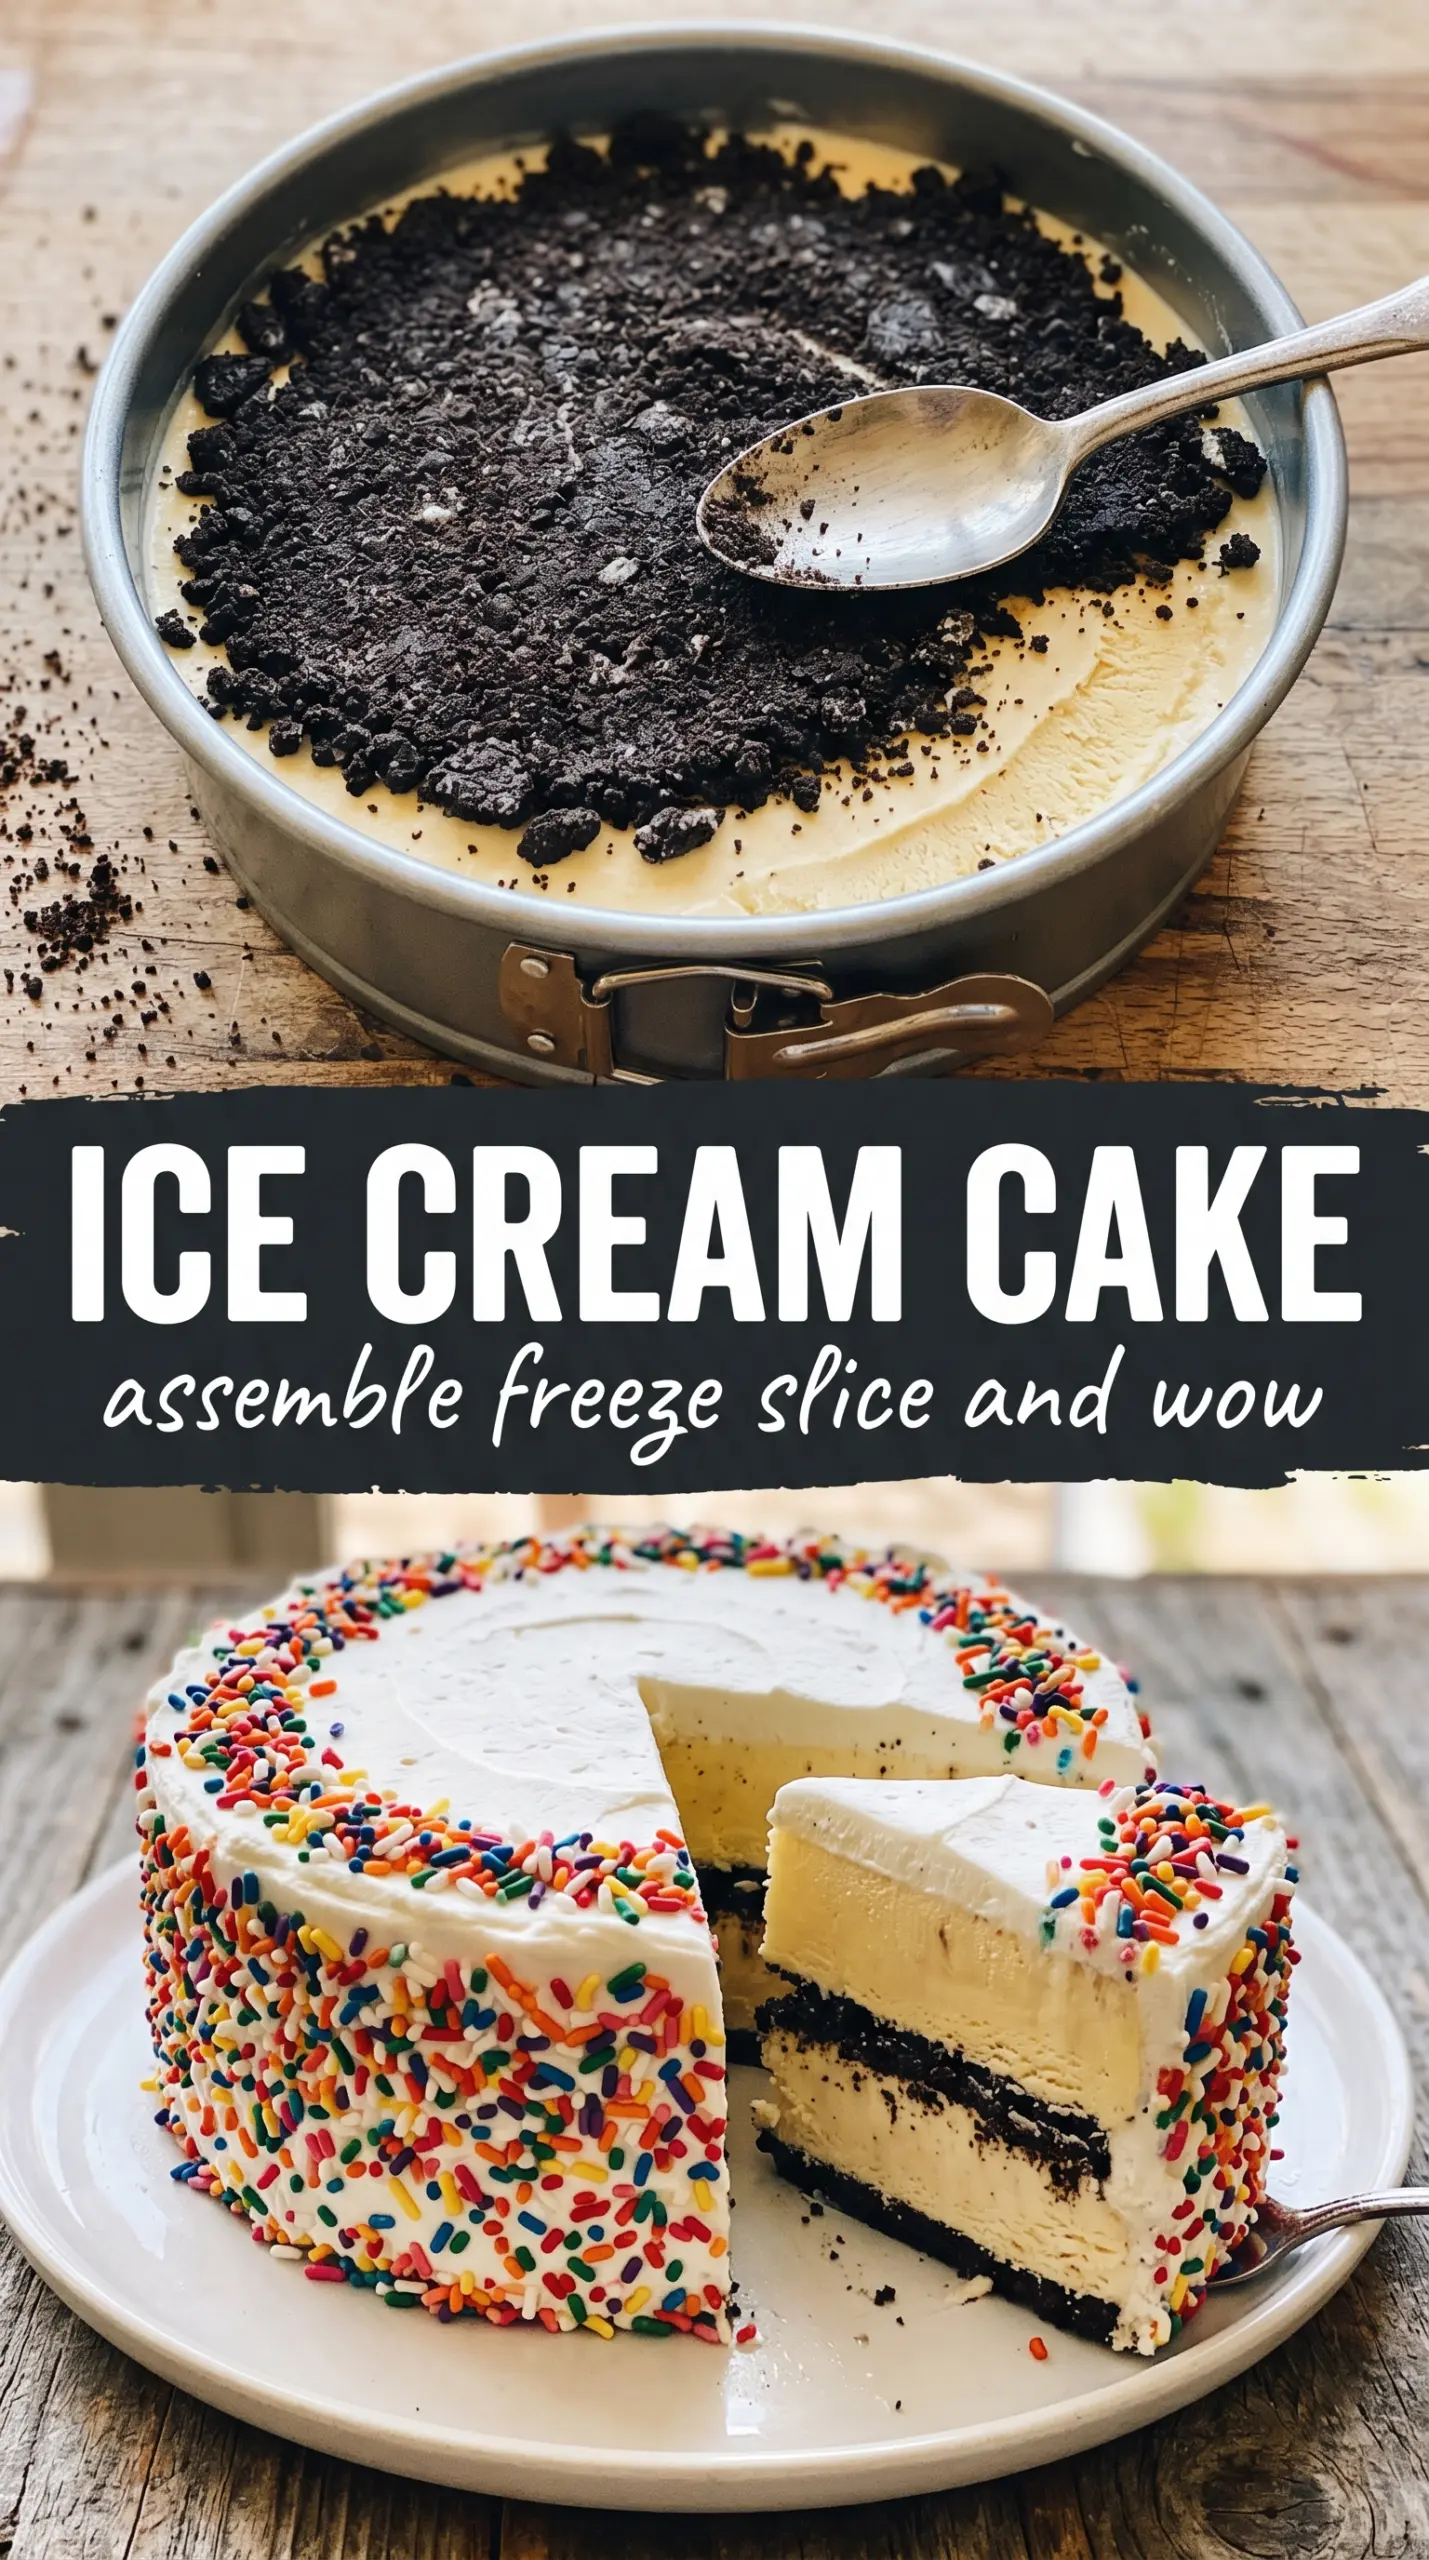
- Oreo cookies — These make the crust without any extra fuss. The cream filling helps bind the crumbs a little, so you don’t need to overthink the ratio. Crush them finely for the most even base, but don’t turn them into dust or the crust can get pasty.
- Butter — Melted butter is what turns loose crumbs into a sliceable foundation. The exact amount matters; too little and the crust crumbles when you cut in, too much and it freezes greasy. Press it firmly into the pan so it sets into a compact layer.
- Vanilla ice cream — This is the neutral middle that gives the strawberry and fudge room to stand out. Slightly softened is the key phrase here: it should scoop and spread, not pour. If it gets too melty, it will streak into the crust and lose its shape.
- Strawberry ice cream — The fruit flavor keeps the cake from tasting one-note and gives the sliced layers a strong visual contrast. Any good-quality strawberry ice cream works, but one with actual berry flavor will taste brighter than a candy-sweet version. Let it soften just enough to smooth over the fudge without tearing it up.
- Hot fudge sauce — Use a sauce that’s pourable but not hot. If it’s too warm, it melts the vanilla layer and slides outward instead of staying in the center. Let it cool for a few minutes after heating so it ribbons neatly between the ice cream layers.
- Whipped topping or stabilized whipped cream — This is mostly for the finish, but it also helps the top look polished instead of bare. Stabilized whipped cream holds its shape longer if the cake sits out for serving. Regular whipped cream works too, but pipe it close to serving time.
Building the Cake One Firm Layer at a Time
Pressing the Oreo Base
Mix the crushed Oreos with melted butter until every crumb looks evenly moistened, then press the mixture firmly into the bottom of a 9-inch springform pan. Use the bottom of a measuring cup to pack it down into an even layer. If the crust feels loose now, it will fall apart later, so take the extra minute to compact it well. A quick 15-minute freeze sets it before the first ice cream layer goes in.
Smoothing the Vanilla Layer
Spread the slightly softened vanilla ice cream over the chilled crust and work from the center outward. Use an offset spatula or the back of a spoon to keep the surface level without digging up the crust. The ice cream should glide, not melt; if it’s too soft, freeze it for a few minutes and try again. Once it’s smooth, freeze until firm so the fudge can sit on top instead of sinking through.
Adding the Fudge Ribbon
Drizzle the cooled hot fudge over the vanilla layer in a loose, even pattern, then spread it gently if needed. You want a visible band in the middle, not a fully blended chocolate layer. If the fudge is still hot, it will melt into the vanilla and disappear into the cake. Fifteen minutes in the freezer is enough to set the surface before the strawberry layer goes on.
Finishing with Strawberry and Toppings
Spread the strawberry ice cream over the chilled fudge layer and smooth the top as evenly as you can. Cover the pan and freeze for at least 4 hours, though overnight gives you the cleanest slices. To serve, run a warm knife around the edge before releasing the springform, then move the cake to a plate and pipe the whipped topping around the edge. Add the sprinkles at the end so their colors stay bright and the top looks fresh.
Three Ways to Make This Ice Cream Cake Your Own
Chocolate-peanut butter version
Swap the strawberry ice cream for chocolate and use peanut butter cups or a peanut butter drizzle in place of the fudge ribbon. The texture stays the same, but the cake turns richer and more dramatic. Keep the layers cold between additions, since nut butter drizzles can soften faster than fudge.
Dairy-free ice cream cake
Use dairy-free ice cream, plant-based butter, and a non-dairy whipped topping. The crust still sets well, but you’ll want to pack it extra firmly because some vegan butter substitutes stay softer when frozen. Pick a dairy-free fudge that stays fluid after cooling, not one that turns stiff and grainy.
Cookie crumb swap
Use chocolate sandwich cookies, graham crackers, or chocolate wafer cookies instead of Oreos if you want a different base flavor. Graham crackers give you a lighter, more classic ice cream cake feel, while chocolate wafers taste cleaner and less sweet. Keep the butter amount the same and press the crumbs firmly so the crust still slices neatly.
Make-ahead for a party
Build the cake a full day ahead and leave it covered in the freezer until serving time. That extra chill time helps every layer firm up evenly, which makes slicing much easier. Add the whipped topping and sprinkles right before serving so the decorations stay sharp and don’t pick up freezer frost.
Storage and Reheating
- Refrigerator: Don’t store this in the refrigerator for more than a few minutes before serving. It softens quickly and loses the clean layers that make it slice well.
- Freezer: Freeze tightly wrapped for up to 1 week for the best texture. After that, the ice cream can pick up freezer flavor and the crust may turn drier.
- Reheating: There’s no reheating here. Let the cake sit at room temperature for 5 to 10 minutes before slicing so the knife passes through cleanly instead of cracking the crust.
Questions I Get Asked About This Recipe
Ice Cream Cake
Ingredients
Equipment
Method
- Mix crushed Oreos with melted butter until the crumbs look evenly coated, then press firmly into the bottom of a 9-inch springform pan, packing tightly to prevent gaps. Freeze for 15 minutes to set the crust, until it feels firm when touched.
- Spread slightly softened vanilla ice cream in an even layer over the Oreo crust and smooth the top with a flat spatula. Freeze for 1 hour until firm to the touch.
- Drizzle the slightly cooled hot fudge sauce over the vanilla layer in an even ribbon. Freeze for 15 minutes so the fudge sets slightly without fully hardening the base.
- Spread the slightly softened strawberry ice cream over the fudge layer, smooth the top, and cover with plastic wrap to prevent ice crystals. Freeze for at least 4 hours or overnight until fully solid.
- Run a warm knife around the edge, then release the springform and transfer the cake to a serving plate. Wipe the knife clean between passes to keep the sides smooth.
- Pipe whipped cream swirls around the top edge, then scatter rainbow or patriotic sprinkles across the center. Slice with a hot knife and serve immediately for the cleanest layers.


