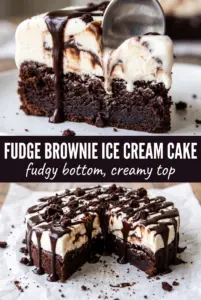
Chocolate Oreo crust, chocolate ice cream, peanut butter swirls, and a heavy finish of Reese’s cups make this the kind of ice cream cake people stand around the freezer waiting for. The layers slice cleanly once they’ve had enough time to firm up, but the texture still stays soft enough to eat without wrestling a frozen block. Every bite gets the contrast that makes peanut butter cups work in the first place: crunchy cookie crumbs, cold creamy filling, and that salty peanut butter hit cutting through the chocolate.
The part that makes this version work is the order. The crust gets a short freeze before the ice cream goes in, which keeps it from turning muddy when you spread the filling. The peanut butter is warmed just enough to drizzle and swirl; if it’s cold, it clumps, and if it’s hot, it melts the ice cream on contact. The ganache goes on after the cake has already firmed up, so it sits in a smooth layer instead of sinking into the top.
Below, I’ve included the little timing details that keep the slices neat, plus a few ways to adjust the cake for different pans and make-ahead plans. If you’ve ever had an ice cream cake slide apart on the first cut, this one is built to avoid that mess.
The peanut butter swirl stayed distinct instead of disappearing into the ice cream, and the Oreo crust sliced cleanly after the full freeze. I added a few extra chopped Reese’s cups on top and it looked bakery-worthy.
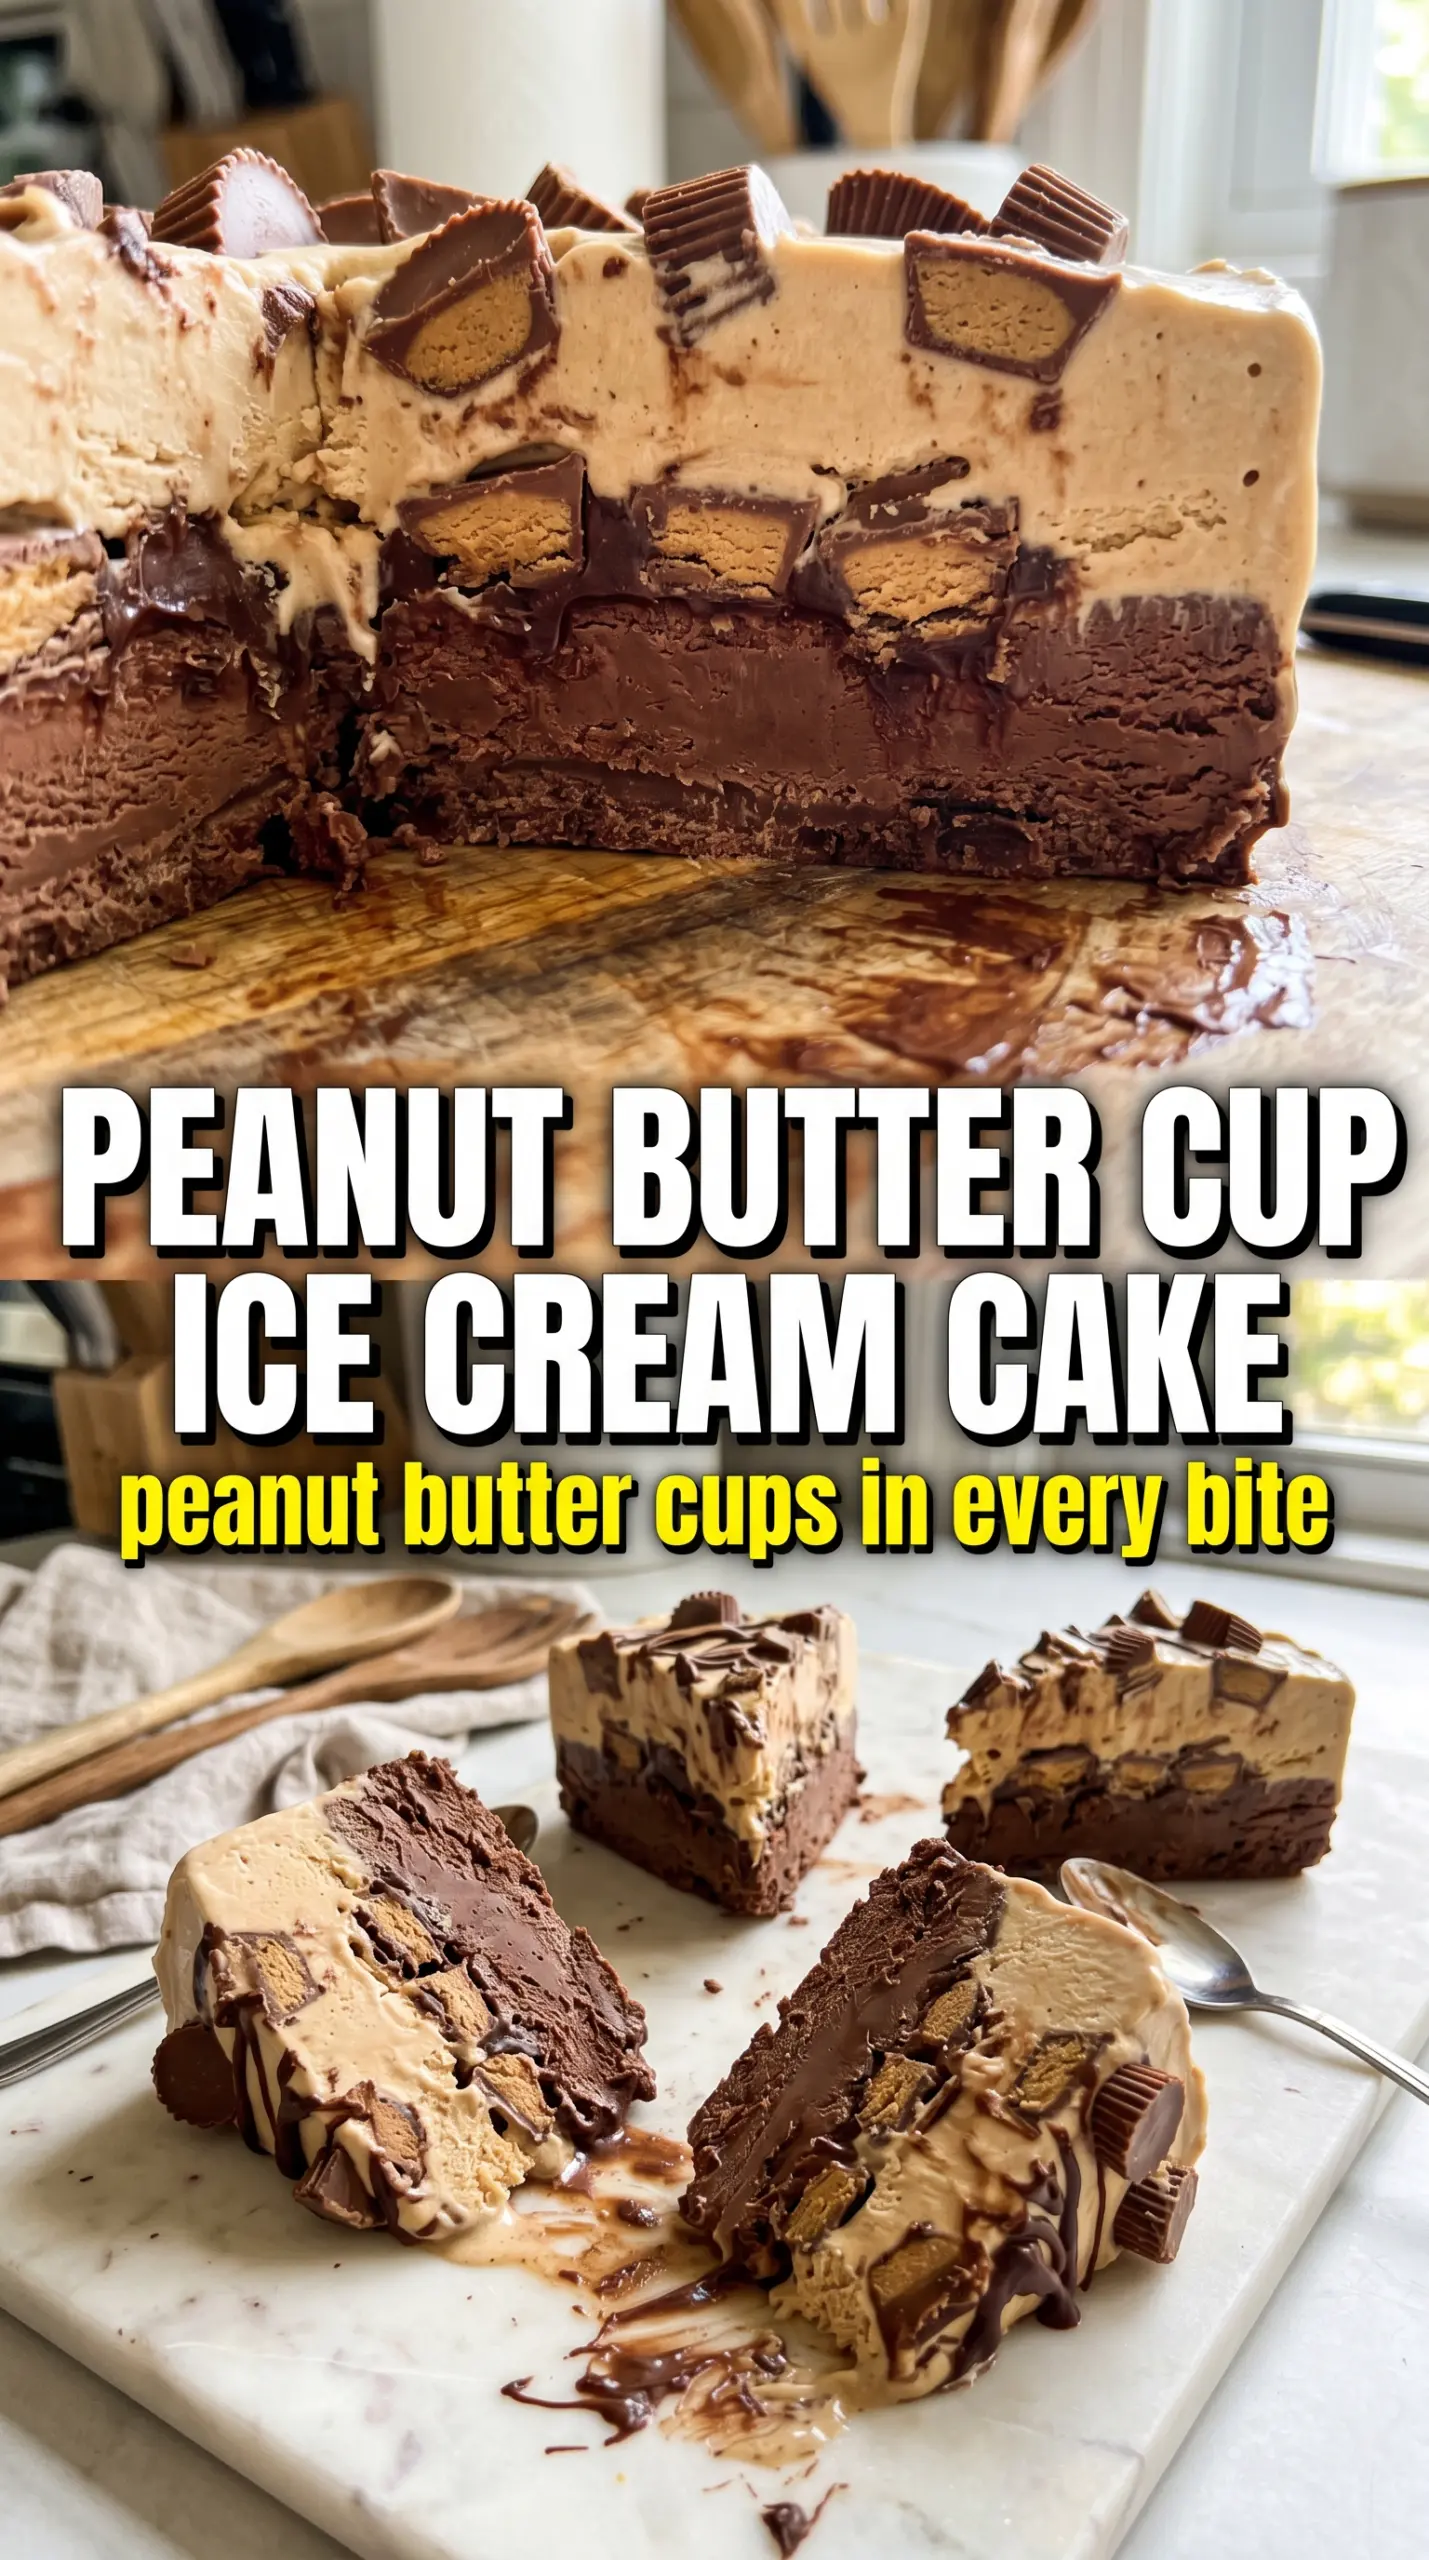
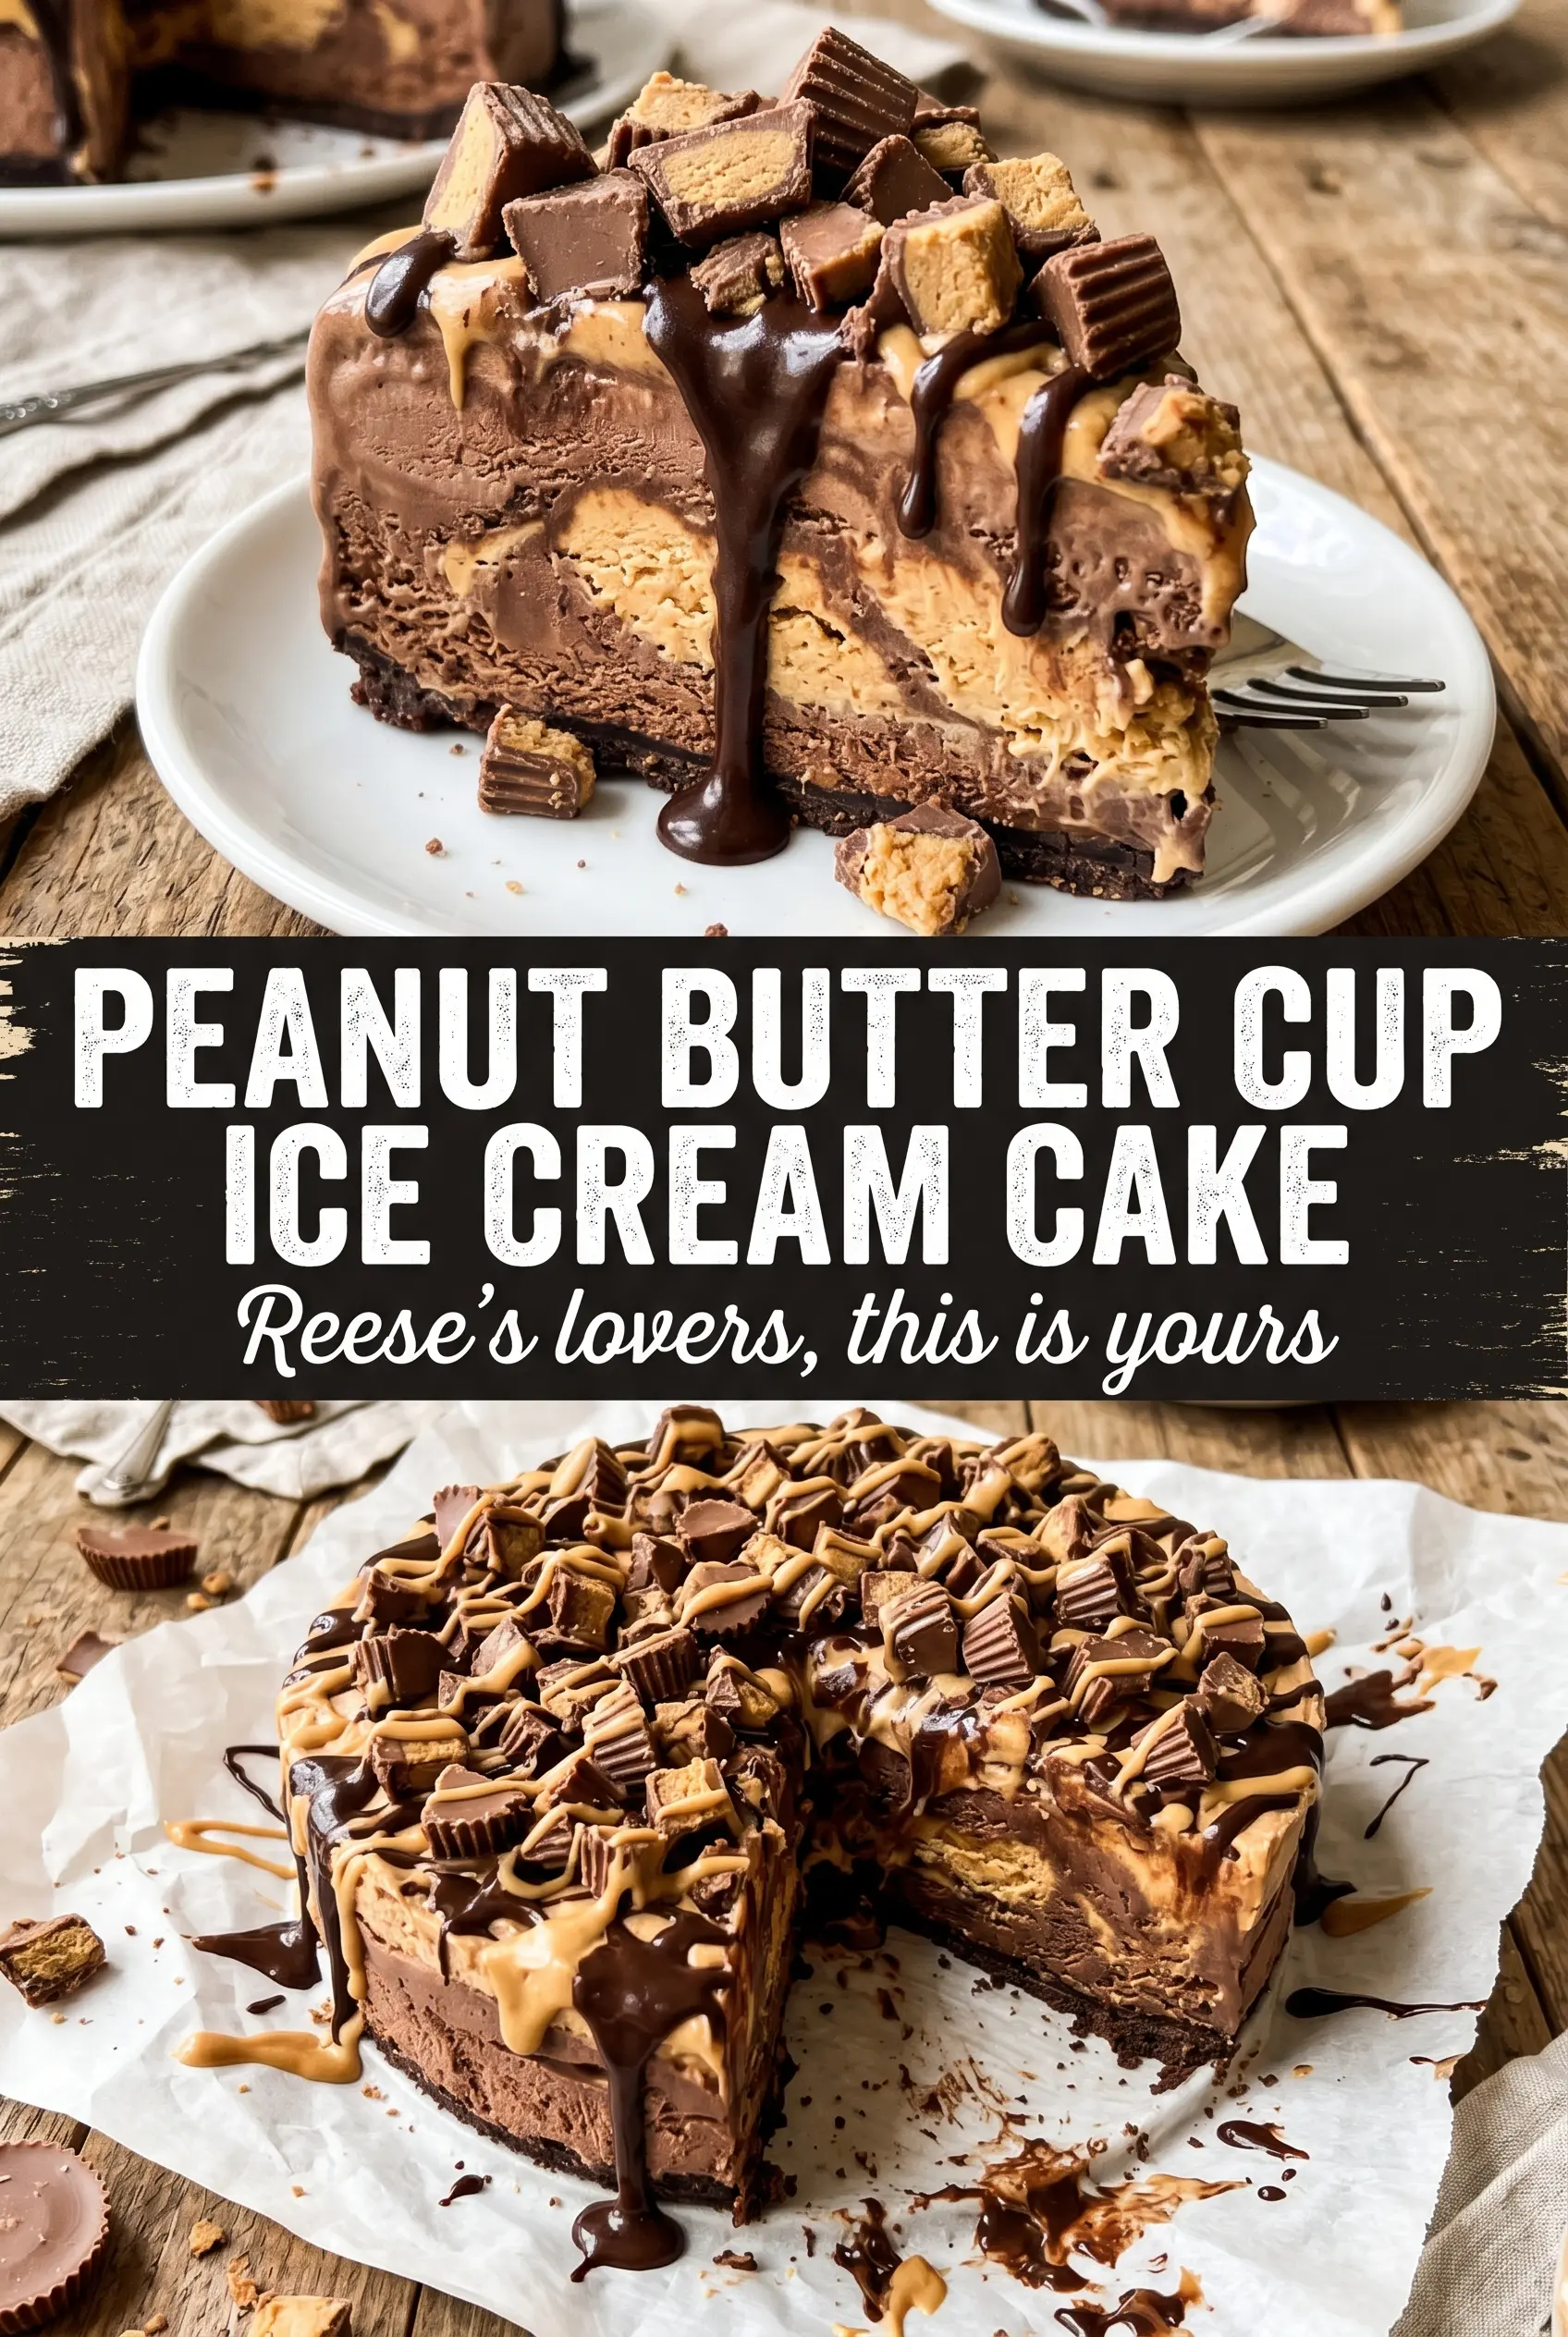
Save this Peanut Butter Cup Ice Cream Cake for birthdays, summer parties, and any night that calls for a frozen chocolate-peanut butter slice with a clean cut.
The Trick to Keeping the Layers Separate Until Slicing Time
Ice cream cakes fail when the filling gets too soft before the structure has a chance to set. The crust turns greasy, the ice cream layer slumps, and the peanut butter ribbon disappears into the base instead of staying visible. The fix is simple: work in stages, and give each layer enough freezer time to hold its shape before adding the next.
That first 15-minute freeze on the crust matters more than it sounds. It turns the Oreo and butter mixture from loose crumbs into a base that can support the ice cream without shifting. After that, the 4-hour freeze before the ganache is the point where the cake becomes stable enough to handle the warm topping without melting at the edges.
- Oreos — Use the whole cookie, filling and all. The filling helps bind the crumbs and gives the crust a slightly richer bite than plain chocolate wafers.
- Unsalted butter — This is what holds the crust together. Salted butter works in a pinch, but unsalted gives you more control since the cookies and peanut butter already bring plenty of salt.
- Chocolate ice cream — Pick a dense, premium-style ice cream if you can. The better the body of the ice cream, the cleaner the slices will be after freezing.
- Creamy peanut butter — Natural peanut butter separates and can turn oily in a frozen dessert. Standard creamy peanut butter gives you a smoother swirl that stays soft enough to cut.
- Reese’s peanut butter cups — Chop some finely enough to fold through the filling, then keep the rest in bigger pieces for the top. That mix gives you little pockets of candy and a more dramatic finish.
- Chocolate ganache — It creates a neat top layer and seals in the peanut butter cups. Warm it just enough to pour, but don’t let it get hot or it will melt into the ice cream underneath.
What Each Ingredient Is Actually Doing in This Ice Cream Cake
- Base layer (cookies, cake, or graham cracker) — This provides structure and stability. Crushed and mixed with butter creates a firm foundation.
- Ice cream (the main star) — Use quality ice cream or make homemade. Softness matters for layering.
- Sauce or topping between layers (fudge, caramel, or fruit) — This adds moisture, flavor, and prevents dryness. Don’t skip this layer.
- Frosting or whipped cream (optional outer layer) — This prevents freezer burn and adds creaminess. Stabilized whipped cream works best.
- Freezing time (at least 4-6 hours) — This sets the layers so cake slices cleanly. Longer freezing prevents melting during serving.
- Room temperature before serving (5-10 minutes) — This softens the cake slightly for better texture. Serve immediately after thawing.
- Toppings (chocolate, nuts, cookies, or sprinkles) — These add visual appeal and texture. Add right before serving.
- Storage (in freezer at 0°F or below) — This prevents ice crystal formation and maintains quality. Cover with plastic wrap.
Building the Cake So It Cuts Like a Bakery Dessert
Pressing the Crust
Mix the crushed Oreos and melted butter until every crumb looks evenly moistened, then press the mixture firmly into the bottom of a 9-inch springform pan. Use the bottom of a measuring cup to pack it down; loose crust crumbles when the knife hits it later. Freeze it for 15 minutes so the butter firms up and locks the base in place.
Folding the Filling
Let the chocolate ice cream soften just until it’s spreadable, not soupy. Fold in 1 cup of the chopped Reese’s cups by hand so the pieces stay distinct instead of getting mashed into the ice cream. If the ice cream is too melted, it will refreeze icy and the texture will lose that creamy middle.
Swirling in the Peanut Butter
Warm the peanut butter just enough that it drizzles in a ribbon. Spoon or pour it over the ice cream layer, then drag a knife through in wide loops to make swirls. Don’t overdo it; too much mixing turns the pretty streaks into a beige layer, and you lose the contrast that makes each slice look sharp.
Finishing With Ganache and Toppings
Freeze the assembled cake for 4 hours until the center feels firm when you press the top lightly. Pour the ganache over the surface and work quickly so it spreads before it sets, then arrange the remaining peanut butter cups on top while the chocolate is still soft. Pipe the whipped cream at the end, after the cake has had its final 2-hour freeze, so the garnish holds its shape.
How to Adapt a Peanut Butter Cup Ice Cream Cake for Different Freezers and Pans
For a 9×13-inch pan
Use a parchment-lined metal pan if you want squares instead of slices. The dessert will be thinner, so it freezes faster, but the edges also soften faster at serving time. Keep the same layering order and watch the freeze time closely, since a shallow cake firms up sooner than a springform version.
Dairy-free version
Swap in a dairy-free chocolate ice cream, plant-based butter for the crust, and a dairy-free ganache. The texture will still be rich, but the topping may set a little softer depending on the chocolate you use. Check the candy coating on your peanut butter cups too, since some brands still include milk ingredients.
Crunchier candy layer
If you want more texture in every slice, reserve a handful of chopped peanut butter cups and scatter them between the ice cream and ganache instead of only on top. That gives you a firmer bite and keeps the candy from disappearing into the chocolate layer. It’s a good move if you like a dessert that leans candy-bar crunchy instead of mousse-like.
Storage and Reheating
- Refrigerator: This dessert doesn’t belong in the fridge for long; it will melt into a puddle within an hour or two. For serving, let it sit out just 5 to 10 minutes to soften enough for slicing.
- Freezer: Store tightly wrapped for up to 2 weeks. After that, the texture is still safe, but the ice cream tends to pick up freezer flavor and the crust loses some of its snap.
- Reheating: There’s no reheating here. If the cake is too hard to slice, let it stand at room temperature briefly and use a hot knife wiped clean between cuts; warming the whole cake will melt the ganache and blur the layers.
Questions I Get Asked About This Recipe
Peanut Butter Cup Ice Cream Cake
Ingredients
Equipment
Method
- Mix the crushed Oreo cookies with melted unsalted butter, then press the mixture into a 9-inch springform pan to form an even crust layer. Freeze for 15 minutes to set and firm up the base.
- Fold 1 cup of roughly chopped Reese’s peanut butter cups into the softened chocolate ice cream until evenly distributed. Spread the ice cream over the frozen crust in an even layer.
- Drizzle the warmed creamy peanut butter over the ice cream, then swirl it through with a knife for thick ribboned streaks. Keep the surface swirled rather than fully mixed so you get distinct PB lines in the slice.
- Freeze the cake for 4 hours, or until firm enough to hold its shape when handled. You should be able to cut into it without the swirl collapsing.
- Pour the chocolate ganache over the top and spread gently to cover the surface, then arrange the remaining peanut butter cups on top in a decorative pattern. Aim for concentric placement if you want a clear center-to-edge reveal.
- Freeze for 2 more hours until fully set, then pipe or spoon whipped cream around the edge and serve. Slice to show the chocolate ice cream and peanut butter swirl inside.