Very Berry Dessert Lasagna slices cleanly into tall, creamy layers that hold their shape on the plate, and that alone makes it a repeat dessert for parties and potlucks. The Golden Oreo crust gives you a buttery, vanilla-forward base without any baking, then the cream cheese and pudding layers settle into a cool, spoonable middle that tastes even better after a long chill. The berries on top keep it from feeling heavy, which matters when the pan has to sit on a buffet table for a while.
The key is getting each layer thick enough before the next one goes on. Softened cream cheese beats smooth much faster than cold cream cheese, and instant pudding needs the full two minutes of whisking so it sets properly before it hits the pan. If you rush the chill time, the whole dessert will slump when sliced instead of showing those clean stripes.
Below, I’ve included the little details that keep the crust firm, the filling fluffy, and the topping bright. Once you’ve made it this way, it’s the kind of dessert you’ll remember whenever you need something cold, neat, and easy to serve.
The layers set up beautifully after the full chill, and the crust stayed firm instead of turning soggy. I used strawberries and blueberries on top, and the slices came out neat enough for a party tray.
Love the five pretty layers in this Very Berry Dessert Lasagna? Save it to Pinterest for the next time you need a chilled, no-bake dessert with a bright berry finish.
The Trick to Keeping the Layers Tall Instead of Sinking
The biggest mistake with a dessert lasagna is building it before the layers have enough body. If the crust is loose, the cream cheese is lumpy, or the pudding is still thin, everything slides together and you lose those sharp stripes that make this dessert worth serving. Every layer in this version gets a little time to set before the next one goes on, and that patience is what keeps the slice clean.
The other thing that matters is temperature. Softened cream cheese blends into a smooth base without overworking it, and cold milk gives instant pudding the structure it needs in just a couple of minutes. Warm milk or a rushed mix will leave you with a filling that tastes fine but never really firms up.
- Golden Oreos — These give you a sweet, vanilla crust that matches the berry and lemon layers better than a chocolate cookie would. Crush them fine so the base presses together evenly.
- Butter — Just enough to bind the crumbs into a sliceable crust. If the crumbs look sandy and won’t hold when pressed, the butter wasn’t mixed in fully.
- Cream cheese — This is the layer that gives the dessert its cheesecake-like richness. Full-fat cream cheese holds up best; reduced-fat versions can turn loose after chilling.
- Instant pudding — Use instant, not cook-and-serve. Cook-and-serve won’t thicken the same way in this no-bake dessert, and the layers won’t stay distinct.
- Whipped topping — This keeps the filling light and helps the top layer spread smoothly. Homemade whipped cream can work in a pinch, but it softens faster and the dessert won’t hold as long.
What Each Ingredient Is Actually Doing in This Recipe

- Primary ingredient (the star) — Quality matters most. Choose the best you can find.
- Cooking medium (oil, butter, or broth) — This carries flavors and prevents dryness.
- Seasonings (salt, pepper, spices, herbs) — Layer flavors so nothing overpowers. Build depth gradually.
- Aromatics (garlic, onion, herbs) — Cook with fat to bloom flavors. Become the foundation.
- Supporting ingredients — Complement the main ingredient without overpowering it.
- Sauce or liquid (if applicable) — Brings flavors together. Balance richness with acid.
- Acid (lemon, vinegar, wine, or other) — Brightens and prevents flat-tasting results.
- Final finish (garnish, glaze, or sauce) — Prevents one-dimensional taste and adds visual appeal.
Building the Dessert So the Slices Hold Their Shape
Pressing and Chilling the Crust
Mix the crushed Golden Oreos with melted butter until every crumb looks evenly damp, then press the mixture firmly into the bottom of your 9×13 dish. Use the bottom of a measuring cup to compact it; a loose crust will crumble when you cut the first slice. A 20-minute chill firms the butter back up and gives the crust enough backbone for the creamy layers above it.
Whipping the Cream Cheese Layer Smooth
Beat the softened cream cheese, powdered sugar, and vanilla until there are no streaks left, then fold in the whipped topping. If the cream cheese is still cold, you’ll end up chasing small lumps around the bowl and the layer won’t spread cleanly. Spread this layer gently over the crust so you don’t pull crumbs up into the filling.
Setting the Pudding Before It Goes On
Whisk the instant pudding with cold milk for the full 2 minutes, then stop and let it thicken just enough to mound slightly on the spoon. If it looks runny, wait another minute before spreading it on the cream cheese. This layer needs to be thick, not pourable, or it will seep into the layer below and muddy the whole dessert.
Finishing With Berries and the Final Chill
Spread the last whipped topping layer evenly across the pudding, then arrange the strawberries, blueberries, and raspberries on top. Keep the fruit dry so the surface doesn’t turn watery in the fridge. Let the pan chill for at least 4 hours, but overnight is even better if you want the neatest slices.
How to Adapt This for Different Toppings and Dietary Needs
Make It Gluten-Free With a Cookie Swap
Use gluten-free vanilla sandwich cookies in place of the Golden Oreos. The crust will still have that sweet, buttery texture, but the flavor may be a little less caramel-like depending on the brand. Crush them finely and use the same butter amount so the base stays compact.
Swap the Fruit Based on What Looks Best
Blackberries, sliced kiwi, or diced peaches all work if you want a different look. Just keep the fruit dry and cut into pieces that won’t weep too much juice, or the top layer will start looking messy after a few hours in the fridge.
Use Vanilla Pudding for a Milder Flavor
Vanilla instant pudding makes the dessert a little softer and more classic, while lemon gives it a brighter edge that cuts through the sweetness. Both set the same way, so this is a flavor choice rather than a technique change.
Lighten the Top With Extra Whipped Topping
If you want a softer, airier dessert, add a thinner layer of whipped topping on top and go lighter on the berries. It won’t cut quite as sharply, but the finished pan will feel less rich and a little more cloud-like.
Storage and Reheating
- Refrigerator: Keep covered and chilled for up to 3 days. The berries will soften a little, but the dessert will still slice cleanly for the first couple of days.
- Freezer: This dessert can be frozen, but the whipped layers and berries soften after thawing. If you freeze it, wrap it tightly and thaw in the refrigerator, not on the counter.
- Reheating: No reheating needed. Serve it straight from the fridge, and use a sharp knife wiped clean between cuts for the neatest rectangles.
Questions I Get Asked About This Recipe
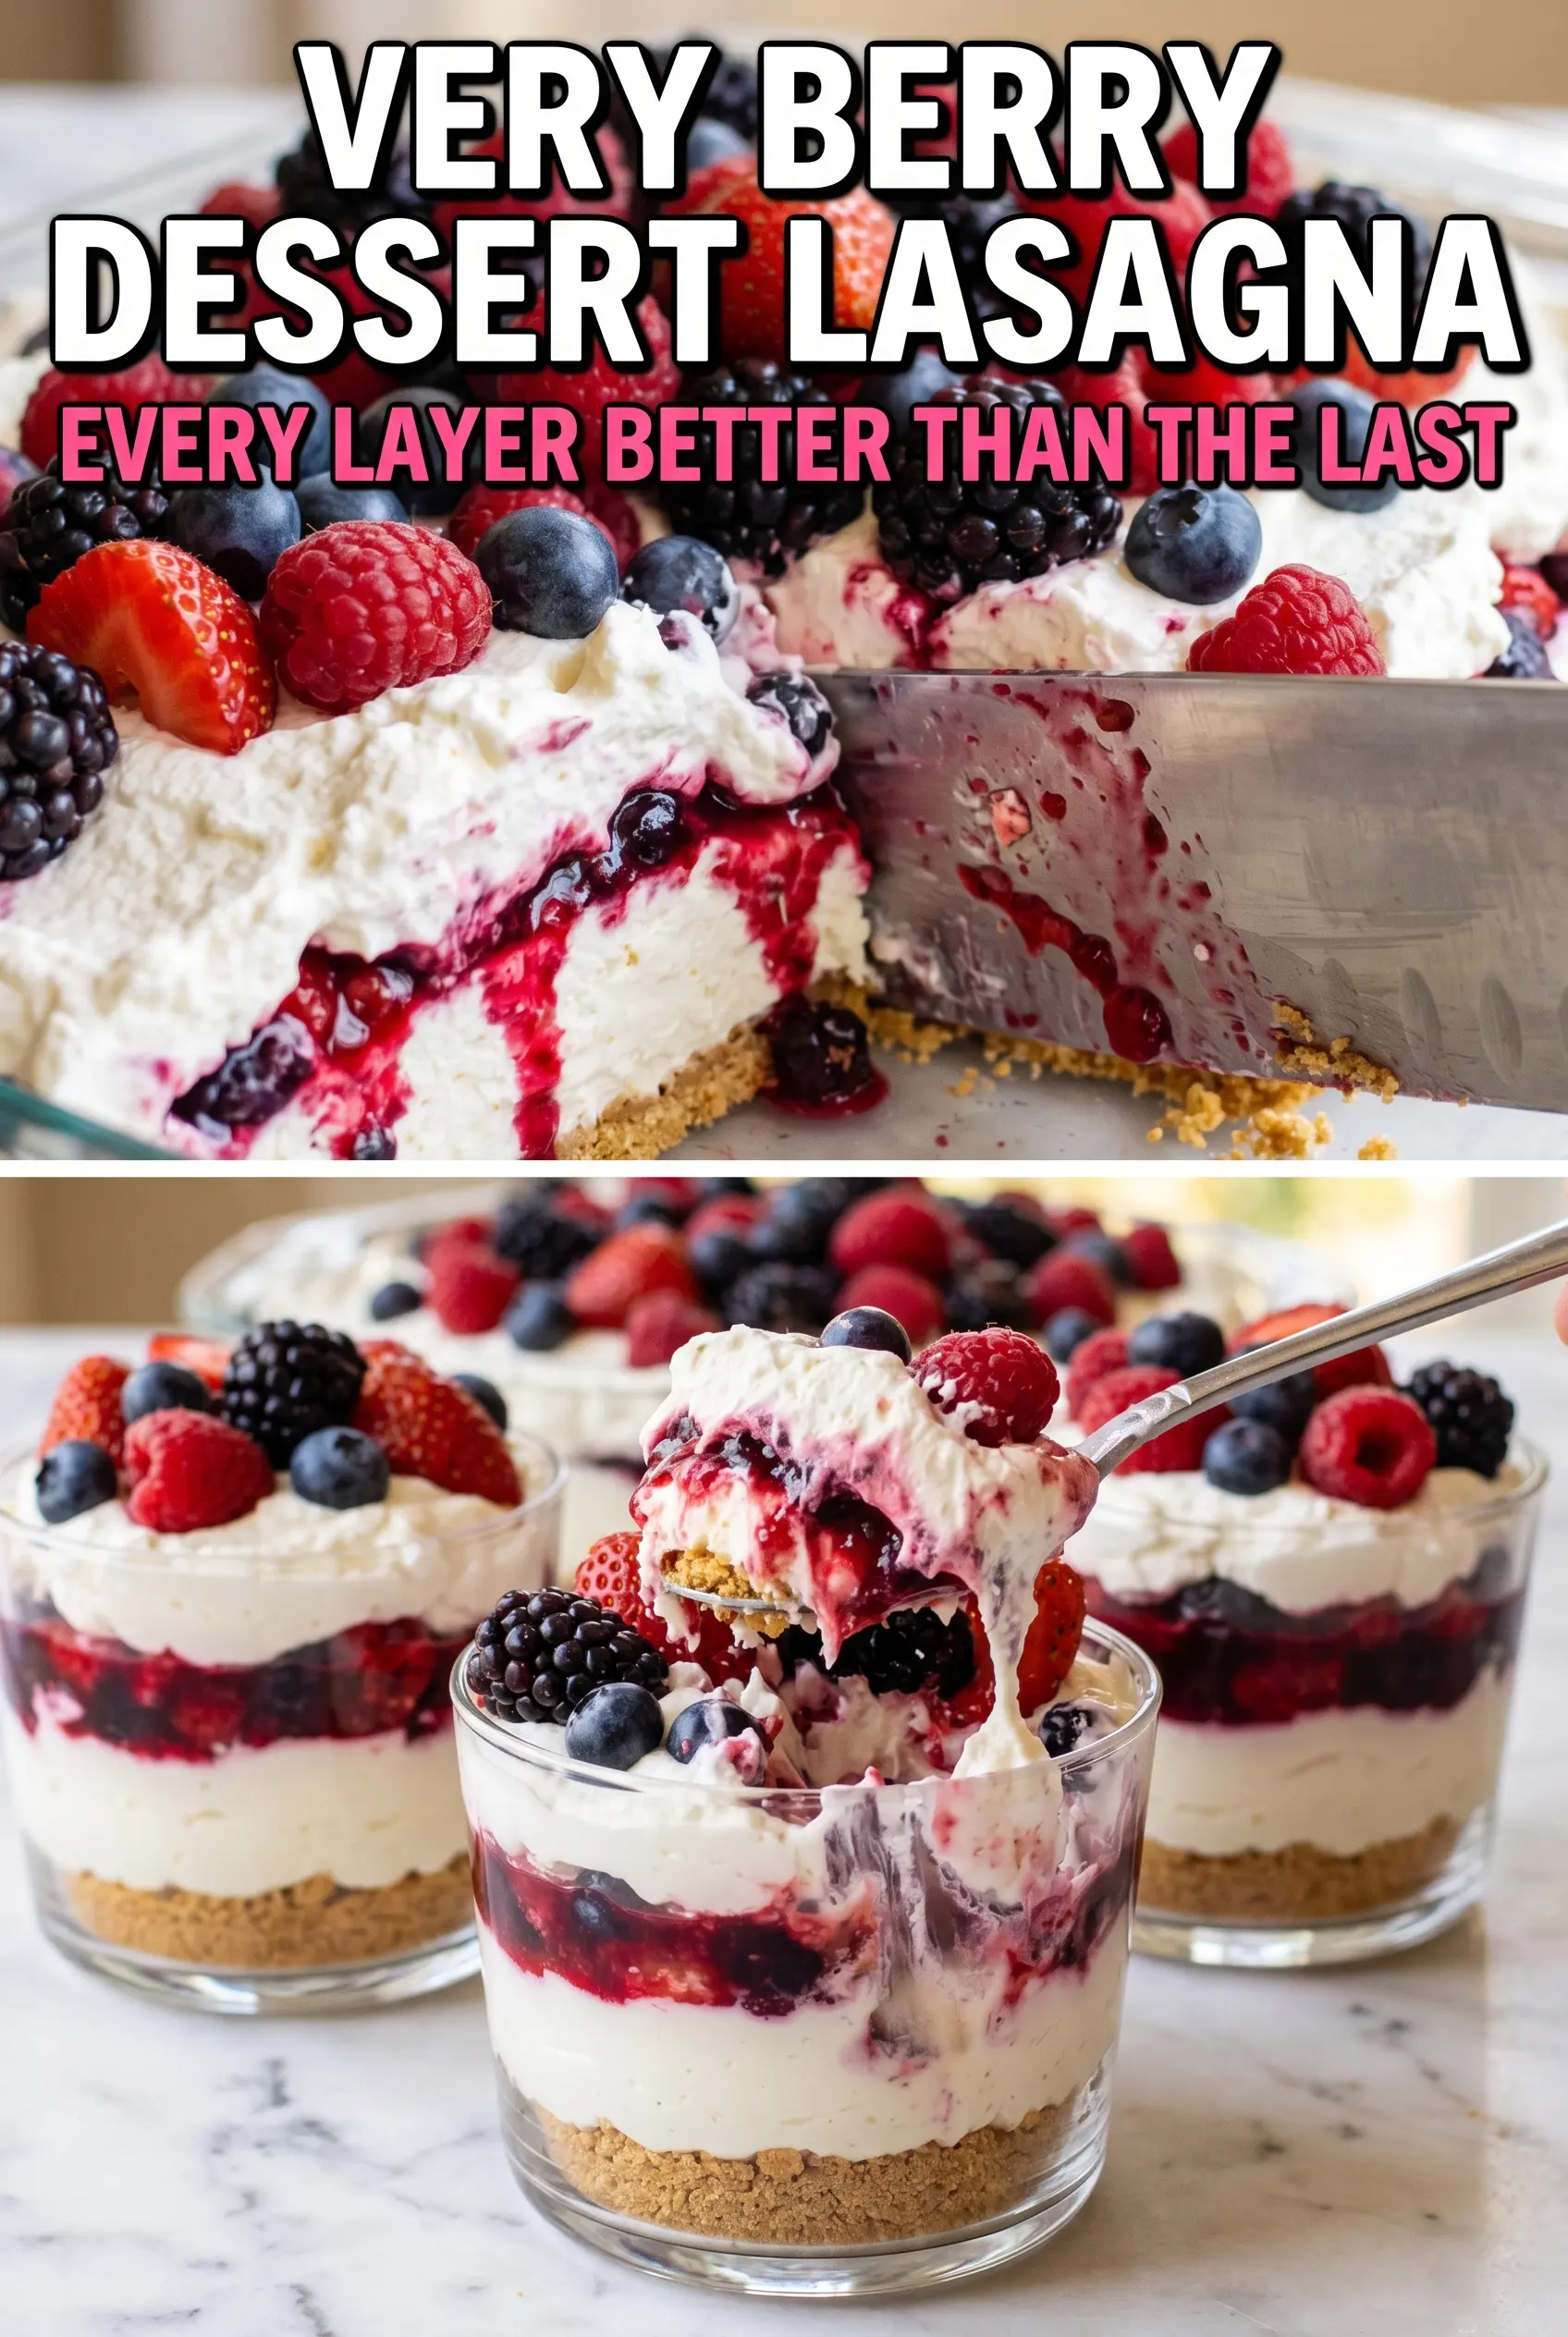
Very Berry Dessert Lasagna
Ingredients
Equipment
Method
- Mix finely crushed Golden Oreos with melted butter until evenly moistened, then press firmly into the bottom of a 9x13 dish. Refrigerate for 20 minutes until the crust looks set and feels firm.
- Beat softened cream cheese with powdered sugar and vanilla extract until smooth. Fold in 1 cup whipped topping, then spread the mixture over the chilled crust, smoothing the top with a spatula.
- Whisk instant pudding with cold milk for 2 minutes until thickened and pourable but not runny. Spread it over the cream cheese layer and level it out for even coverage.
- Spread 2 cups whipped topping evenly over the pudding layer. Arrange sliced strawberries, blueberries, and raspberries in rows or a scattered pattern across the top.
- Cover and refrigerate for at least 4 hours until all layers are fully set and the slice edges hold their shape. Slice into rectangles and serve cold.


